There may be a lot of RGB LED Drivers out there, but this one is a bit different, its versatile, small, cheap, and is simple to control.
A potentiometer with built in switch is used for the controls. A quick press, switches between color cycling and solid color select modes. Pressing in on the dial and holding, toggles an Intensity control, to brighten or dim the LED. Pressing in and holding again, exits Intensity control. Settings are saved when turned on/off.
It supports common anode, common cathode, or single color LEDs. Selectable via jumper wires.
The PCB is set-up for a single 3 watt RGB LED but, it can be easily made to power a 12 volt string of LEDs in series as long as each color channel isn’t more than the recommended 2 watts ( though the transistors are rated for 2.5w ) or 500 miliamp per color channel. Correct resistor for R1, R2, R3 would have to be calculated and changed. Goto Step 7 to View.
This driver is great for ambient lights, mood lamps, display lights, case light for a PC, I have even made a lantern version that ran off 4 D batteries
And of course best of all its free, with PCB layout, HEX file, schematics are available.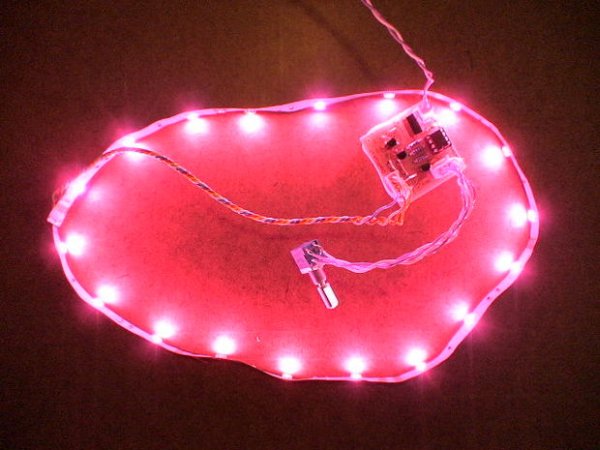
Measures 1.5″ x 1.5″ x 1″ finished.
Full Kits including 3 Watt RGB LED, PCB, all the parts, interconnects, wire, heat sink and thermal grease. Can Be Found Here
All the parts you need. Just need a 5 volt @ 700ma+ Power Supply.
Or get a Full Kit with 0.5 Meters or 12v RGB LED strip with adhesive backing. Dial RGB LED Driver Kit, Full, RGB Light Strip
There is an Economy Kit and Basic Kit available for this project as well. For a Cheaper Project. No Headers, potentiometer or LED, see descriptions.
Get a Programmed PIC and PCB in a Combo Pack
ZIP containing HEX, PCB layout, Schematics, & datasheet is below
Download the Dial RGB LED Driver v.1 Datasheet
UPDATE 2/15/12: A new refined version has been released. It is recommended that devices are upgraded to this new firmware. Anyone who has purchased a kit, or programmed PIC can contact me for special price on a new version, or download the HEX from the ZIP file and re-program.
Changes v.1 to v.2:
– Faster PWM Rate
– Better Dimming down to 50%
– Color Select now goes Red -> Green -> Blue -> White (added white)
– Refined user controls
– Fixed misc bugs
I have included 2 modified versions of the firmware both use GP5 as a second button, one toggles the light on/off when the button is pressed, the other version holds the light on/off depending on the state of GP5, designed to work with a QT113 touch sensor. See readme for details.
===NOTE===
This Instructable will assume that the kit with a 3 watt RGB LED is being assembled.
If you are not using a 3 watt RGB LED, R1, R2, R3 will be different values try
led.linear1.org/1led.wiz to find the correct resistor values you should use, or send me a PM, I will help you out. Choosing incorrect resistor values can cause damage.
The author of this Instructable can not be held liable for any damage or personal loss in anyway resulting from the information in this Instructable. use at your own risk.
Common Anode – Common lead goes to V+
Common Cathode – Common lead goes to V- ( gnd )
Step 1: Prepare
Clear a work area, preferably with good light.
Layout the parts and ensure that they are all there.
Parts:
– PCB – Buy a PCB with Free Shipping
– 12F675 programmed with the firmware Or Buy One Programmed
– 8 pin DIP socket
– 3x 500 ohm 1/4 watt resistor
– 1x 10k ohm 1/4 watt resistor
– 3x NPN Transistors, I chose MPSW45ARLRAG
– 2 Pin Locking Header
– 2 Pin Housings
– 10 Crimps ( Purchased kits come with 12, just in case)
– 3 Watt RGB LED
– 10k Potentiometer, with built in momentary Pushbutton
– A regular Pot 1-10k ohm and a momentary Pushbutton can be substituted.
– 2x 4 Pin locking Header
– 2x 4 Pin housing
– Heatsink for LED
– 2 screws
– current limiting resistors for LEDs
– For a 3 watt RGB Star LED
– 1x 5.1 ohm 1 watt, for Green
– 2x 16 ohm 1 watt for Blue and Red
*Note: these need to be small resistors, 8 mm in length. I’ve only found PR010001 that fit.
though larger ones can fit, its just not pretty.
– 0.1uF disc capacitor
– 7805 if the input voltage and LED voltage is more than 7 volts.
– Wire, about 20″ of twisted pair (2 wires)
A power supply of at least 5 volts, at least 700ma ( 1 amp is better ) is also required.
Required Tools:
– Soldering Iron
– Wire Stripper
– Needle Nose Pliars
Optional:
– Hot Glue
– Electrical Tape
– Volt Meter
– Shrink Tube
Step 2: Resistors and Jumpers
Place all the Resistors First, they have no polarity so they can go in either way. Save your lead clippings for later. Placing the resistors in, and then taping them temporarily with electrical tape helps.
( figure below )
R1 – 5.1ohm 1w
R2 – 16ohm 1w
R3 – 16ohm 1w
R4 – 500ohm 1/4w
R5 – 500ohm 1/4w
R6 – 500ohm 1/4w
R7 – 10kohm 1/4w
Then place the jumpers:
Using some solid strand wire of at least 24 gauge, or some of the 1 watt resistors leads that were clipped,.
Take a needle nose pliers, bend the wire into shape pictured below.
If you are constructing the Kit, do this:
If a common anode(common positive) LED is used (3 watt star)(red lines on the figure)
J1 is jumped to NEG1
J2 is jumped to POS2
If a common cathode(common negative) LED is used (blue lines on the figure)
J1 is jumped to POS1
J2 is jumped to NEG2
Note: If input voltage is more than 5 volts goto Step 7 for jumper details.
All types connect these:
A1 is jumped to A2
B1 is jumped to B2
Place the capacitor C1. Its non-polarized so the capacitor can go in either way, even though the top-side shows polarity.
Step 3: Transistors and Headers
Now that the jumpers, resistors and capacitor are placed. Its time for the IC socket.
The socket has a notch on it that is placed as pictured on the top side illustration on the PCB, or there is reference image below.
When soldering, ensure that there are no solder bridges to other pins, I recommend checking with a continuity meter ( volt meter) to be sure if some pads look to be touching.
The transistors position is based on if the LED(s) to be used are common anode or cathode
For common anode (3 watt Star, This one if you are assembling the Kit)
-The transistors are placed reverse of the topside illustration. See Image Below
For common cathode
-The Transistors are placed as pictured on the topside illustration.
The full kit with a 3 watt RGB LED should not use a 7805 voltage regulator. A input of 5 volts must be used. And the solder pads for the 7805 be jumped and filled.
– Pin 1 & 3 are jumped ( the 2 outer holes of the 3) and the center hole’s solder pad needs to be filled in with solder.
If you are using interconnects or have purchased the Full Kit.
– Solder in the 2x 4 pin locking headers, they can go in either way works best.
– Install the 2 pin locking header, keeping in mind the polarity.
If you are not using interconnects
You will just solder your wire directly into the holes and
Skip the Next Step
Step 4: Interconnects
The full kit at comes with connectors to easily connect and disconnect your LED and potentiometer for easy installation into a lamp or diffusing medium.
There are 3 parts, the headers, the housings and crimp terminals.
Decide how long you need your LED wires and your potentiometer wires and cut the supplied twisted pair into 2 pieces, which you are going to make into 2 sets of 4 wires.
Trim 1/8th” of wire off each end and follow this Short Tutorial, to attach the crimps to the wire.
Once each piece has crimps on all the ends fold evenly and cut in half, so you are left with 2 pieces of double wire with 4 crimps, See images
Slide the crimps into the housings with the tabs facing the slots, they will click when they are in.
Then cut evenly in half, see 2nd image.
Repeat with second set of wires.
For more detail: Cheap and Easy Dial Controlled High Power RGB LED(s) Driver