Summary of Using Microchip’s MPLAB X IDE and Programming the PIC18F
This article details a step-by-step process for developing and programming a PIC18F25K22 microcontroller. It covers creating a project in MPLAB X IDE, writing C code to control LEDs via buttons, compiling the source into an Intel HEX file, and finally using a SuperPRO programmer to flash the chip with the generated binary.
Parts used in the PIC18F25K22 Development Project:
- MPLAB X IDE software
- PIC18F25K22 microcontroller
- SuperPRO programmer
- C18 compiler (v 3.40)
- Push buttons
- LEDs
- Development circuit board
Overview
This guide provides a step-by-step guide on how to use the MPLAB X software by Microchip to set up a
project, write code and generate a programming file for the PIC microcontroller. It then explains how to
program the PIC (in this case a PIC18F25K22) using the SuperPRO programmer and the file generated
from MPLAB X.
Procedure
- Start MPLAB X by going to Start > All Programs > Microchip > MPLAB X IDE > MPLAB X IDE
- On the Start Page, click ‘Create New Project’ under ‘Dive In’

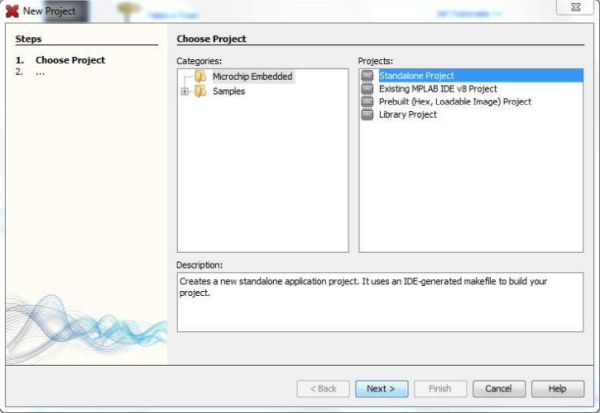
- In the New Project window, click ‘Microchip Embedded’ under ‘Categories’ on the left-hand
side, select ‘Standalone Project’ under ‘Projects’ on the right-hand side and hit ‘Next’.
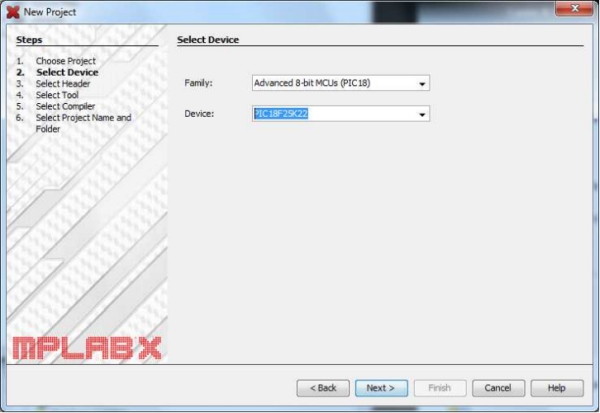
- On the next screen, under the ‘Select Device’ section, pick your device. In this tutorial, the
PIC18F25K22 will be used. Under ‘Family’ select ‘Advanced 8-bit MCUs (PIC18)’, select
‘PIC18F25K22’ under ‘Device’ and hit ‘Next’
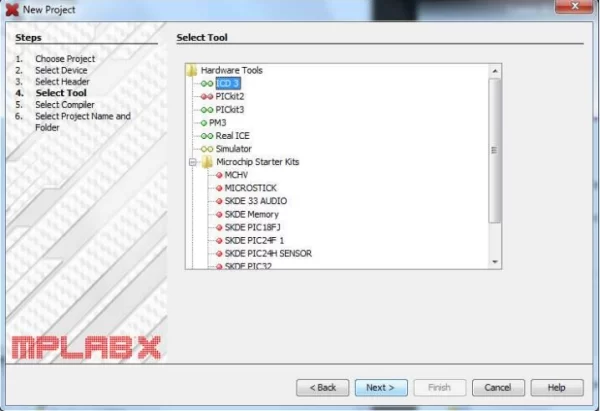
- On the next screen, under the ‘Select Tool’ section, you need to pick a programmer or debugger.
Since you will be using the SuperPRO device to program the PIC, choose any tool (in this case
‘ICD 3’) and hit ‘Next’.
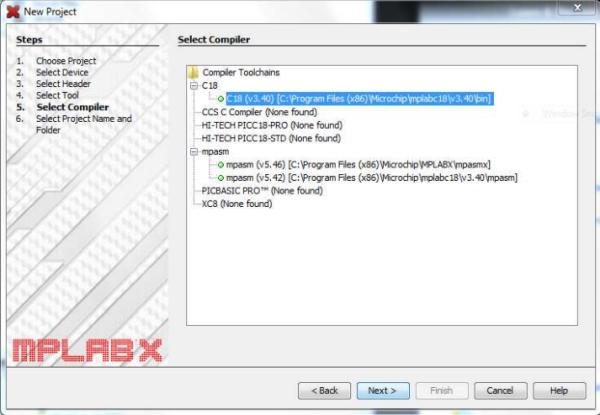
- On the next screen, under the ‘Select Compiler’ section, select ‘C18 (v 3.40)’ under ‘C18’ and hit
‘Next’.
- On the next screen, under the ‘Select Project Name and Folder’ section, choose a name and a
place to store your project. Use the ‘Browse’ button to select a folder to save you project. Be
sure that the directory path has no spaces in it!
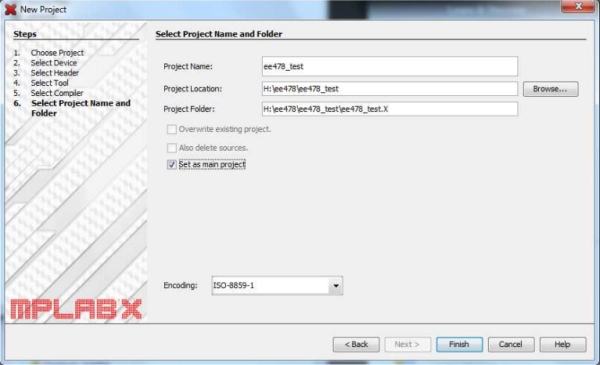
- Check ‘Set as main project’ to tell MPLAB X that this is the primary project you’ll be working on
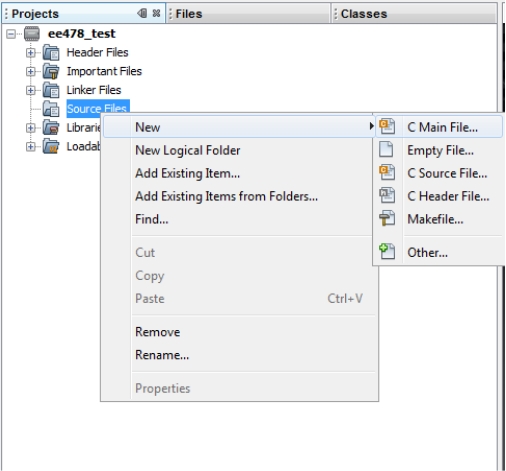
in the MPLAB workspace. Hit ‘Finish’ to complete the New Project Wizard. - Your project will now open in the main IDE window under ‘Projects’ on the left-hand side of the
main window. Several categories of files are listed. The PIC18F is programmed using C source
and header (.c and .h) files. To add a new main source file, right-click on ‘Source Files’ under the
‘Projects’ tab on the left and select New > C Main File.
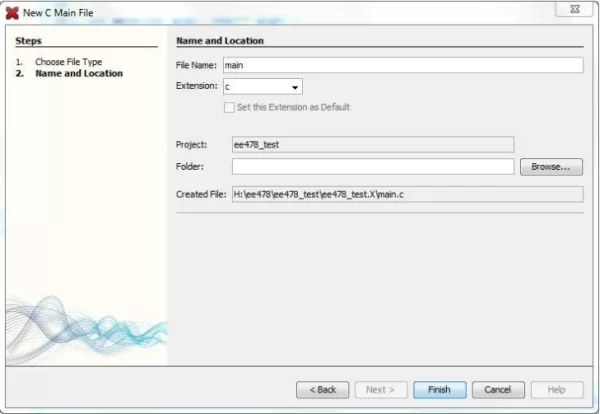
- In the New C Main File window, choose a name and location for your main source file. I’d
recommend naming the file ‘main’ and creating the file in the same folder as your project
(default). When you’re finished with your settings, hit ‘Finish’.
- The new source file will now open on the right-hand side of the main IDE window. Write your
program for your PIC. For this tutorial, a simple program to write button presses out to LEDs has
been created:
/*
- File: main.c
- Author: mstanisz
* - Created on October 8, 2012, 10:00 AM
*/
include
include
include
pragma config WDTEN = OFF
volatile int i;
unsigned char temp;
void main(void) {
/* Make RA0 – RA2 inputs (Push Buttons) / TRISA = 0x07; / Enable Digital Inputs / ANSELA = 0xE0; / Make RB0 – RB2 outputs (LEDs) / TRISB = 0; / Reset Push Buttons and LEDs / PORTA = 0x07; PORTB = 0x07; while(1) { / Output Button Presses to LEDs */
temp = PORTA;
PORTB = ~temp;
}
}
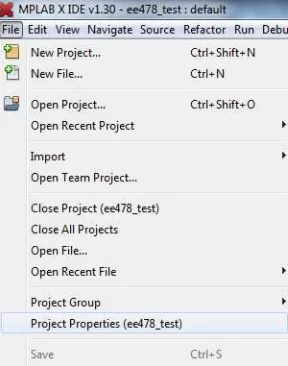
- To use the default PIC header files (in this case p18f25k22.h), we need to add the correct path to
the header files. To add a path, go to File > Project Properties.
- In the Project Properties window, select ‘MPLINK’ under ‘C18 (Global Options)’, which appears
under ‘Categories’ on the left-hand side of the window.
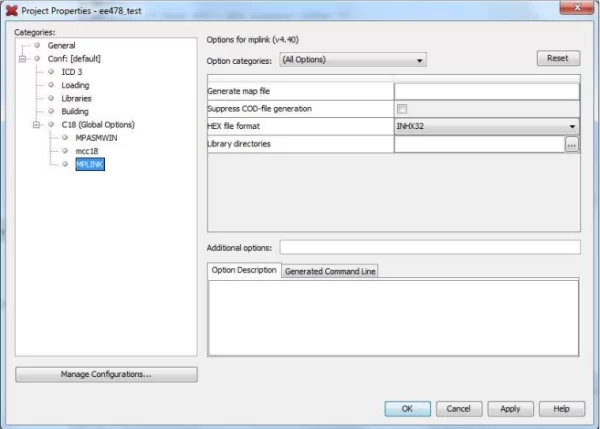
- On the right-hand side of the window, click the (…) icon next to ‘Library Directories’ to open the
Library directories window.
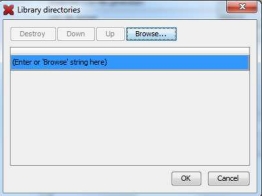
- In the Library Directories window, hit ‘Browse’ to navigate to the correct header files. In this
example, the PIC default header files are located under C:\Program Files
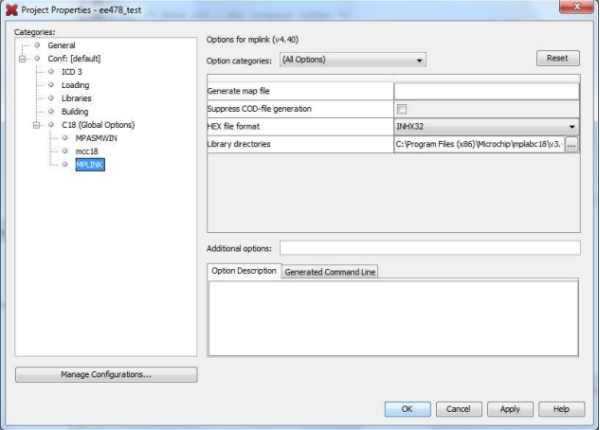
(x86)\Microchip\mplabc18\v3.40\h. - Once you’ve found the correct directory, click ‘Open’ and then ‘OK’ in the Libraries directories
window to close it. - The library path should now appear in the Project Properties window. Hit ‘Apply’ and ‘OK’ to
close the window.
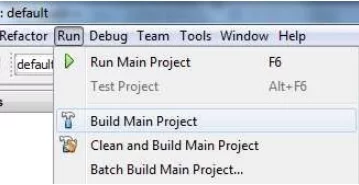
- Next, we will build the code to generate the programming files. Select Run > Build Main Project
to compile your code.
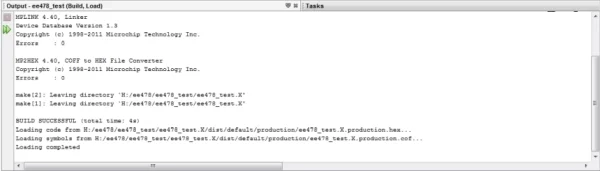
- The results of the compilation will appear in the Output window located at the bottom of the
main IDE window. If it ends with ‘BUILD SUCCESSFUL’, then your code is syntactically correct
and MPLAB was able to generate a programming file. If you have an error, consult the Output
window to see what went wrong.
- Now that you’ve built a programming file, you will program the PIC using the SuperPRO
programmer. Go to Start > All Programs > SUPERPRO M Series > SUPERPRO M Series. - Place your PIC into the SuperPRO programmer.
- In the main SuperPRO window, click ‘Device’ near the top to pick your microcontroller. For this
example, the PIC18F25K22 is chosen. In the Select window, choose your device and hit ‘OK’
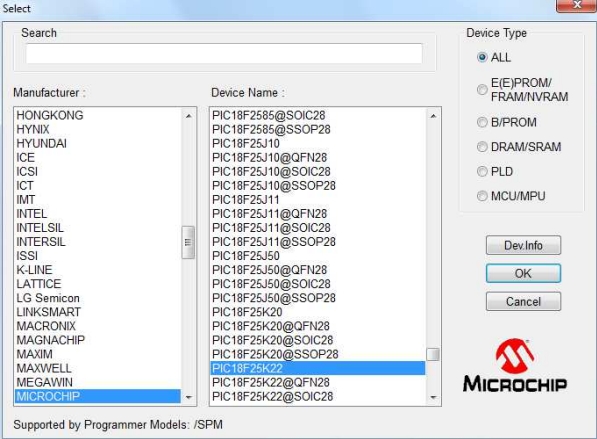
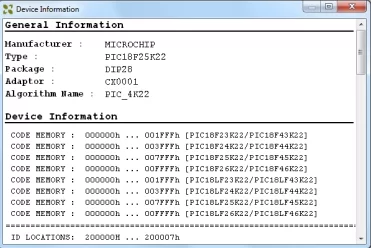
23. If a Device Information window pops up, close it to return to the main SuperPRO window.
- If you have already programmed your PIC previously, click ‘Erase’ on the left-hand side of the
main SuperPRO window to delete everything on your chip. Confirm that ‘Erase OK!’ appears on
the right-hand side of the main window. - To add the source file from MPLAB, go to File > Load or click the blue folder icon.
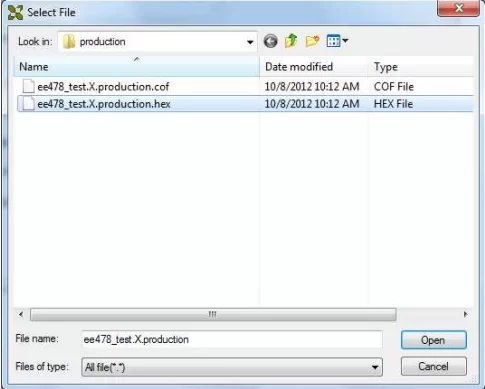
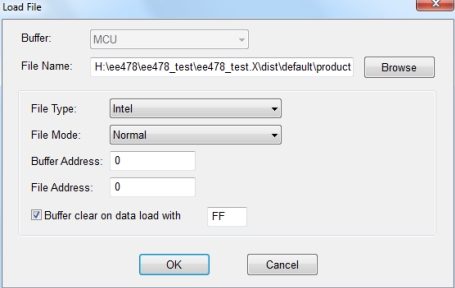
26. In the Load File window, click ‘Browse’ next to ‘File Name’ to find your source file. This file will be a binary file in the Intel HEX (.hex) format. It will be located under the .X\dist\default\production folder under the folder where you saved your MPLAB project.
For this example, the file was under:
H:\ee478\ee478_test\ee478_test.X\dist\default\production.
- Once you’ve found the correct .hex file, hit ‘Open’ to close the Select File window
- In the Load File window, the file you chose will now appear next to ‘File Name’. Verify the
following settings are selected:
File Type: Intel
File Mode: Normal
Buffer Address: 0
File Address: 0
(Checked) Buffer clear data load with FF IMPORTANT!
These are the default settings and should be correct. Hit ‘OK’ to close the window.
- Click ‘Program’ on the left-hand side of the main SuperPRO window to program the device. A
status bar will appear along the bottom of the screen. Confirm that ‘Program OK!’ appears on
the right-hand side of the main window. - Click ‘Verify’ on the left-hand side of the main SuperPRO window to check that the code was
correctly programmed on the PIC. Confirm that ‘Verify OK!’ appears on the right-hand side of
the main window.

- Remove your PIC or other device from the SuperPRO programmer and place it into your circuit.
- Wire up and verify your circuit.
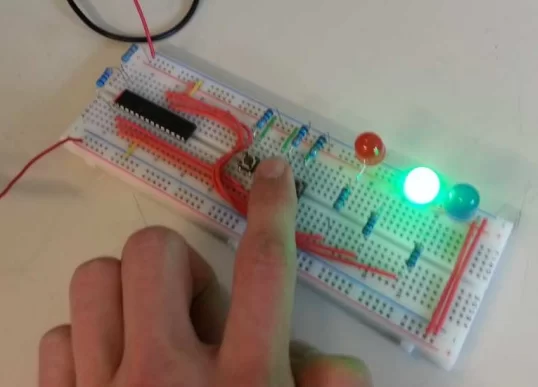
- Try it out! Power on your circuit and see if your code works. If it did, awesome! If not, well
then it’s back to MPLAB to debug and then to load a new programming image on to the PIC.
For more information about MPLAB and programming the PIC18F series, please see the following
documents:
• MPLAB X IDE User’s Guide (especially Chapter 3)
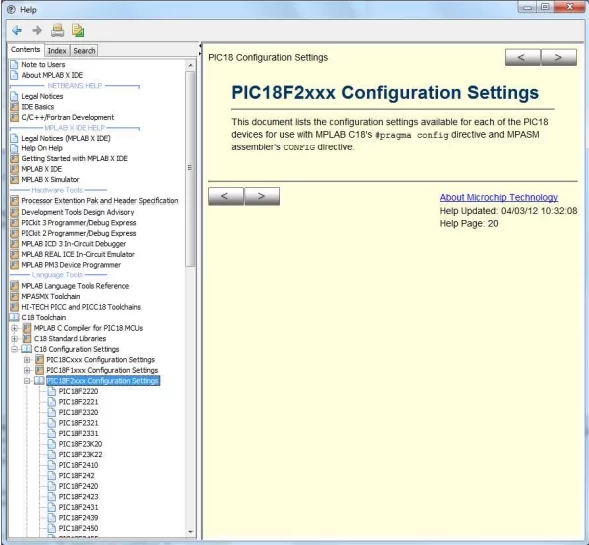
• PIC Configuration Settings (Help > Help Contents in MPLAB, then select Language Tools > C18
Toolchain > C18 Configuration Settings and then your PIC microcontroller)
Source: Using Microchip’s MPLAB X IDE and Programming the PIC18F
- How do I start a new standalone project in MPLAB X?
Navigate to the Start Page, click Create New Project under Dive In, select Microchip Embedded and Standalone Project, then choose your device and tool. - Which compiler is selected for this tutorial?
The C18 (v 3.40) compiler is selected under the Select Compiler section during project setup. - What is the recommended naming convention for the main source file?
The article recommends naming the file main and placing it in the same folder as the project. - Where are the default PIC header files located?
The header files are located under C:Program Files(x86)Microchipmplabc18v3.40h. - How can I verify that my code compiled successfully?
Check the Output window at the bottom of the IDE; if it ends with BUILD SUCCESSFUL, the code is syntactically correct. - What file format does the SuperPRO programmer require?
The SuperPRO programmer requires a binary file in the Intel HEX (.hex) format generated from the production folder. - What steps must be taken before loading the file in SuperPRO?
If the chip was programmed previously, you should click Erase on the left-hand side of the SuperPRO window to delete existing data. - How do I confirm the programming was successful?
After clicking Program, wait for Program OK! to appear, then click Verify to ensure Verify OK! appears.