Summary of IR Remote Controlled Home Automation using PIC Microcontroller
This project demonstrates a PIC microcontroller-based home automation system controlled via an IR remote. It allows users to toggle AC loads like lights and simulate fan speed control using Triacs. The system utilizes a TSOP1738 sensor to receive 38KHz modulated signals, which the microcontroller decodes to trigger relays or adjust power levels. The hardware was designed on EasyEDA and manufactured as a custom PCB.
Parts used in the R Remote Controlled Home Automation using PIC Microcontroller:
- PIC Microcontroller
- IR Remote
- TSOP1738 Sensor
- Relay Driver Circuit
- Relays
- Triac
- On-board LEDs
- Four small colored bulbs
- One large bulb (simulating a fan)
- EasyEDA PCB Design Service
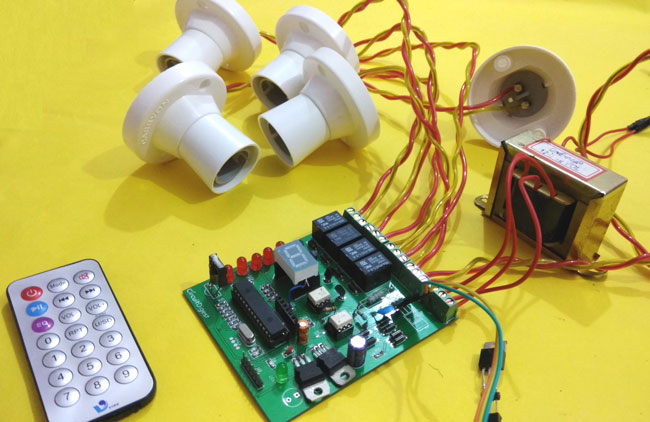
In this project, we are going to use a PIC microcontroller to remotely control few AC loads by just using an IR remote. A similar project IR remote controlled Home automation has already been done with Arduino also, but here we designed it on PCB using EasyEDA’s online PCB designer and simulator, and used their PCB designing services to order the PCB boards as shown in the subsequent section of the article.
At the end of this project you will be able to toggle (ON/OFF) any AC load using an ordinary Remote from the comfort of your Chair/Bed. To make this project more interesting we have also enabled a feature to control the speed of the fan with the help of Triac. All these can be done with simple clicks on your IR remote. You can use any of your TV/DVD/MP3 remote for this project. The different IR signals from the remote are received by the microcontroller which then controls the respective relays via a relay driver circuit. These relays are used to connect and disconnect the AC Loads (Lights/Fan).
Working Explanation:
The working of this project is fairly simple to understand. When a button is pressed on the IR Remote it sends a sequence of code in form of encoded pulses using 38Khz modulating frequency. These pulses are received by the TSOP1738 sensor and then read by the Controller. The Controller then decodes the received train of the pulses into a hex value and compares it with the predefined hex values in our program.
If any match occurs then the controller performs a relative operation by triggering the respective Relay/Triac and the corresponding result is also indicated by on-board LEDs. Here in this project, we have used 4 bulbs (small bulbs) of different colors as lighting loads and another bulb (bigger bulb) is considered to be a fan for demonstration purpose.
We have selected key 1 to toggle the relay1, 2 to toggle the relay2, 3 to toggle the relay3, 4 to toggle the relay4, and Vol+ to increase fan speed and Vol- to decrease speed of the fan.
Note: Here we have used 100watt bulb instead of a fan.
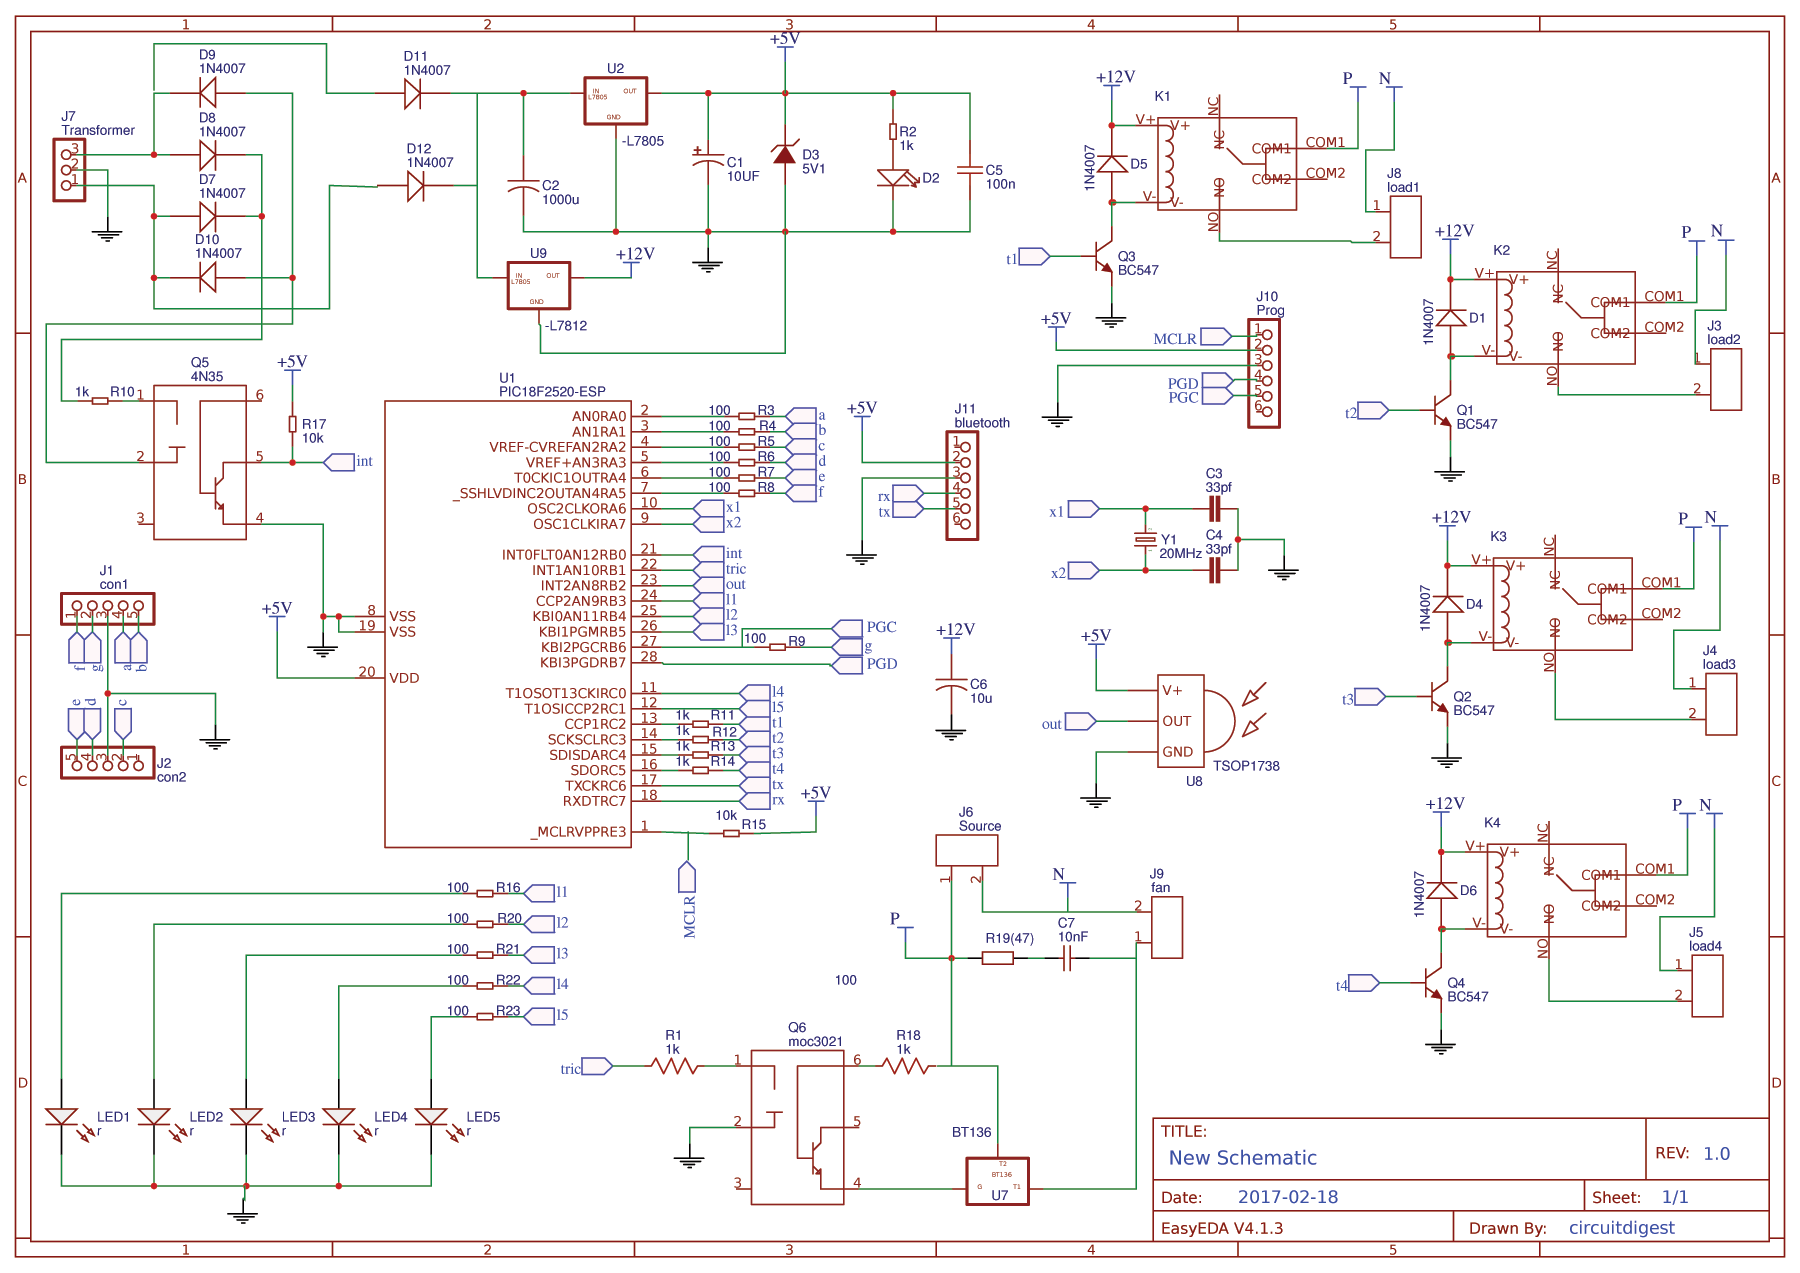
The above schematic was made easy by using esayEDA schematic editor since they provide the layouts of all components used in this project. It also does not require an installation and can be used online on the go.
The pinouts and component values are clearly specified in the schematic above. You can also download the schematic file from here.
for more detail: IR Remote Controlled Home Automation using PIC Microcontroller
- How does the system receive commands?
The system receives commands when an IR remote sends encoded pulses at a 38Khz modulating frequency. - What component detects the IR signals?
The TSOP1738 sensor receives the sequence of code sent by the remote. - Can I use any standard remote for this project?
Yes, you can use any TV, DVD, or MP3 remote for this project. - Which keys control the specific relays?
Key 1 toggles relay1, Key 2 toggles relay2, Key 3 toggles relay3, and Key 4 toggles relay4. - How is the fan speed controlled?
Fan speed is increased using the Vol+ button and decreased using the Vol- button on the remote. - What tool was used to design the circuit board?
The schematic was made using the EasyEDA online schematic editor. - What happens when a key match occurs?
The controller triggers the respective Relay or Triac and indicates the result with on-board LEDs. - What type of loads are demonstrated in this project?
The project uses four small colored bulbs as lighting loads and one larger bulb to demonstrate a fan.