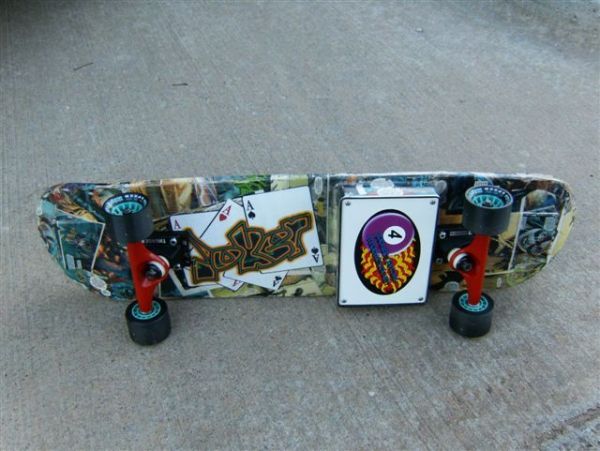
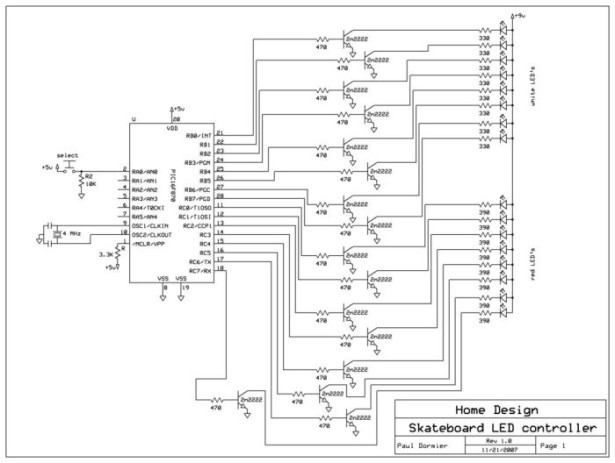
What do you get when an Electrical Engineer builds a Skateboard from scratch for a 13 year old’s Christmas present? You get a skateboard with eight white LEDs (headlights), eight red LEDs (tailights) all controlled via PIC microntroller! And I might add, one very happy 13 year old, well as happy as a 13 year old can be. Following is how I modified a skateboard kit (from ROAROCKIT.COM), added LEDs to the front and back, added PIC circuit, and covered with a comic book and custom graphics.
Step 1: Start building the Skateboard
Starting with a laminate kit that was purchased from www.roarockit.com, laminate the first three layers together. The laminate kit from roarockit includes everything needed to laminate and form your own skateboard. This is the second kit that I have used from them and have been very happy with their product.
1. Place the first laminate on the foam mold.
2. Spread the skateboard glue on the first layer.
3. Place the second laminate on top of the first.
4. Spread the skateboard glue on the second layer.
5. Place the third laminate on top of the second.
6. Insert guide pin.
7. Slide the assembly into the netting.
8. Slide the assembly into the vacuum bag, seal the bag, and pump out all the air.
Step 2: Create Channel for Wires
The wires that connect the LEDs at the front and the back of the Skateboard to the circuit board are installed in the fourth (middle) laminate of the skateboard.
1. After 24 hours remove the first three laminates from the vacuum bag.
2. Cut a channel/groove into the fourth laminate.
3. Add glue to the top of the first three laminate.
4. Place the fourth laminate on top of the assemble.
5. Place the assembly onto the foam mold, insert guide pin.
6. Place the entire assembly into the netting, then vacuum bag, and vacuum all the air out again.
For more detail: Skateboard with PIC microcontroller and LEDs


