Summary of Remotely Controlled Microcontroller From a Browser
This project lets you control a PIC32-based Digilent BasysMX3 microcontroller from a web browser via an HTTPS Python server and an ESP32 Pmod. A simple Python HTTPS server serves a webpage with buttons that update a hidden file; the ESP32 connects over SSL, GETs that file, and changes LEDs accordingly. Repository includes MPLabX project and server code; you must set the server IP/port in simpleServer.py and the ESP32 target IP in main.c and provide a server.pem certificate.
Parts used in the Remotely Controlled Microcontroller From a Browser:
- Digilent BasysMX3 development board (PIC32)
- Pmod ESP32 (ESP32 WiFi/Bluetooth module)
- Computer running Python with simpleServer.py
- server.pem SSL certificate file
- MPLabX IDE project files (BasysESP32.X)
- USB connection for in-system programming/debugging
- WiFi network for ESP32 connectivity
Interface with a microcontroller from a web browser, using HTTPS and a simple Python server.

Story
I love microcontrollers. I also love controlling hardware remotely, say, from another room of my house. The idea of being able to do this through a browser, like from my laptop or phone, rather than from an ssh console.
I’ve never worked with https or done any sort of web programming before. Luckily, I found this project that allowed me to get up and running quite quickly with an HTTPs server in Python. I was able to modify it to meet my needs for this very basic project. If you are looking to rebuild this project in any way, or just want to create your own python server, I recommend following the steps in the project linked above to create your own ‘server.pem’ file. I needed to add support for handling HTTP GET and POST requests. I was able to find an example project for GET and POST requests here.
As far as web programming goes, you will find that I’ve done only the basic CSS and html type scripting to create a very simple webpage. I’ll leave the web development to the more experienced people out there. However, even from this very basic example, you can see how it would be quite easy to create a more complex webpage and support more behavior on the microcontroller.
For hardware
I am using the Digilent BasysMX3 which is basically a handy little development board for a PIC32. It’s got LEDs, an RGB LED, two Pmod ports, an in-system programmer and debugger, a 16×2 LCD screen, an integrated H-bridge, buttons, four seven segment displays, and a whole bunch of other fun things. I am only really using the LEDs and uart controllers for this project though. To connect to my python server, I am using the Pmod ESP32. This is basically Digilent’s own Pmod board featuring an ESP32 from Espressif. These ESP32 chips are great. They allow for WiFi/Bluetooth 4.2/BLE connections, have a whole host of peripherals, come with free RTOS, and can do pretty much anything.
How The Project Works
The Python server (simpleServer.py) creates an HTTPS server at the IP address and port number specified by the call:
httpd = BaseHTTPServer.HTTPServer(('192.168.1.107', 4443), MyHandler)
This allows you to visit the server by typing “https://192.168.1.107:4443” in your browser. Your browser may get mad at you for attempting to visit a page hosted locally, but it should let you still visit this page.
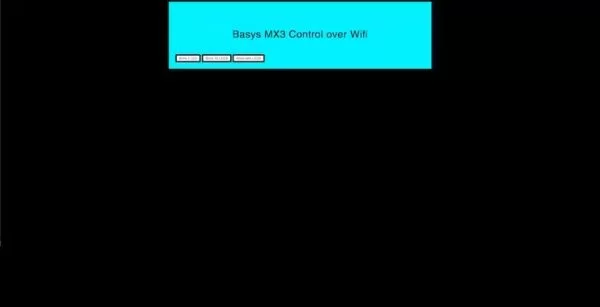
When you visit the address in the browser, there are three buttons present on the screen. Everytime one of these buttons is pressed, a hidden file is updated on the server, and then the page is reloaded.
On the microcontroller side, the ESP32 is already connected to the wifi network, and the ESP32 repeatedly attempts to create an SSL connect at the IP address and port number specified above. Once the SSL connection is established, the ESP32 submits an HTTP GET request for the hidden file described earlier. Based on the contents of the file, the ESP32 modifies the behavior of the LEDS.
If You Want To Build The Project
The MPLabXIDE project files are included in the linked github repository in the ‘BasysESP32.X’ directory. The corresponding files for the python server are also included in the repo.
You will need to make some changes to the server files and MPlab files in order to get it to work. Modify the ‘simpleServer.py’ file. So that it creates the server port on the IP address where you are hosting your server. This change will happen at line 95. For the MPlabX files, modify ‘main.c’ to connect the ESP32 to the IP address where you are hosting the server. This should be the same IP address that you just put in to the server code. This change occurs at line 30.
The server should look for a file called “server.pem” in the same directory as the server. I have included this in the repository, but if you want to run your own server. I recommend following the instructions shown here to create your own.pem file.
Connect the ESP32 to my wifi network before running the project, and so. I do not explicitly do this in software. I recommend you do the same. This way, you can test that the network connectivity is valid beforehand by pinging the device at its IP address. However, if you desire, there is an included function in the MPLabx project files that should allow you to connect the ESP32 to any wifi network. Additional utilities are provided in ESP32.c/.h.
- How does the browser interface communicate with the microcontroller?
The browser talks to a Python HTTPS server; button presses update a hidden file the ESP32 then GETs over SSL to change LEDs. - Can I visit the server address from my phone or laptop?
Yes; visit https://server_ip:port (for example https://192.168.1.107:4443) though the browser may warn about the local certificate. - What files must I modify to use my own IP address?
Edit simpleServer.py (line 95) to set the server IP/port and edit main.c (line 30) in the MPLabX project to point the ESP32 to that IP. - Does the project include an SSL certificate?
The repository includes a server.pem, but the article recommends creating your own server.pem following the linked instructions. - How does the ESP32 determine what to do with the LEDs?
The ESP32 establishes an SSL connection to the Python server and issues an HTTP GET for the hidden file; it modifies LED behavior based on that file's contents. - Do I need to configure WiFi in code for the ESP32?
The article suggests connecting the ESP32 to WiFi beforehand manually, though the MPLabX project includes a function to connect to any WiFi network if desired. - Where are the project source files located?
The MPLabX project files are in the repository under BasysESP32.X and the Python server files are also included in the repo. - What web programming is required to recreate the webpage?
Only basic HTML and CSS were used in this example; more complex webpages can be added but are not provided.