Summary of Programming Your Chipkit Dp32 Using the Arduino IDE
This article guides users on programming chipKIT dp32 boards using the Arduino IDE, leveraging their superior processing power. It details installing the ChipKIT core via the Board Manager, restoring the bootloader using MPLAB X if erased, and uploading standard Arduino sketches. The process resolves common errors like "No Target Found" by ensuring correct cable quality and port selection.
Parts used in the chipKIT dp32 Programming Project:
- chipKIT dp32 board
- Arduino IDE software
- ChipKIT Core package
- MPLAB X IDE
- Micro USB cable
- Bootloader file
- Programmer device
- chipKIT boards typically have far more memory and computing power than many Arduino boards, and as a result, they are so much better at manipulating data.
- On the other side, the Arduino IDE is easy to use and understand.

- So what if we could interchange the Arduino board with the chipKIT while still programming with the Arduino IDE. Lets see what happens.
The following instructable shows how to program the chipKIT dp32 using the Arduino IDE
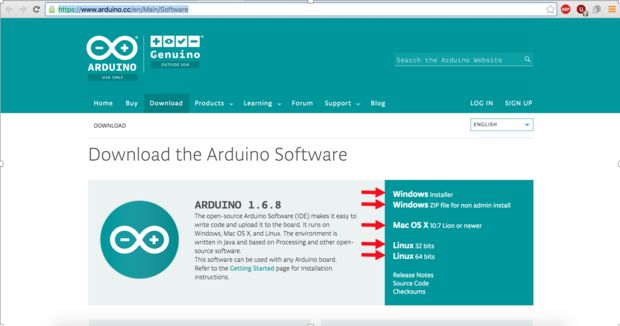
Step 1: Download and Install the Arduino IDE

1. Go to arduino.cc and download the Arduino Software as per your Operating System (Windows, Mac, Linux)
2. Follow the installation guide step-by-step and install the software
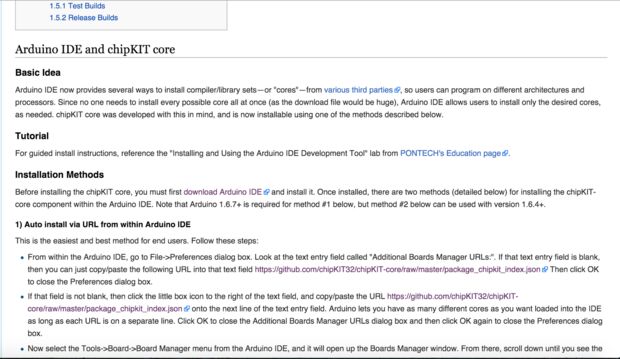
Step 2: Install ChipKIT Core

To be able to program on different architecture and processors you need to install the desired core. In this scenario, we need to download and install the chipKIT core and can be done using the method below.
1. Go to chipKIT.net and you can see various method to install the chipKIT core
2. In this instructable we are going to be using the first method which is “Auto install via URL from within Arduino IDE“.
- Open your Arduino IDE
- Go to File -> Preferences. A dialog box will appear and at the bottom of the dialog box you can see a text entry field called “Additional Boards Manager URLs:”
- If that field is not blank, hit the little box that appears right next to the text entry field
- Copy/Paste the following link in the text entry field – “https://github.com/chipKIT32/chipKIT-core/raw/master/package_chipkit_index.json” and hit OK
3. From the Arduino IDE select Tools -> Board -> Board Manager and scroll down to select your chipKIT dp32 board. You can also use the search box to find your chipKIT board
4. When you see your board click once in the box that appears and then you can see the install button
5. Hit install and it will download and install all the chipKIT core components needed
6. Click the close button to close the Board Manager Window
Step 3: Restore the Boot Loader on Your ChipKIT

This step will show you how to restore your chipKIT bootloader, in the event that it has been erased from a chipKIT- compatible board. This operation is required if you have used MPLAB X to program the board, causing the bootloader to be over-written.
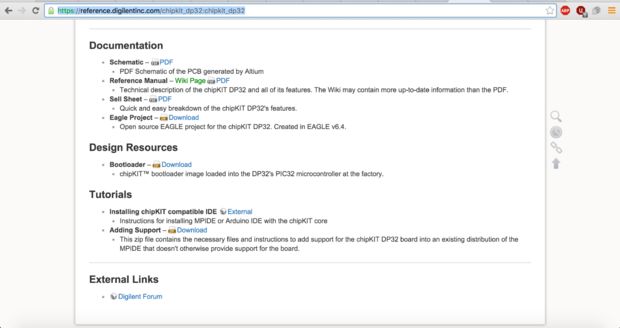
We need to download the bootloader for the chipKIT from the resources page.
- Download the bootloader from the resources page
- Go to the resources page
- Scroll down to “Design Resources”
- Download the Bootloader
- Once you have downloaded the Bootloader we need to upload the file onto the chipKIT board
- Open MPLAB X IDE
- Connect your chipKIT board and your programmer
- Create a new project
- Select “Categories -> Microchip Embedded” & “Projects -> Prebuilt (Hex, Loadable Image) Project” and hit next
- Add the downloaded bootloader file using the browse button and select your device appropritately and hit next
- Give the project a suitable name and hit finish
- Now you need to program the device using the “Make and Program Device Main Project” button that appears on the top centre of the window
- Once the program is verified and completed the LED LD1 will start blinking which means the bootloader has been successfully uploaded to the board and is ready to program using the Arduino IDE
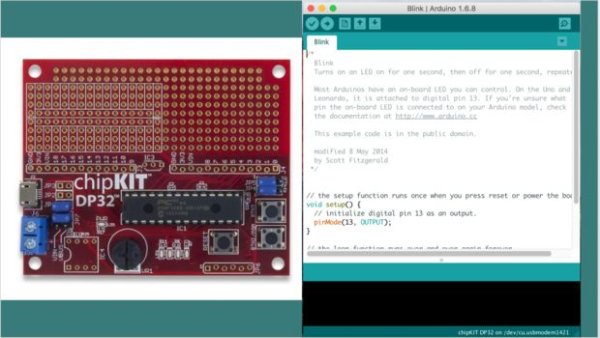
Step 4: Arduino Program on the Dp32 Board

Now that you have the bootloader on the dp32 working you can run any program using the Arduino IDE
- Start the Arduino IDE
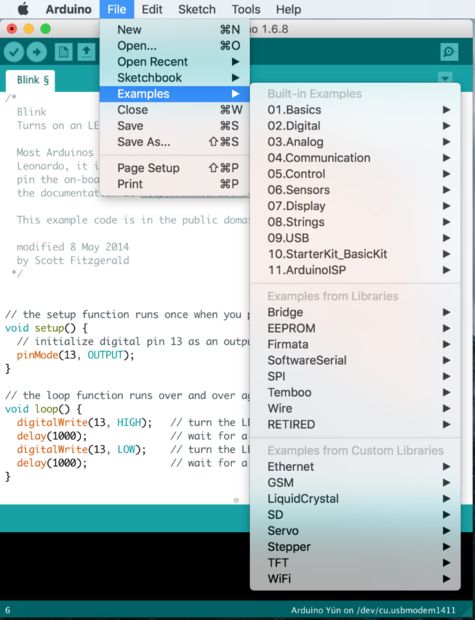
- You can see there are many example codes written for you. Go to “File -> Examples -> Select whichever you want”
- Before compiling and uploading the code you need to select the port to which your board is connected
- Go to “Tools -> Port -> Select one”. (Select the micro USB port)
- Verify your code
- Upload your code on the dp32 and your program is running
Step 5: Common Errors

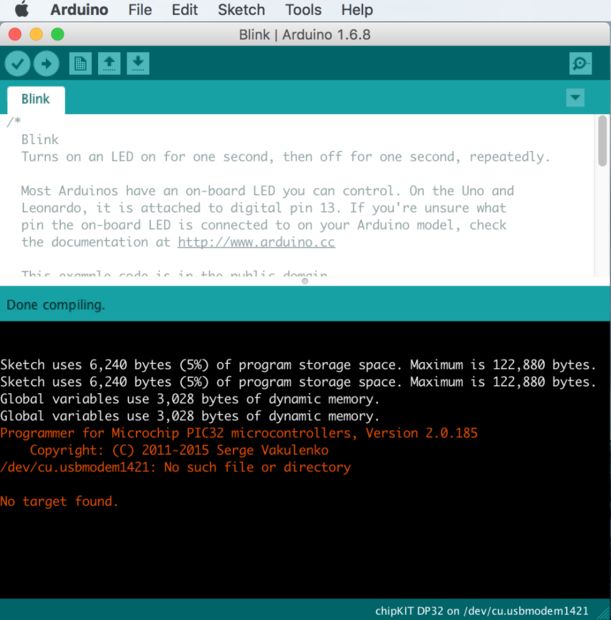
- While uploading your program to your chipKIT board you may come across this error “No Target Found”. To solve this issue you may need to reload the bootloader on the chipKIT and then reprogram your board. Hence it is advisable to keep MPLAB X open and upload the bootloader whenever necessary.
- Some may have this issue even if you perform the above step. It might be the case that you are using a low quality micro USB cable.
- While selecting the board and port from the tools in the Arduino IDE make sure that you select the right ones as per your board and serial I/O port.
- How do I install the ChipKIT core in Arduino IDE?
Add the URL https://github.com/chipKIT32/chipKIT-core/raw/master/package_chipkit_index.json to the Additional Boards Manager URLs field in Preferences, then select and install the chipKIT dp32 board from the Board Manager. - Can I program a chipKIT board with the Arduino IDE?
Yes, after installing the ChipKIT core and ensuring the bootloader is present, you can run any Arduino program on the dp32 board using the Arduino IDE. - What should I do if I get a No Target Found error?
You may need to reload the bootloader on the chipKIT using MPLAB X or ensure you are using a high-quality micro USB cable. - When is it necessary to restore the bootloader?
Restoring the bootloader is required if it has been erased, such as when the board was previously programmed using MPLAB X. - How do I upload the bootloader file to the board?
Create a Prebuilt Hex project in MPLAB X, add the downloaded bootloader file, select the appropriate device, and use the Make and Program Device Main Project button. - Which port should I select for uploading code?
Select the micro USB port from the Tools menu under Port options before verifying and uploading your code. - What causes the LED LD1 to blink during the process?
The blinking of LED LD1 indicates that the bootloader has been successfully uploaded to the board. - Where can I download the bootloader resources?
The bootloader can be downloaded from the Design Resources section on the chipKIT.net resources page.