Life Size Operation Game
As a child I loved the Milton Bradley Operation game, the buzzer always scared me when it went off, but it was fun. The object of the Operation game is to remove a body part with out touching the tweezers to the metal sides that surround the object for removal. If you touch any metal sides you make his nose light up and a buzzer will sound and startle you.
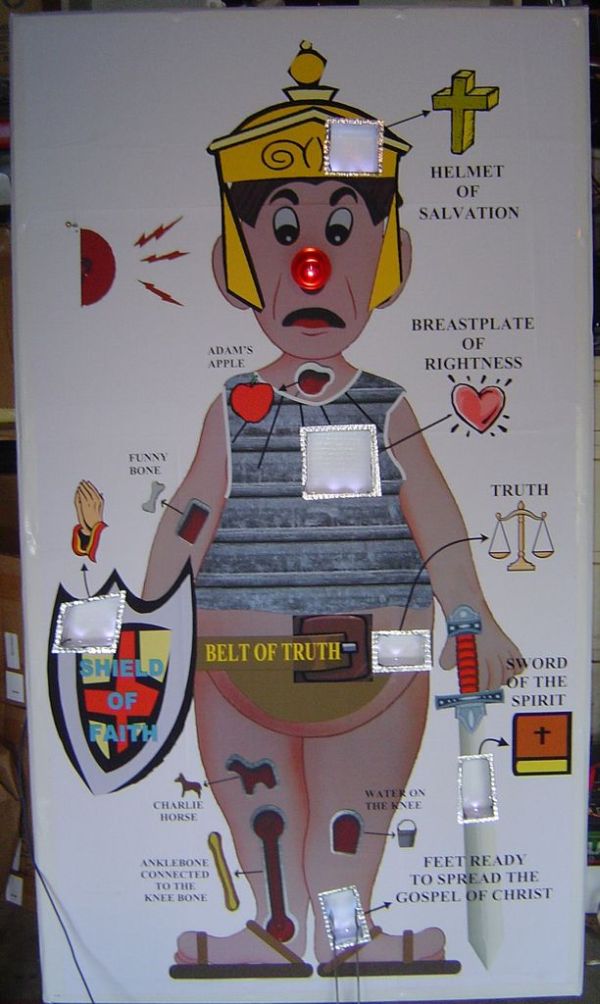
This year the Church I attend was having a new Harvest Festival or Halloween function this year called Trunk O Treat. Truck O Treat is where you play a game or activity out the trunk of your car. For my life size Operation game I would put candy in the pockets for the kids to pick out with salad tongs and put a Bible Armor of God theme for the pockets. I used a microcontroller to detect when the tongs come in contact with the metal sides and flash the red nose and make the buzzer sound.
Step 1
The Picture
To build the life size over 5ft tall game board. I took a digital picture of the original Operation game board and in a photo shop edited the picture to add clipart and removed the yellow background to save on printer ink. The picture is glued down on cardboard front and a wood frame is made to give it a structure. I printed out the picture on banner paper to make it easier to assemble it in strips. The picture is overlapped about half inch when printed out so you can align and glued down the image. I taped together two the cardboard project display boards with a white background. I used the display boards from Michaels Crafts and there size is 36in wide by 48in long. To glue down the picture I used 3M Supper# 77 spray glue to adherer the picture (banner paper) to the cardboard and trimmed the cardboard to size. The finished Operation board size was 34in wide by 62in long and 4in thick.
Step 2
Wood Frame and Red Nose
Step 3
Red Nose
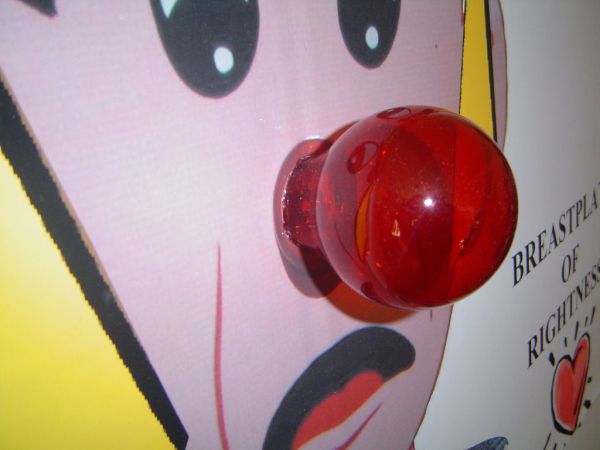
The light bulb used for the nose was a 120VAC bulb that is red color. I removed the filament and socket base and glued it to the front poster board with four white LED’s for illuminating the inside the nose.
Step 4
Make Boxes
Boxes
The size for the pockets and constructed them out of cardboard and taped together. The pocket sizes are all two inches deep; Sword 2in x 3.50in, Feet 1.75in x 3.50in, Shield 3inx 3in, Belt 1.75in x 2.75in, Breastplate 3.75in x 3.75in, and Helmet 2.75in x 2.75in. I made a template out of paper to fit inside the box so I can use it for cutting out the correct size hole on the picture. I cut out all the pockets on the picture and hot glued wings to the pocket boxes so they will sit flush with the bottom and hot glued them to the back of the picture cardboard.
Step 5
Aluminum Foil in Boxes
I glued 1 inch strips of aluminum foil on the front edge of all the boxes. I took the cutout cardboard pieces and used it as a template for the front aluminum metal pieces. I cut out a disposable aluminum oven liners for the front mount seen metal. This was used for better lower resistance to detect contact with tongs. I glued the aluminum to the front 1/8in to 1/4in to go around the opening on the front picture and bent it inside the boxes 1/4 inch to 1 inch.
For more detail: Life Size Operation Game using PIC16F877 microcontroller


