Summary of Esp8266 based home automation system using wifi
This article guides users in building a low-cost ESP8266-based home automation system. It details hardware setup, including modifying the module for breadboard use and configuring the Arduino IDE with specific libraries. The project demonstrates controlling an LED via a web interface by connecting the ESP8266 to an Arduino UNO and using AT commands or direct programming to manage WiFi connectivity and GPIO pins for remote switching.
Parts used in the ESP8266 Home Automation System:
- Esp 8266
- Perfboard
- Ams1117
- FTDI
- Arduino UNO
- Headers
- Breadboard
- LED
- Buttons
Esp8266 based home automation system using wifi
It is also cheap and be used for making cool projects connected to the Internet .Learn how to make a simple IOT Project with it .The ESP8266 WiFi Module is a self contained SOC with integrated TCP/IP protocol stack that can give any microcontroller access to your WiFi network. The ESP8266 is capable of either hosting an application or offloading all Wi-Fi networking functions from another application processor. Each ESP8266 module comes pre-programmed with an AT command set firmware, meaning, you can simply hook this up to your Arduino device and get about as much WiFi-ability as a WiFi Shield offers (and that’s just out of the box)! The ESP8266 module is an extremely cost effective board with a huge, and ever growing, community.
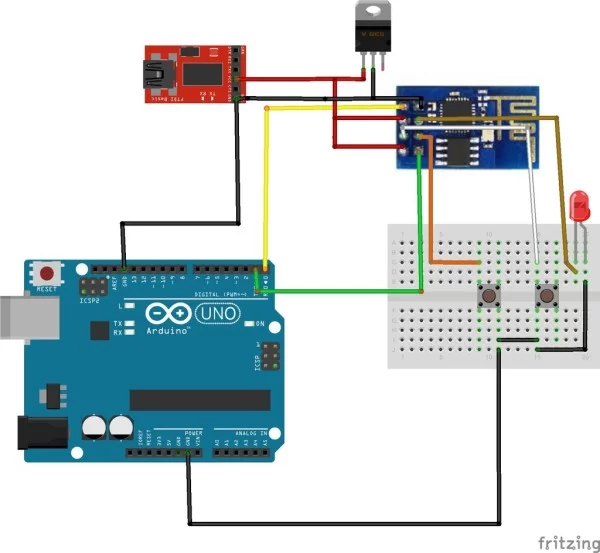
Step 1: Components and Connection

Thing we will need
ESP8266 Pinouts
Vcc -power supply 3.3 v
Gnd – Ground
RST- reset
CH-PD-Chip power Down- Connected to 3.3V
Rx-Recieve
Tx – Transmit
GPIO 0- Normal mode for HIGH Programming Mode for LOW
GPIO 2 General purpose 2
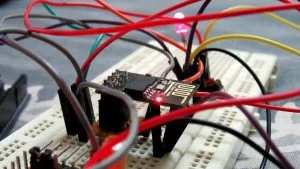
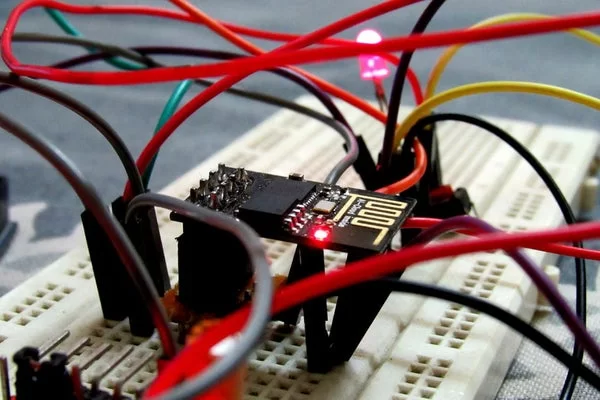
Step 2: Making the Esp 8266 Bread Board Friendly

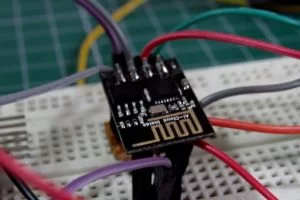
Esp 8266 esp 1 is badly famous for being rude to the Bread board .
Here is a small hack to make it convert into a DIP pack.
You only want a 4x 4holes perf section with 4 rows of copper track of length four holes.
see the photos and you’d understand what I mean by that.
Cut two Strips of 4 Male Header pins each.
Cut two Strips of 4 Female Header pins each.
Push the 4-Pin Female header pins
Solder the Female Header (4-Pins each)
Push the 4 pin male all the way down until they are invisible in one side of the plastic frame.
Solder the male Header (4-Pins each) and join female together with it
Connections
Vcc and ch_pd to vcc
Gnd to gnd
Rst to button 1
GPIO0 to button 2
Note While uploading Program press reset once while holding GPIO Button as long as the program uploads.
Step 3: Setting Up the Arduino Environment

You need to download the core if your Arduino is below 1.6
https://github.com/esp8266/Arduino
Installing with Boards Manager for Arduino
Starting with 1.6.4, Arduino allows installation of third-party platform packages using Boards Manager. We have packages available for Windows, Mac OS, and Linux (32 and 64 bit).
- Install Arduino 1.6.8 from the Arduino website.Start Arduino and open Preferences window.
- Enter http://arduino.esp8266.com/stable/package_esp8266… into Additional Board Manager URLs field.
- You can add multiple URLs, separating them with commas.
- Open Boards Manager from Tools > Board menu and install esp8266 platform (and don’t forget to select your ESP8266 board from Tools > Board menu after installation).
Boards manager link: http://arduino.esp8266.com/stable/package_esp8266…
Step 4: Trying the Blink Sketch
Connections
TThe led is connected to the GPIO 2
Tx is connected to Rx
Rx is connected to Tx
Vcc to 3.3v gnd to gnd
Ch_pd to 3.3v
GPIO 0 to gnd while programing
int ledPin=2;

void setup() {
pinMode(ledPin, OUTPUT);
}

void loop() {
digitalWrite(ledPin, HIGH); // turn the LED on (HIGH is the voltage level)
delay(1000); // wait for a second
digitalWrite(ledPin, LOW); // turn the LED off by making the voltage LOW
delay(1000); // wait for a second
}
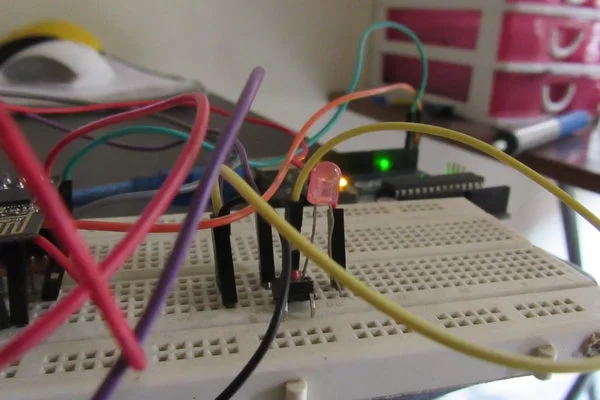
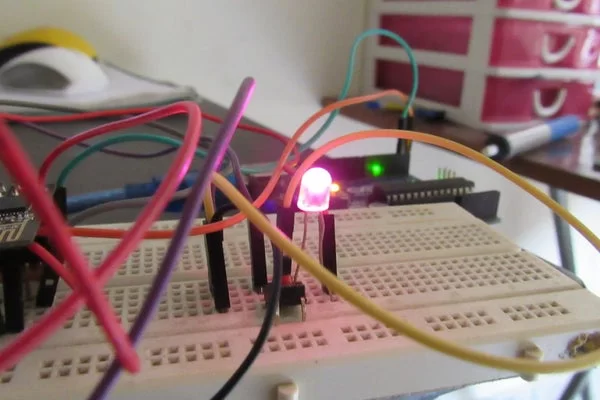
Step 5: Making a Web Controlled Home Automation

Connections
The led is connected to the GPIO 2
Tx is connected to Rx
Rx is connected to Tx
Vcc to 3.3v gnd to gnd
Ch_pd to 3.3v
GPIO 0 to gnd while programing
<p>#include <ESP8266WiFi.h><br></p><p>const char* ssid = "dlink";
const char* password = "ilovechips";</p><p>int ledPin = 2; // GPIO2
WiFiServer server(80);</p><p>void setup() {
Serial.begin(115200);
delay(10);</p><p>pinMode(ledPin, OUTPUT);
digitalWrite(ledPin, LOW);</p><p>// Connect to WiFi network
Serial.println();
Serial.println();
Serial.print("Connecting to ");
Serial.println(ssid);</p><p>WiFi.begin(ssid, password);</p><p>while (WiFi.status() != WL_CONNECTED) {
delay(500);
Serial.print(".");
}
Serial.println("");
Serial.println("WiFi connected");</p><p>// Start the server
server.begin();
Serial.println("Server started");</p><p>// Print the IP address
Serial.print("Use this URL to connect: ");
Serial.print("http://");
Serial.print(WiFi.localIP());
Serial.println("/");</p><p>}</p><p>void loop() {
// Check if a client has connected
WiFiClient client = server.available();
if (!client) {
return;
}</p><p>// Wait until the client sends some data
Serial.println("new client");
while(!client.available()){
delay(1);
}</p><p>// Read the first line of the request
String request = client.readStringUntil('\r');
Serial.println(request);
client.flush();</p><p>// Match the request</p><p>int value = LOW;
if (request.indexOf("/LED=ON") != -1) {
digitalWrite(ledPin, HIGH);
value = HIGH;
}
if (request.indexOf("/LED=OFF") != -1) {
digitalWrite(ledPin, LOW);
value = LOW;
}</p><p>// Set ledPin according to the request
//digitalWrite(ledPin, value);</p><p>// Return the response
client.println("HTTP/1.1 200 OK");
client.println("Content-Type: text/html");
client.println(""); // do not forget this one
client.println("");
client.println("
");</p><p>client.print("Led pin is now: ");</p><p>if(value == HIGH) {
client.print("On");
} else {
client.print("Off");
}
client.println("<br><br>");
client.println("Click <a>here</a> turn the LED on pin 2 ON<br>");
client.println("Click <a>here</a> turn the LED on pin 2 OFF<br>");
client.println("</p><p>");</p><p>delay(1);
Serial.println("Client disonnected");
Serial.println("");</p><p>}</p>
- How can I make the Esp 8266 compatible with a breadboard?
You can create a small hack by cutting two strips of 4 male header pins and two strips of 4 female header pins, then soldering them together on a 4x4 holes perf section to convert it into a DIP pack. - What URL is needed to install the ESP8266 core in the Arduino environment?
The required URL to enter in Additional Board Manager URLs is http://arduino.esp8266.com/stable/package_esp8266... - Which pin should be connected to ground during program upload?
GPIO 0 must be connected to gnd while programming the device. - How do I connect the Tx and Rx pins between the modules?
The Tx pin is connected to the Rx pin, and the Rx pin is connected to the Tx pin. - What voltage level is required for the Vcc and Ch-PD pins?
Vcc requires a power supply of 3.3 v, and Ch-PD (Chip power Down) is connected to 3.3V. - Can the ESP8266 host an application or offload networking functions?
Yes, the ESP8266 is capable of either hosting an application or offloading all Wi-Fi networking functions from another application processor. - What happens when the request /LED=ON is received?
The code sets the ledPin to HIGH, turning the LED on. - What happens when the request /LED=OFF is received?
The code sets the ledPin to LOW, turning the LED off.