If you are building a coilgun (or gauss gun) or rail gun, a necessary part of your project will likely be some sort of speed detector. Getting a coilgun to work is rewarding, but you can’t continue the project without a reliable, accurate device to measure speed. A speed or velocity detector allows you to objectively quantify the performance of your gun. Given this information, you will hopefully be able to tune your project for maximum performance. For example, you can double the size of your capacitor bank and see if there is an improvement in final speed or not. Or, you can use different projectiles and see which ones go the fastest, or which ones have the greatest amount of kinetic energy (you will also need a weight scale to determine kinetic energy).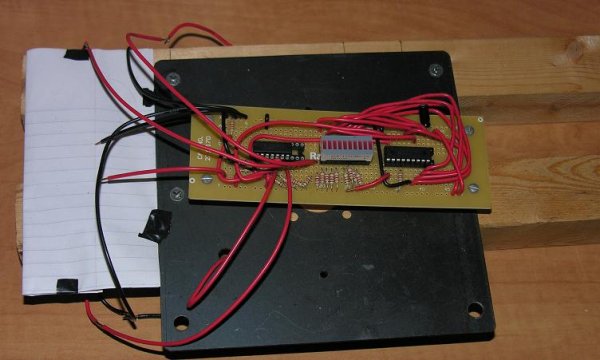
Here is my speed detector for my coilgun project:
This is quite simple and very cheap to build. In order to build it, you will need two infrared LEDs and two infrared detectors. These are readily available from Radioshack. You can probably buy them for a cheaper price from Jameco or Digikey, but then you would have to pay and wait for shipping. I built my project from two scrap pieces of wood and a piece of metal. As you can see, I didn’t even bother to cut the two pieces of wood to the same length because I’m lazy. You will also need to buy a PIC microcontroller and prototype board. The prototype board is readily available from Radioshack; however you will probably need to order the PIC microcontroller from Jameco or Digikey. The only other specialty components are LM339N and a BAR LED, both available from Radioshack for a fairly cheap price. One last thing I would like to mention is that since you will need to buy a PIC from Jameco, it would probably save you money just to buy all the components from Jameco, with the exception of maybe the prototype board.
How the speed detector works
The speed detector I designed is extremely simple, which is why I’m sharing it with you. There are two sets of infrared emitter and detectors. The emitter is always on. As soon as an object breaks the first beam, the first infrared detector no longer detects a signal. The signal from the infrared detector is analog, not digital. To help interface it to the PIC microcontroller, an op amp is used. This brings the signal to either a full zero or one. This signal is then sent to the microcontroller. Some microcontrollers have ADCs built in, but I would still recommend using an external op-amp such as the LM339N to produce a cleaner trigger signal. For my project, I used a PIC16F627, but there are many microcontrollers you can choose from that will work fine. I do recommend PIC16FXXX microcontrollers because they are very cheap, and you can even build a PIC programmer yourself. One thing that is important is to keep the infrared detectors in a dark place. As you can see, a piece of paper is covering the first detector, and a metal plate is covering the second detector. This helps to get cleaner signals and block out unwanted infrared radiation.
As soon as the processor detects the pin goes low, the software enters a counting state. In this state, the PIC microcontroller simply starts counting from 0. The current value of the counter is always displayed on the BAR LED. When you’re designing your detector, you have to keep in mind how fast you expect objects to pass through, and how accurate you want your results to be. In my case, results are only 8 bits accurate, but that is more than sufficient to get reliable and accurate data for a coilgun project. During the counting phase, you will need to carefully tune how fast the microcontroller counts. Because I’m only using an eight bit display, the counter will overflow very quickly. Therefore, it is necessary to intentionally add delay into the microcontroller program to count at a rate where you don’t expect there will be any overflow. For example, if you don’t expect objects to travel slower than 2 meters per second, you can use that fact and the length between the two detectors in order to figure out how many clocks it will take before overflowing.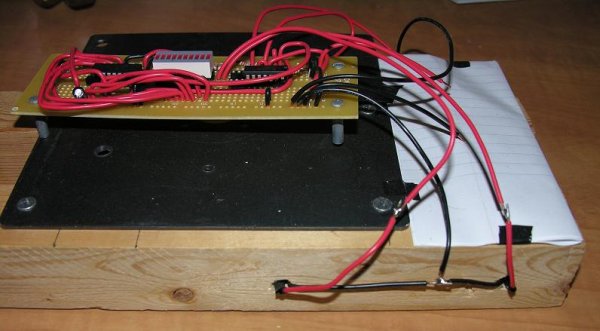 And oscilloscope is very useful to ensure your microcontroller is counting at the correct rate. Otherwise, all your data will be wrong. Verifying the counting frequency with an oscilloscope is necessary because it is too fast for a human to see. My microcontroller operates at 7.15 kHz.
Once the projectile breaks the second infrared beam, the program stops counting and displays the final count on the BAR LED. You will then have to use good old fashioned math to determine the final velocity in meters per second. I wrote a quick C program to do this, but you could also use Excel to create a simple lookup table.
For more detail: How to build a speed detector for a coilgun project