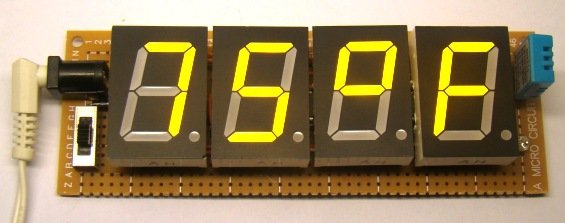
This project is about building a microcontroller-based digital room thermometer plus hygrometer that displays temperature and relative humidity on 4 large (1 inch) seven segment LED displays which adjust their brightness level according to the surrounding illumination. It consists of a closed loop system that continuously assesses ambient light condition using an inexpensive light-dependent resistor (LDR) and uses that information to adjust the brightness of the display. An inexpensive DHT11 sensor is used to measure temperature and relative humidity. The microcontroller used in this project is PIC16F688, and it runs at 4 MHz clock generated from its internal source. A separate display driver chip (MAX7219) is used to control and refresh the display data on the seven segment LEDs.

Why do we need adaptive brightness control?
Auto-adjusting the brightness of the seven segment LED displays not only saves power but also enhances the readability in all ambient lighting conditions. Many smartphones, HDTVs, PDAs, tablets, and computer screens now come with this feature. It basically dims the display in a dark environment and is still readable and eye-soothing. Similarly, when the ambient light level goes up, it brightens the display to enhance the readability. This project displays indoor temperature and relative humidity on large 1 inch seven segment LEDs that automatically adjust the brightness to be in balance with the light condition in the room. So, if you put this meter in your bedroom, you won’t have to worry about turning it off during nighttime. It will automatically dim low enough to not to disturb your sleep, while maintaining the readability.
Circuit diagram
To make it easy to explain, I have divided the complete circuit diagram into 3 parts: Power supply unit, Microcontroller and sensor unit, and Display driver unit.
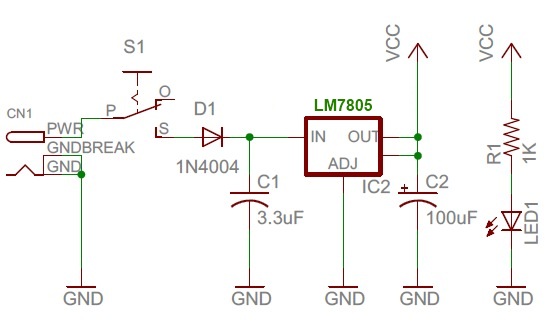
The power supply unit consists of a LM7805 regulator IC to derive regulated +5V power supply from a 9-15V DC wall adapter. The complete power supply unit circuit diagram is shown below. LED1 is a power-on indicator LED.

The following circuit diagram shows connections of the DHT11 sensor and the photoresistor (also called light dependent resistor or LDR) to the PIC16F688 microcontroller. DHT11 is a low cost digital sensor for measuring temperature from 0-50 °C with an accuracy of ±2°C and relative humidity ranging from 20-95% with an accuracy of ±5%. The sensor provides fully calibrated digital outputs and has got its own proprietary 1-wire protocol for communication. I have described more about this sensor and its communication protocol in Measurement of temperature and relative humidity using DHT11 sensor and PIC microcontroller. The PIC16F688 uses the RC4 I/O pin to read the DHT11 output data. Note that R7 serves as the pull-up resistor required for the data pin of the DHT11 sensor. The S2 switch in the circuit diagram is to select between degree Fahrenheit (°F) and degree Celsius (°C) unit for temperature display. When the switch is open, the RC3 pin is pulled low by default, and the temperature is displayed in °F scale. In order to chose °C scale, the RC3 pin should be pulled high, which happens when S2 is closed.
For more detail: TrH Meter: A DIY indoor thermometer plus hygrometer with adaptive brightness control implemented to 7-segment LED displays
