Introduction
For our final project, we made a video game in which the player controls a predator and gains points by eating boids. The video game ended up having three different modes and could be played by either one or two players. We enjoyed taking the optimization lab of lab 2 and turning it into a playable game with a menu, scorekeeping, and sound effects while keeping boids in the picture.
Design

Concept
This project was largely an extension of lab 2. We took the boids algorithm that we had developed and optimized in lab 2 and encapsulated it inside of a game. The idea came from a statement one group member made when discussing how the predator for the 5000-level version of microcontrollers moves randomly. “What if we could control the predator!?” we thought. Then the juices got flowing and we made the idea into a reality.
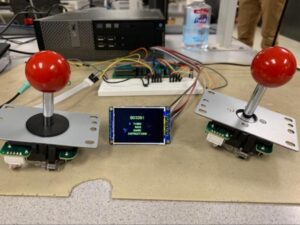
After working for over a month since the inception of the idea, we were able to create an entire gaming system. We combine different menus, instructions, modes, players, and sound effects with nostalgic joysticks and a button to bring the experience to life.
Hardware Description
Materials
A more detailed breakdown of the materials, their cost, and their vendors can be found in Appendix D.
- Big Dev Board
- TFT
- PIC32
- Jumper wires
- Breadboard
- Joysticks (x2)
- 10 kΩ resistors (x8)
- Button
- Audio Socket
- Lab speakers
- DAC
Joysticks
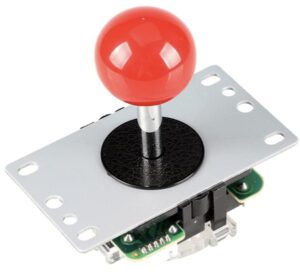
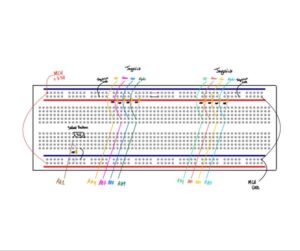
The Joystick was an integral part of the video game we created. It was one of two hardware components that was used as inputs to the game. The Joystick is an 8-way input device that allowed us to do a hardware read of the directional control that the players were moving in as they attempted to devour boids and escape the shark. The Joystick had a 5 pin interface– one pin reserved for GND and four pins retained for the Cardinal directions. To integrate the Joystick with the PIC32 microcontroller a 10kΩ pull-up resistor was used to tie the four directional pins high to the MCUs 3V3 rail and the 5th pin was tied to the GND of the MCU. To detect which cardinal direction was pushed, one of the four directional pins would be tied to ground, essentially making the system active low. When they weren’t pressed they would be tied back to 3V3 remaining idle high. See the below figure for an image of the joystick and reference the Gameplay interface section of the schematic capture in appendix C to see how the two joysticks were implemented in Hardware.

Select Button
The second hardware component that was used for inputs was a button. Since our joysticks did not have a digital button integrated into its design we had to have a way to select choices within the game so we decided to implement a select button. To do this one terminal of the button was pulled up to 3V3 via a 10kΩ resistor while the other terminal was tied to GND from the PIC32. Our button functioned as an active high device and was idle low. The button was also debounced to account for false contacts that may have occurred during the oscillations of the internal spring inside the button. See the diagram below for the debouncing algorithm implemented via a finite state machine.
Audio Socket
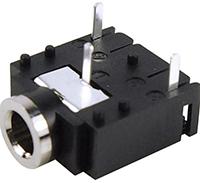
The audio socket was used to output audio signals from the DAC_A and DAC_B channels. Everytime a prey was eaten by a predator or the game ended, an “Oww!” or “Chomp!” sound (courtesy of Prof. Bruce Land) was outputted to the DAC_A and DAC_B channels and the audio socket enabled for the signals to be heard on the two lab speakers as it afforded a 3.5mm jack.The front pin on the audio socket was tied to ground and the two rear pins were individually connected to either DAC_A or DAC_B on the PIC32 Development board. Featured below is an image of the audio socket that was used in this project. Also reference the schematic in appendix C to view the connections from the DAC to the audio socket.

Completed Hardware Circuitry (Breadboard)

Software Description
There was only one file that we created and worked on for this lab in C: bpjf.c. The project and clock settings in MPLab were left as default, and Bruce Land’s libraries for controlling the TFT were used.
We also created a python script to convert wav files (sound effects) into DAC outputs.
There is a variable called game_state that reflects the current state of the player. MENU if the player is inside the menu choosing what to do next, PLAYING if the user is playing a game, GAMEOVER if the game has ended and the result is being displayed, and INSTRUCTIONS if the instructions are being displayed.


