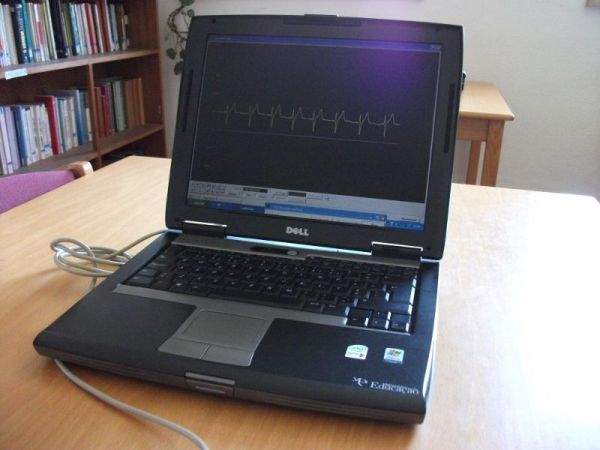
ECG on your laptop!
That’s right! This Instructable shows you how to build a device that enables you to do an electrocardiogram on yourself, your family or your friends! All you need is intermediate-level knowledge on electronics, access to Ye’ Ol’ Electronics Shoppe (or online shopping if preferred) and a laptop.
The device is composed of an amplifier/filter and a microprocessor unit, everything surrounded by a metallic box to avoid interferences.
Safety warning: DO NEVER use devices like this with a regular computer, as it is not isolated from the electrical power network. It may kill you in case of an electrical anomaly!
Information about the authors: we are students living in Portugal and we developed this device for our school project named Palpita-me! (Beat in me!, says the heart). With our project we intend to alert the school community and the general public to the importance of the prevention of cardiovascular diseases. We are studying issues such as the circulatory system, its anatomy, physiology and measurable parameters, relevant diagnostic techniques (especially electrocardiography), hospital services and emergency, telemedicine, statistics and risk factors.
Take good care of your heart so that it will beat inside you for many happy years to come!
Feel free to visit our website and leave us a comment. We’d love hearing from you!
Step 1: Plans, Schematics and Board Layout

Our ECG amplifier/filter board schematics is derived from an Analog Devices application handbook. We adapted and complemented it to suit our needs and we used PCB123 Schematic to draw the circuit schematics. Then, we used PCB123 Layout to draw the actual board. PCB123 is a great program and it’s entirely free, so you can get it here.
The microprocessor unit was made by a member of our team some years ago and at its core lies a PIC microcontroller.
To plot data on a laptop screen, we needed software that could simulate an oscilloscope. For that we used the excellent (and free) Oscilloscope.dll, written by Michael Bernstein. We thank him for his kind support.
Furthermore, we also prepared a list of components that is just too big to show up here. From our website, you can download this list, every schematic and layout we’ve made.
Step 2: Getting Ready for the Build
If you would like to reproduce the unit with minimum effort, we suggest you work in a properly equipped workshop, as you are going to deal with SMT (Surface Mount Technology).
 Regarding equipment, we used:
– Pneumatic solder paste dispenser, activated by foot pedal;
– Vacuum pipette pick-and-place unit;
– Soldering iron and its support;
– Multimeter;
– Miscellaneous workshop tools, like tweezers, pliers and so forth.
We ordered the bare board from a local electronics store and the rest of the materials (components) from Farnell.
We advise the usage of an anti-static wrist strap and the help of a friend.
Step 3: Applying Solder

When you are ready to start assembling, the first step is to apply solder paste on the proper spots, that is, on the component solder lands.
For that, we used our semi-automated solder paste dispenser, but you could also do it by hand carefully operating the syringe.
Step 4: Placing the Components

Again with the help of our dispenser equipment, we used a vacuum pipette to suck the tiny components and to place them according to the layout of the board. It is mostly a work of patience and precision.
In case you don’t possess specialized equipment, use the tweezers and take your time.
Step 5: Melting the Solder

The last main assembly step consists of applying heat to the board, so that the solder paste melts and establishes perfect contact between the board’s copper pads and the components’ legs.
We used a simple kitchen hot plate to get 200º C or 392º F. The board heats up gradually until the solder paste gets shiny as we know it from finished boards.
After removal and cooling down, we soldered via wires on some holes and the input and output cabling for the preliminary testing.
Step 6: Tests and Troubleshooting

After the assembly session, we ran tests and realized that our wave was suffering from 50 Hz noise originated by power conductors all around us. We then decided to build a small, passive 50 Hz notch-filter, as seen in one of the Intro pictures.
Even using the filter and a protecting metal box, due to the high amplifier gain we should operate our ECG apparatus away from cables, computers, projectors, etc.
Step 7: Boxing and Final Touches

We bought a metal box from our local electronics store and, with the help of an employee from our school, we managed to pierce it with the right holes for connectors, switches and so on.
Then, we placed stickers made by ourselves to show which plug is which.
Our device is now ready to roll!
Step 8: Demonstration

We enjoyed very much this activity of our project. It was a way of applying technology to medical science and showing people their heart’s electrical activity.
Below, we show a video demonstrating the operation of our ECG device:
Thanks for reading and have fun with ECG on your laptop! Again, feel free to visit our website and leave us a comment. We’d love hearing from you!

