Summary of WiFi Car Using NodeMCU
This article details the construction of a WiFi-controlled car using a NodeMCU microcontroller. The project enables local control via a web interface on a mobile device or computer connected to the same network. It integrates IoT technology, allowing users to operate the vehicle through buttons displayed on a webpage generated by the ESP12 chip's built-in WiFi capabilities.
Parts used in the WiFi Controlled Car:
- NodeMCU
- Breadboard
- Wires
- L293D Motor Driver
- Chassis
- Motors (200-500 rpm)
- Wheels
- Castor wheel
- 5-9V power supply
We have build car using many transmission technologies. But what about a WiFi Controlled Car?
Actually speaking..Wifi is till now the most promising technology and engineers are using that tech to improve it more and more. This tech is most popular today and will remain for decades.Low power WiFi have also been developed.So let us focus today on this technology.
Here I have made a Car that can be controlled using WiFi. Actually you can control it anywhere from the world if you host your IP on a site, but here we shall restrict us to local WiFi only. So let’s build it.
Step 1: Parts Required
1. NodeMCU
2. Breadboard
3. Wires
4. L293D or L298 Motor Driver (I used L293, L298 is better option)
5. Chassis,Motor(200-500 rpm),Wheels
6. Castor wheel 1pc
7. 5-9V power supply
Step 2: About the NodeMCU and the Car
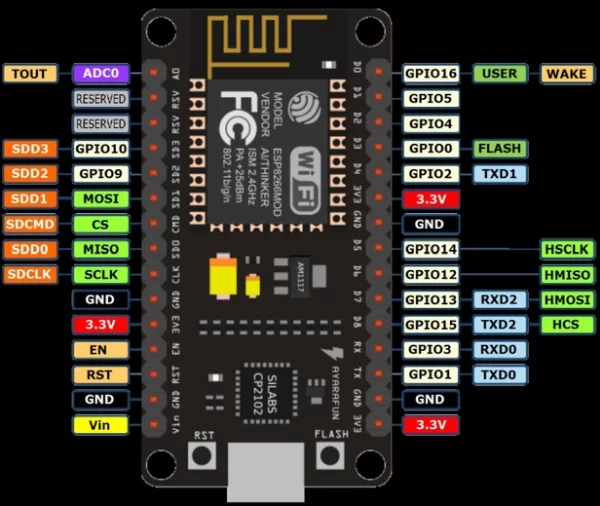
NodeMCU is actually a ESP12 AI THINKER microcontroller(MCU) like the 328P but the thing is that it has WiFi integrated into the ESP12. So excellent for IOT beginners. It can connect over Wifi and can also create a Hotspot as well. See the pinout given in the pic above.The GPIO numbers will be used in the arduino code. If you are using LUA then the coding is a bit different. But here we are using Arduino IDE.
Now here in this case…the MCU connects with my router and it creates a local IP and we can enter that IP in our Mobile or computer( connected to the same router) and can see a webpage coming and there will be certain buttons by which we can control the car.Now you can host that IP and then you can control it from anywhere over the world.
Step 3: Connections and Uploading Code
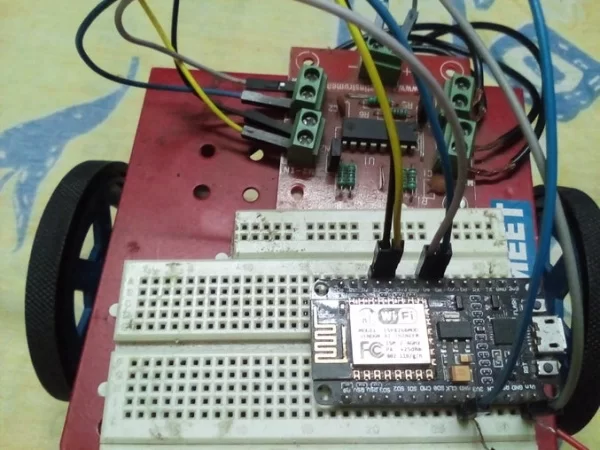
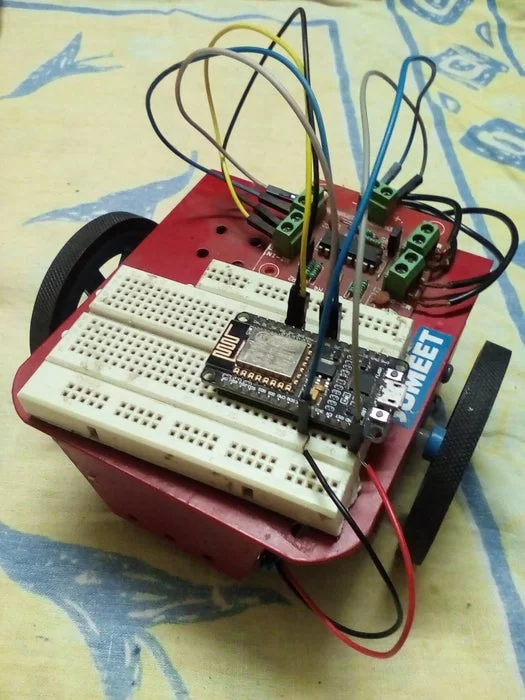
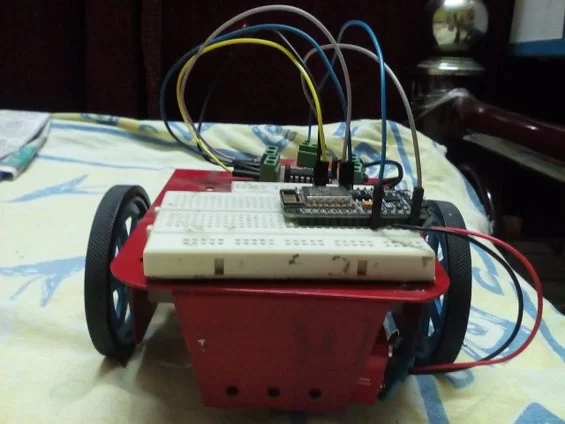
Setup your chassis.Connect motors and wheels and the castor wheel with screws.Solder wires with motors and connect it to sockets of driver.
See the figure above and connect. Connect your motors as per your configuration. If you are connecting your motor for first time with the L293 driver then at first run a code for moving forward with the UNO. Then give a try to the right and then left.Backward will follow it. It will be just a case of digitalWrite(). Comment freely if you are not okay.
Power is required for the Nodemcu as well as the L293D. It will be better by using a different supply for the two things. Give 5V from powerbank at the Vin and GND of NodeMCU. You can use 9V or 12Vfor L293. The whole process is rather easy. See the pic given here and refer it with the pinout pic of nodeMCU. You will understand it better.
Install the driver given here before connecting MCU to your PC
http://www.arduined.eu/ch340-windows-8-driver-down…
OR
https://www.silabs.com/products/development-tools/…
before uploading code see the tutorial here..
Now upload the code the given here.Change the password and SSID at the beginning.Enter that of yours.Then upload it.
Attachments
Step 4: Opening Browser
Get your IP and enter in the search box of a browser. You can see the following webpage. Sorry for the worst web skills. Design it as you can like. You can also host it..that will be far better.Press any button and run the car, if not running, check the power supply given and for any loose connections happening.Do not give NodeMCU beyond 10V. You can use 12V for the L293D.
So you are all set now and enjoy, for any problem please comment down here.
Source: WiFi Car Using NodeMCU
- Can this car be controlled from anywhere in the world?
Yes, if you host your IP on a site, but the tutorial restricts operation to local WiFi only. - What microcontroller is used for this project?
The project uses a NodeMCU, which is an ESP12 AI THINKER microcontroller with integrated WiFi. - Which software environment is recommended for coding the NodeMCU?
The article recommends using the Arduino IDE, though LUA is also possible. - How do I access the control interface for the car?
You must get the local IP created by the MCU and enter it into a browser search box on a device connected to the same router. - What voltage should be supplied to the L293D driver?
You can use 9V or 12V for the L293D motor driver. - Is there a maximum voltage limit for the NodeMCU?
Do not give the NodeMCU beyond 10V. - What driver might be needed before uploading code to the PC?
You may need to install the CH340 or Silabs driver depending on your setup. - Can the design of the control webpage be changed?
Yes, you can design the webpage as you like or host it for better performance.