Summary of Weather meter using PIC 16F877 Microcontroller
This project builds a low-cost customizable weather meter using a PIC microcontroller to measure humidity, temperature, and light intensity, displaying results on an LCD. Sensors used: LM35 for temperature (10 mV/°C), a store-bought humidity sensor scaled to percent, and an LDR with a resistor voltage divider for light percentage. The system initializes the LCD and ADC channels, labels parameters H, L, T, reads sensors sequentially, converts ADC values to physical units, compares readings to defined weather conditions, and displays the values on the LCD.
Parts used in the Weather meter using PIC 16F877 Microcontroller:
- PIC16F877 microcontroller
- LM35 temperature sensor
- Humidity sensor (bought from local store)
- LDR (light dependent resistor)
- Fixed resistor (for LDR voltage divider)
- LCD display
- ADC channels/interface (on PIC16F877)
- Power supply (suitable for PIC and sensors)
- Connecting wires and PCB or breadboard
Weather monitoring systems are available in plenty and these are pretty handy gadgets we use in our daily life for weather forecasting and other purposes. But these kinda gadgets might be expensive and may not be available for customization to our specified purpose. To overcome these advantages you can build this customized weather meter using PIC microcontroller which won’t cost much like those gadgets.
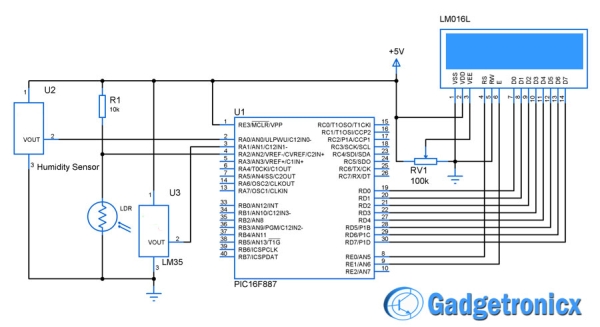
The system is built around PIC microcontroller where three parameters are measured in this system. Humidity,Temperature and ,Light intensity are the parameters this system takes as input to understand the weather condition. Then these parameters are displayed in the LCD screen for the user.
 LM35 was used as a temperature sensor which is capable of sensing temperature ranging from -55 C to 150 C. The output voltage will be proportional to the temperature hence there is no need of trimmers. The output voltage of this sensor varies by 10mv per degree change in temperature.
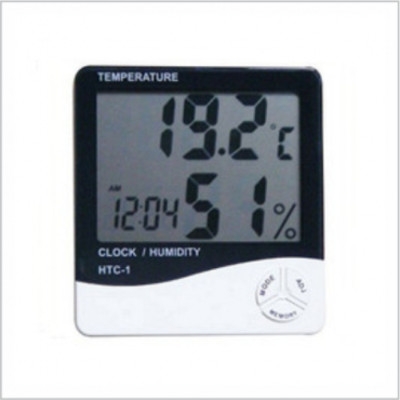
Bought this Humidity sensor from a local store. The obtained output voltage is scaled to percentage and the reading in means of percentage is displayed in the LCD.
Simple LDR is used to measure the light intensity of the environment. Here LDR was used along with a resistor to form a voltage divider and the output is obtained from that divider. This output is also scaled to percentage and displayed in the LCD for the user.
ALGORITHM:
- Initialize the LCD display.
- Display “H” , “L” and “T” which represents the parameters Humidity, Light intensity and Temperature.
- Define various weather conditions such as Sunny, rainy ,etc for the expected sensor readings.
- Initialize the ADC Channels for the respective sensors.
- Read the sensor output one by one.
- Make appropriate conversion of the ADC value.
- Display the sensor values in the LCD display for the user.
For more detail: Weather meter using PIC 16F877 Microcontroller
- What parameters does this weather meter measure?
It measures humidity, temperature, and light intensity. - What microcontroller is used in the project?
PIC16F877 microcontroller is used. - Which sensor measures temperature?
LM35 is used to measure temperature. - How is the LM35 output interpreted?
The LM35 output varies by 10 mV per degree Celsius and is proportional to temperature, so no trimmers are needed. - How is light intensity measured?
An LDR is used with a resistor to form a voltage divider, and the divider output is scaled to percentage. - How is humidity measured?
A purchased humidity sensor provides an output voltage that is scaled to percentage for display. - How are sensor values read and shown?
The ADC channels are initialized, sensors are read one by one, ADC values are converted, and results are displayed on the LCD. - What does the LCD initially display to represent parameters?
The LCD displays H, L, and T to represent Humidity, Light intensity, and Temperature. - Are weather conditions defined in the system?
Yes, various weather conditions such as Sunny and Rainy are defined for expected sensor readings.