Summary of Uploading Firmware to Your ChipKIT Boards
This article guides users on loading new firmware onto a chipKIT WF32 board using the MPLAB X IDE and a chipKIT PGM Programmer. The process involves downloading the firmware HEX file, physically connecting the programmer to both the computer and the board, identifying the specific microcontroller (PIC32MX695F512L), and configuring the software to upload the data.
Parts used in the ChipKIT Firmware Loading Project:
- chipKIT Board
- Bootloader file
- MPLAB X IDE
- chipKIT PGM Programmer/Debugger
- USB A to mini-B cable
- One 6-pin right angle male header
There may come a time in your chipKIT explorations when you have to put some new firmware onto your board. Well, fear not. This Instructable will go through how to load firmware onto your board. (We’re gonna be using the WF32)
In order for us to upload firmware you’ll need a few things.
- A chipKIT Board
- The Bootloader file
- The MPLAB X IDE
- chipKIT PGM Programmer/Debugger
- Accessory Items (This are included in the PGM Programmer/Debugger Kit
- USB A to mini-B cable
- One 6-pin right angle male header
Step 1: Finding the Firmware
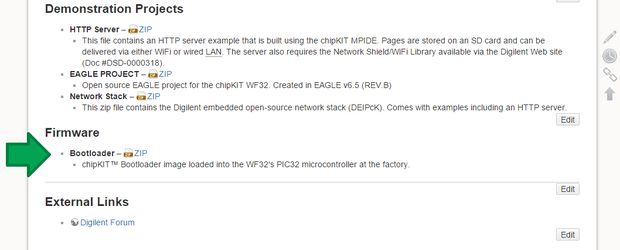
The Digilent Wiki page has pages for the MicroController boards, each of those have a bunch of information. But in this case, we want to check out the Firmware section. Just click on the download to get a ZIP file and extract the HEX file. Be sure to remember where you saved the file.
Step 2: Attaching Your ChipKIT Programmer
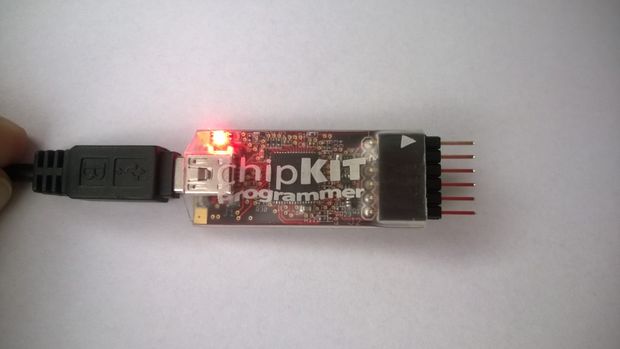
Now it’s time to use the mini-Cable to connect the chipKIT PGM to the computer.
- Plug the cable into the computer via the USB connector
- Now attach the chipKIT PGM to the mini connector side.
It will light up with red and orange lights (The orange lights will disappear in a few seconds).
Step 3: Attaching the ChipKIT PGM to the ChipKIT WF32
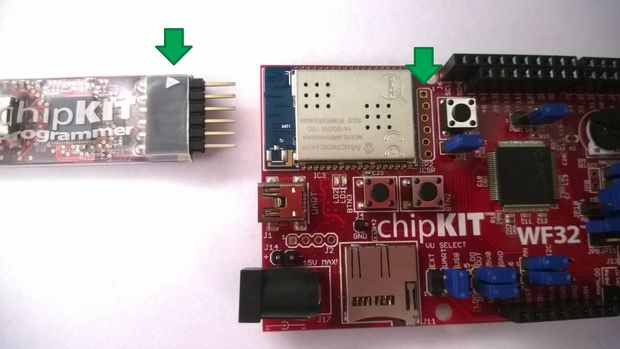
On the chipKIT PGM you can see that their is a white arrow next to one of the pins, that’s pin 1. On the WF32, you can see at the JP2 location there are 6 pin connectors, with 1 having a square border instead of circle, that is pin connector 1.
Attach the chipKIT PGM and the chipKIT WF32 with pin 1 (on the PGM) connected to pin connector 1 (on the WF32).
Step 4: Finding the Board Microcontroller
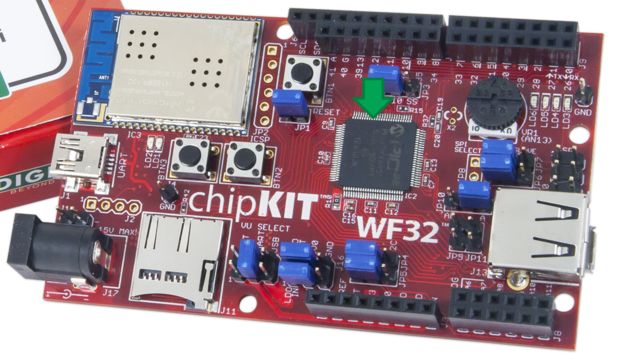
In order to upload firmware to the Microcontroller, we need to know what kind of chip is on the board.
You can check out the product page to find the Microcontroller that the board has on it. Or you can look at the writing on the chip to see what kind it is.
For the WF32, the chip is the PIC32MX695F512L. Be sure to record this, as we’ll need it later.
Step 5: Opening the Hex File.
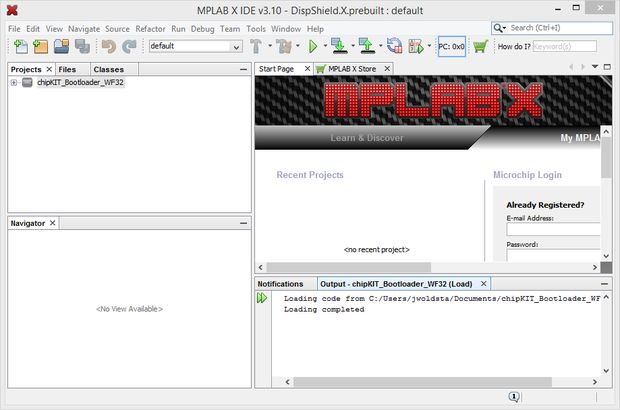
At this point, everything we have to do now is using MPLAB X. So if you haven’t already downloaded it click here.
After you open it, it should look like the picture above.
Now we want to import the HEX file. Click on the IMPORT button on the left hand side and click on the Pre-built HEX/ELF file. This will take you to a new page. Click browse and find the file you downloaded.
Step 6: Finishing Up
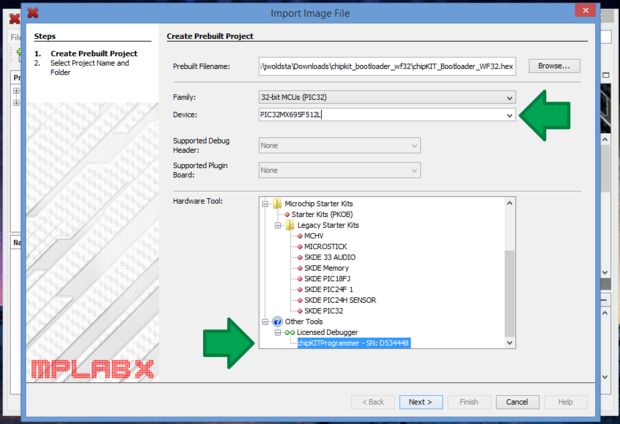
- Select the Device and find the Microcontroller number from the earlier step (PIC32MX695F512L for us). You’ll have to select the PIC32 device family.
- In Hardware Tool, go to other tools and click the chipKITProgrammer selection
- Then hit the Next button
- Now pick your desired option of the checklist and hit finish.
This will take you back to the main page of MPLAB and you’re all set!
- How do I find the firmware file?
Navigate to the Digilent Wiki page for your MicroController board, go to the Firmware section, click download to get a ZIP file, and extract the HEX file. - Can I connect the programmer without a cable?
No, you must use a USB A to mini-B cable to connect the chipKIT PGM to the computer. - What lights indicate the programmer is active?
The programmer will light up with red and orange lights, though the orange lights disappear after a few seconds. - How do I identify pin 1 on the hardware connections?
On the PGM, look for a white arrow next to a pin; on the WF32, locate JP2 where one connector has a square border instead of a circle. - Where can I find the specific microcontroller model number?
You can check the product page or read the writing directly on the chip on the board. - Does the WF32 use the PIC32MX695F512L chip?
Yes, the text confirms that the WF32 board uses the PIC32MX695F512L microcontroller. - What button is used to import the HEX file in MPLAB X?
Click the IMPORT button on the left hand side and select the Pre-built HEX/ELF file option. - Which tool selection is required in the Hardware Tool menu?
You must go to other tools and click the chipKITProgrammer selection.