Robots look cooler when they have a sinister green glow. Better yet, when that glow exists for a functional purpose it’s even better!
Here I show how to make a custom robot and use LED’s to not only enhance line following, but also make it work in the dark too.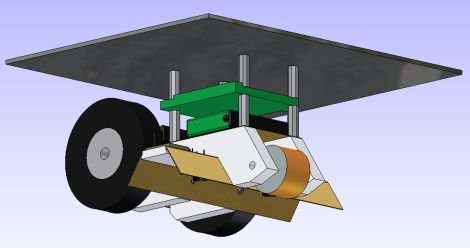
Step 1: The Mechanical Design
First you need to design your robot.
I designed mine using CAD, planning out the locations of all the parts carefully. This is the most important step to making a robot!
The wheels are servo driven, the material is made out of HDPE and bronze metal sheets, the back wheels are foam, and in the front is an orange caster wheel.
I hand made each of the components using a manual mill.
Follow the images in order for construction steps.
Step 2: Add the LEDs
In this step, I used two 4000 candela green LEDs in series with weak resistors.
Next to the LEDs I added photoresistors to be used as a color sensor. See the second image for a close-up.
When the green light reflects back at the sensor, more light reflects back from the white line than the background. By using a simple voltage threshold, the sensor picks up more light when its on the line. Therefore it can follow it!
I could have also used infrared LEDs . . . but you can’t see it so where’s the fun?!
The sensor schematic is the third image.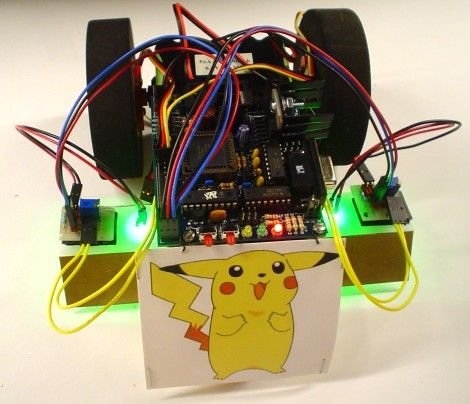
Step 3: The Microcontroller
I used the Cerebellum 16F877 PIC microcontroller (no longer sold).
You can download my sourcecode here
I mounted the microcontroller using hex spacers and screws. I also added a bit of amusing decoration . . .
It’s turned on so thats why its glowing green!
That concludes my instructable, hope you give me a good rating! =)
For more detail: The Glowing Green Robot