This tutorial comes right after my Installing MPLAB X tutorial, so if you haven’t installed MPLAB X and the XC32 compiler, check that one out first.
In Arduino, programming a board is as simple as selecting that board, and picking the port it’s using. That’s because Arduino IDE expects to program on a select set of microcontroller boards, like the Arduino line, or the chipKIT line.
MPLAB is a more general IDE, which has the potential to program not just Arduino microcontrollers, but also custom boards, which may have a completely different microcontroller running them. Because of this, there are more options when creating new projects.
This tutorial will only be using a few of those options; just enough to get your project running on a chipKIT board, without overwhelming you.
Let’s get started!
~~~~~
For more things that I’ve done, you can check out my profile page!
For more info from Digilent or the Digilent Makerspace, check out the Digilent blog!
Step 1: What You’ll Need
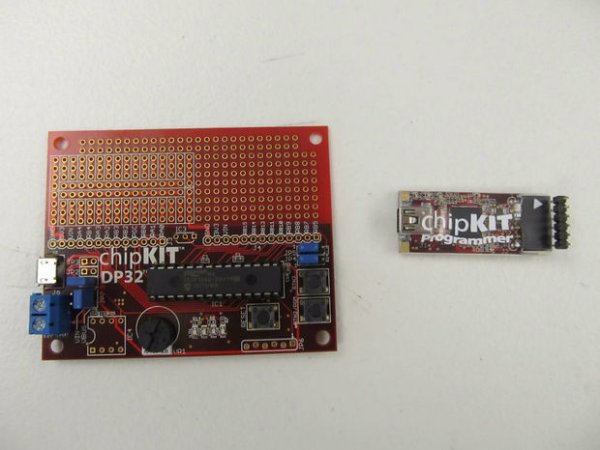
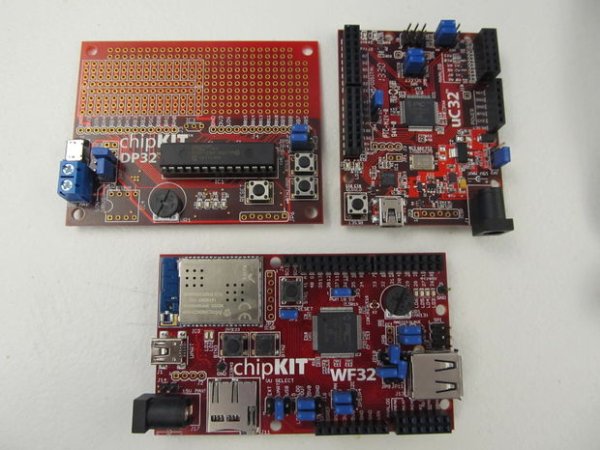
You will need the following:
- chipKIT PGM
- chipKIT DP32
This tutorial is intended as a general tutorial for how to program chipKIT boards with MPLAB. However, because each board requires different code, I will focus on using the DP32.
For a more in-depth explanation of what the code specifically does, as well as insight on how to change this code and project to work with other boards, please check out my post on the Digilent Blog on the subject (to be published shortly).
Step 2: WARNING
Programming your board with MPLAB and the PGM will overwrite your bootloader. This means that once you use MPLAB, you will not be able to switch back to using Arduino or MPIDE until you re-load the bootloader.
Thereareseveraltutorials here on Instructables that cover how to re-load the bootloader for the DP32. This will also work for the WF32, and most other chipKIT boards. There are extra steps needed for reloading the bootloaders on the uC32, however, so I will be covering that process in another tutorial.
Step 3: Create New Project
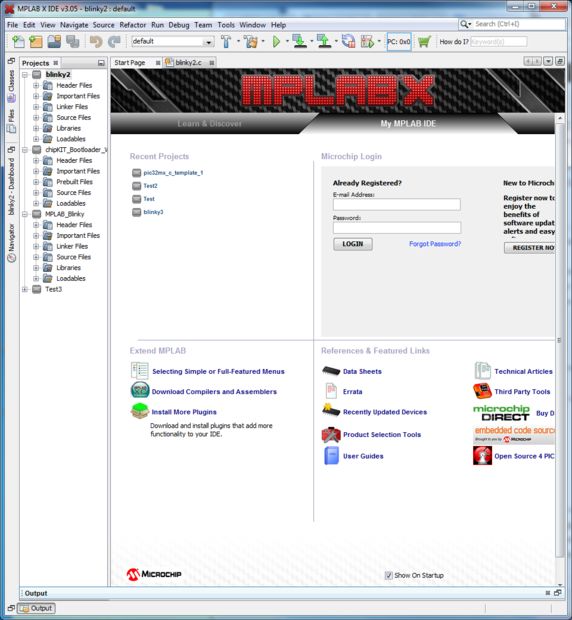
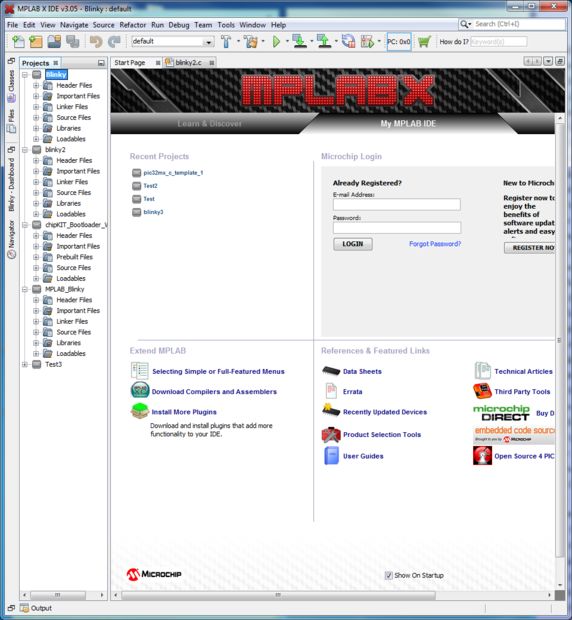
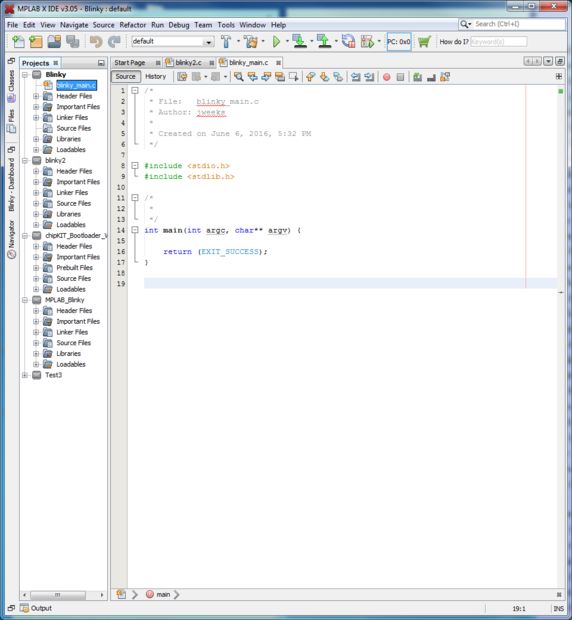
When you first open MPLAB, you’ll see something similar to the first picture above. Obviously, you won’t have any projects open yet, like I do in the panel to the left.
Click the orange file button in the upper left hand corner of the window. This is the “New Project” button, and will say so if you mouse over it. You can also go to File -> New Project.
Step 4: Choose Project
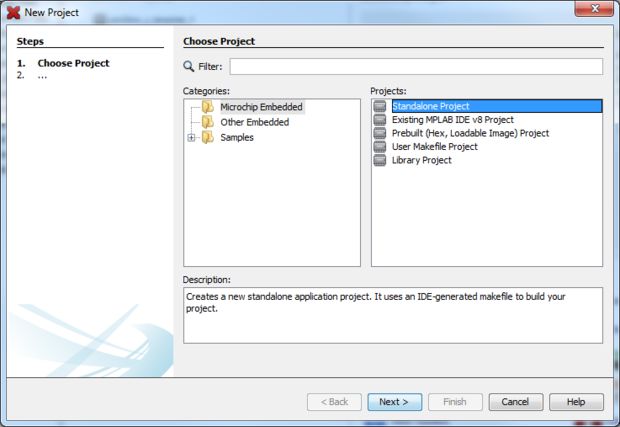
The first screen you’ll see is the “Choose Project” screen.
The chipKIT boards have a microcontroller embedded in a circuit that allows them to more easily use their IO pins, so select “Microchip Embedded” in the left pane under “Categories”.
If you think about it, most Arduino projects are self contained. You write the code. You upload the code to the board. You run the code. Select “Standalone Project” in the right pane under “Projects”.
~~~~~
Some of the other options for projects are worth taking a look at too.
The “Existing MPLAB IDE v8 Project” option allows you to open up or continue an MPLAB project that’s already been started.
“Prebuilt” is an option for projects that have not only been finished already, but have been compiled into machine code ready to be loaded onto your microcontroller. Many of the tutorials here on Instructables for re-loading boot-loaders onto chipKIT boards will use this option to start a new project containing the bootloader hex file for their board.
Step 5: Select Device
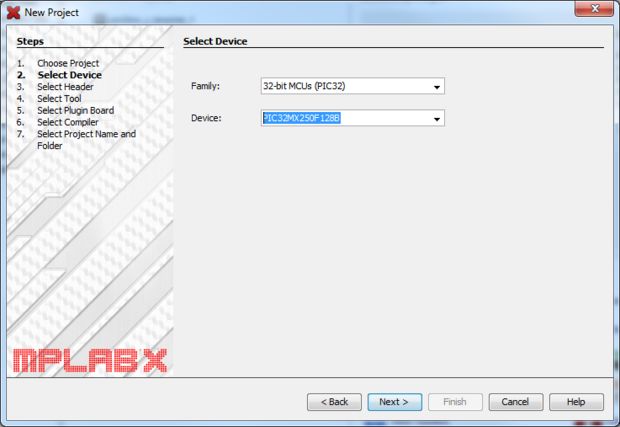
The next screen you’ll be taken to is the “Select Device” screen. This step will be different, depending on which chipKIT board you have.
Each chipKIT board has a different microcontroller on it. If you look closely (you may have to use a magnifying glass) you can read the label which tells you what it is. For example, above I have a close up of the uC32’s microcontroller, which is the PIC32MX350F512H. After that I’ve got a closeup of the DP32, which uses the PIC32MX250F128B.
Once again, because this tutorial focuses on the DP32, I’ll be using it’s microcontroller.
If you can’t make out what the numbers and letters are on your board, you can also find that information on the reference manual page for each board, on the Digilent reference wiki.
To enter this information into the “Device” field, simply click the field and start typing. If you’ve typed something incorrectly, it won’t allow you to make an incorrect choice, so don’t worry about typos!
Step 6: Select Tool
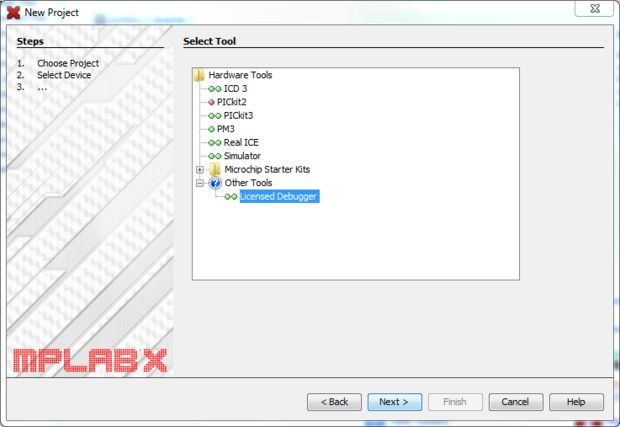
Here you’re going to select what tool you’re going to use to program your board. If you’re using the chipKIT PGM, which is the cheapest option sold by Digilent, just pick “Licenced Debugger” under “Other Tools” (like the picture above).
Step 7: Select Compiler
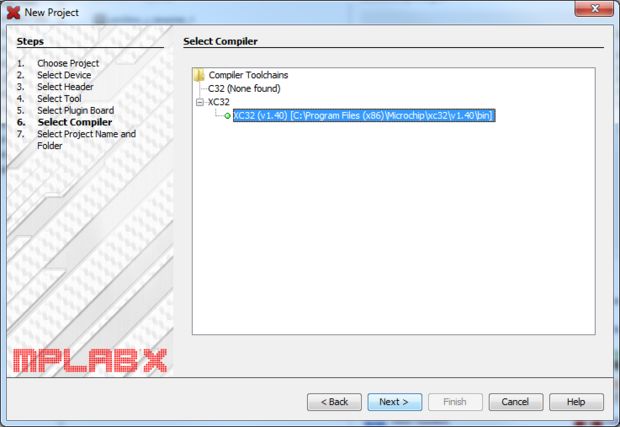
Finally, you need to select the XC32 compiler that you installed during the MPLAB installation guide I wrote earlier. If you followed that tutorial, chances are it’s the only compiler available.
Step 8: Name Your Project
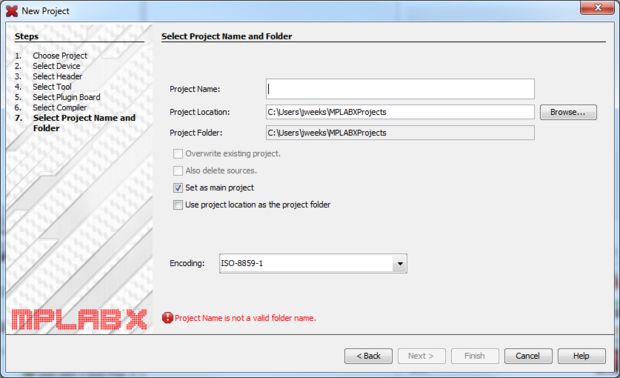
Pretty self explanatory.
You can also pick where your project will be saved.
Lastly, see that little check-box where it says “set as main project”? Make sure that’s checked.
Step 9: Selecting the Main Project
Now you’ve created your new project!
If you followed the previous step, it should also be your main project. If it’s not, or if you want to set a different project as main, right click on where it appears in the left-most pane, and select “Set as main project” from the drop-down menu.
Finally, to move to the next step, click the white button up in the top left, or select File -> New File.
Step 10: Choose File Type
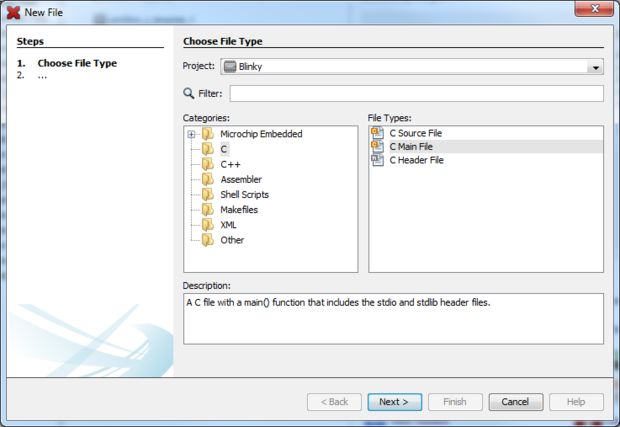
A window should pop up titled “Choose File Type”.
C is generally the best programming language for microcontrollers. It’s abstract enough to make things easy for you, but low enough to give you control while also producing a small file size.
C++ is also a good option, but those files tend to be larger. We’ll be using C for this project.
Select “C” in the left-hand pane, and “C Main File” in the right-hand pane, as in the picture above. Then click Next.
Step 11: Name and Location
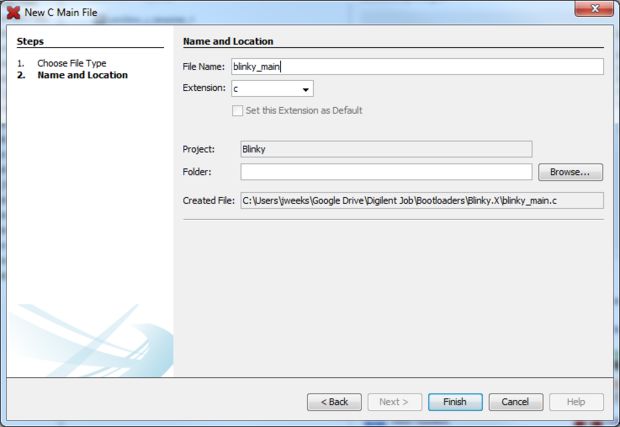
The next window will be Name and Location.
This step is self explanatory, but you’ll want to leave the “folder” field empty. That way MPLAB will automatically place your new project in the project folder it’s already created.
Click “Finish”.
Step 12: Move Your File
By default, your new file will be put into the main folder of your new project. This is fine, and will work, but it’s best to put program files into the “Source Files” folder inside your project.
Select the file (as in picture 1) and drag it down to the “Source Files” folder, as in picture 2.
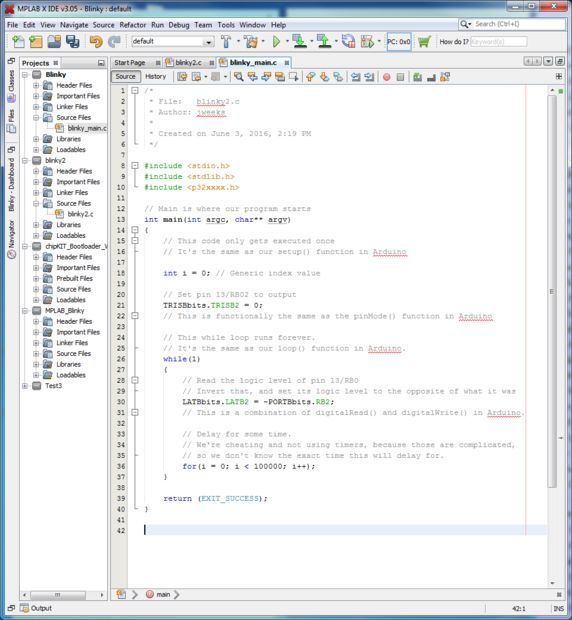
Step 13: Copy and Paste

Copy and paste the following code into your main file (overwriting whatever is already there).
// This code is specific to the DP32, and will not work on any other chipKIT device.
// For instructions on how to change this code to suit other chipKIT boards, check the
// Digilent blog for my post on how this code works.

#include <stdio.h>
#include <stdlib.h>
#include <p32xxxx.h>

// Main is where our program starts
int main(int argc, char** argv)
{
    // This code only gets executed once
    // It's the same as our setup() function in Arduino

    int i = 0; // Generic index value

    // Set pin 13/RB02 to output
    TRISBbits.TRISB2 = 0;
    // This is functionally the same as the pinMode() function in Arduino

    // This while loop runs forever.
    // It's the same as our loop() function in Arduino.
    while(1)
    {
        // Read the logic level of pin 13/RB0
        // Invert that, and set its logic level to the opposite of what it was
        LATBbits.LATB2 = ~PORTBbits.RB2;
        // This is a combination of digitalRead() and digitalWrite() in Arduino.

        // Delay for some time.
        // We're cheating and not using timers, because those are complicated,
        // so we don't know the exact time this will delay for.
        for(i = 0; i < 10000; i++);
    }

    return (EXIT_SUCCESS);
}
I won’t explain what this code does here, but if you’re interested and would like a complete explanation of what is going on, I’m writing a blog post for the Digilent blog that goes into more depth.
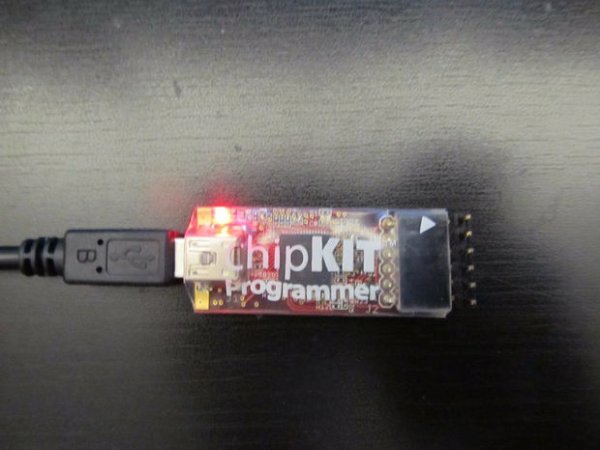
Step 14: Connect Your Board
Each chipKIT board has an ICSP port, used by programmers like the chipKIT PGM. If you look closely at this port, you will find that one of the pin holes is square instead of round.
When you connect the PGM to your chipKIT board, you need to make sure the little white arrow on its wrapping is closest to this square pin, or you could damage your board.
Once the PGM is plugged into the board, connect both the PGM and the microcontroller to your computer with their respective USB cords.
Step 15: Set Configuration
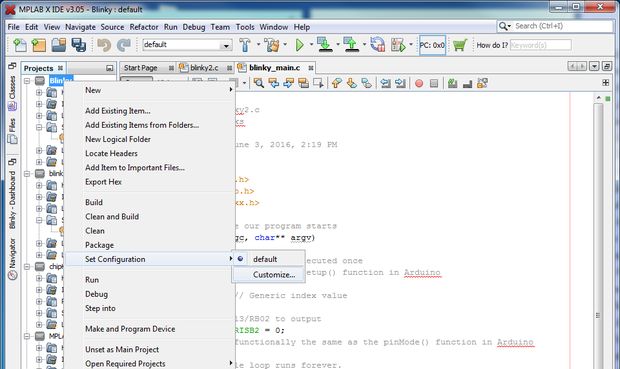
Now that your board and programmer are plugged in, you’ll need to tell MPLAB to use that programmer.
Right-click on your project and select Set Configuration -> Customize. This will take you to the Configuration window. In the left-pane, scroll down until you see the chipKITprogrammer option, and select this. In the right-pane, make sure the XC32 compiler is selected, then hit “OK”.
The PGM needs to be plugged in during this step, otherwise it won’t appear as an option.
Step 16: Upload Your Code
Finally, click the “Make and Program Device” button (boxed in the picture above).
This will compile your C code into machine code, and program your chipKIT board! If you used the code I supplied, you should see your board’s LED slowly blinking.
Of course, as I mentioned before, this will overwrite the bootloaders that Arduino uses to load code onto your board. That means that after using MPLAB, you cannot use Arduino, or MPIDE, to program your board until you re-load those bootloaders.