Summary of Raspberry Pi OLED Internet Bandwidth Display
This project uses a Raspberry Pi and a 128x64 I2C OLED display to graphically show home WAN upload and download bandwidth by polling the router via SNMP. The Pi (already acting as a media player) connects to the OLED with four I2C wires and runs a Python script to display real-time rates, helping distinguish between ISP issues and heavy household usage. The OLED was inexpensive and instructions from Adafruit were followed to set up the display.
Parts used in the Raspberry Pi OLED Internet Bandwidth Display:
- Raspberry Pi (already configured as media player)
- 128 x 64 pixel OLED display (I2C)
- Pre-made connector wires (female-to-female I2C jumper wires)
- Raspberry Pi case (with a cut-out for wires)
- Router with SNMP enabled
- Python demo/script (from Adafruit guide)
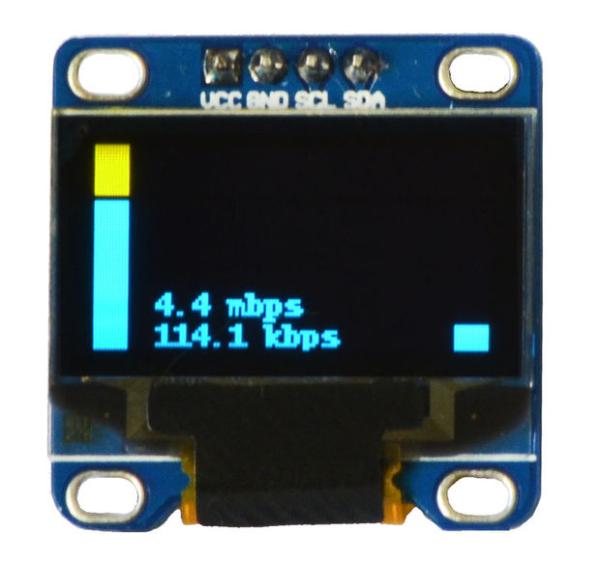
This is a bandwidth monitor using a Raspberry Pi and an OLED display to graphically show the internet bandwidth into and out of our house.A video showing it working is above. Sometimes if the internet is slow or not working very well it can be hard to tell if it’s because three other people are watching YouTube videos of if there’s some other problem with the internet connection. By checking the bandwidth monitor you can see straight away the data rate into and out of the house and work out if the problem is with your internet connection or just too many people watching Mat and Pat on YouTube. In a very brief summary it works as follows: The Raspberry Pi uses SNMP (Simple Network Management Protocol) to get the WAN data rates from the router and then displays these graphically on the OLED screen. The Raspberry Pi was already set up as our media player and is next to the television. The OLED display was inexpensive and can be bought from a number of places including eBay.Step 1: Connect the OLED display to the Raspberry PI This OLED display was purchased from eBay and cost around five dollars. It is a 128 x 64 pixel display. The top eight or so lines are a yellow colour and the rest of the display is blue. You could use a different sized or different coloured display although this could require modifying the code slightly. This display connects using i2c which makes things slightly simpler because it only requires four wires to connect.
To connect the pins on the display to the pins on the Raspberry Pi I used pre-made connector wires which can also be purchased inexpensively on eBay. These can be purchased in a few different types: They can either have a pin on each end and these are useful for making breadboard connections. They can have a pin on one end and a female plug on the other end or they can have a female plug on both ends. I bought a fair few of each type and they are very useful for connecting different types of boards and pin headers together. For this project I needed four wires with the female plug on each end.
I also had to cut out a hole in the top of my Raspberry Pi case to allow the wires to go through, but many cases already have an opening in the required location.
There are a number of guides which show how to connect an OLED display to a Raspberry Pi. The one that I followed was from Adafruit here: https://learn.adafruit.com/adafruit-oled-displays-for-raspberry-pi/introduction
After following this guide you should be able to run the demo Python script and see things appearing on your display. You will need to have this up and running before continuing with this instructable.
For more detail:Raspberry Pi OLED Internet Bandwidth Display
- What does this project display?
It graphically displays WAN upload and download bandwidth on an OLED screen by polling the router via SNMP. - How does the Raspberry Pi get bandwidth data?
The Raspberry Pi uses SNMP to get WAN data rates from the router. - What kind of OLED display is used?
A 128 x 64 pixel I2C OLED display, with the top lines yellow and the rest blue, was used in the project. - How is the OLED connected to the Raspberry Pi?
The OLED connects via I2C requiring four wires, using female-to-female pre-made connector jumper wires. - Do I need to modify code for different displays?
You could use a different sized or colored display but this may require modifying the code slightly. - Where did the setup instructions come from?
The author followed an Adafruit guide for connecting and running the demo Python script on the OLED. - Why place the Raspberry Pi next to the television?
The Pi was already set up as a media player and was conveniently located next to the television. - Is cutting the Raspberry Pi case always necessary?
The author cut a hole for wires, but many cases already have an opening in the required location.