Anyone awake in the early 2000’s knows the familiar shape of those candy bar style mobile phones. In the Shenzhen phone markets we see tons of them. Literally, there are tons of these phone passing through the markets every day. Some are resold while others are disassembled for parts and recycled. This is where all those cheap Nokia 3310/5110 LCD shields come from. It’s great to see so much reuse and recycling.
Having all these cheap LCDs is nice, but most of the interesting and useful parts are wasted. We saw a fantastic opportunity to save a heap of phones from the recycling bin and save people a pocket full of money. We can make a positive impact on the environment if we reuse some of these phones that we are literally tripping over in the streets. Let’s make an Arduino to GSM network bridge for just a few dollars.
 There are already a bunch of slick Arduino shields for getting your project connected:
- Seeed GPRS Shield V3.0 $60 USD
- Tronix Labs SIM900 GSM Shield for Arduino $47 USD
- Geeetech GPRS/GSM SIM900 Shield $32
- SparkFun Cellular Shield $100 USD
The low cost of this technology is pretty amazing; for around $50 USD you can connect an Arduino to the world. The problem is not that this connection is expensive, but that perfectly usable alternatives are being tossed in the recycling bin every day.
Hardware
The cheapest and most common old phone we’ve seen is the Nokia 3100. There’s no camera, no Bluetooth, no WiFi, no frills at all. Perfect! We can pick it up in the market for just a few dollars.
This is a pretty old phone and there is no guarantee it will work on a modern mobile phone network. Our test phones are confirmed to send text messages on the China Mobile network in Shenzhen. We will have to do more tests around the world. If you have tested the Nokia 3100 or similar phone in your area, please post in the comments below.
everything should be connected and slap it on a breadboard.
Connection
The Nokia 3100 sports a Nokia Pop-Port connector. We can use the Nokia CA-53 Pop-Port to USB cable for communications. This is also very inexpensive. The 3100 does not actually support USB communications. Some phone models do support USB, but we are only using the USB cable as a physical interface and communicating via Nokia’s own F-Bus.
The F-Bus is a bi-directional full-duplex serial type bus running at 115,200 bit/s, 8 data bits, no parity, one stop bit (8N1). Much like a standard RS-232 serial port, F-Bus connections use one pin for data transmit, one pin for data receive and one pin for ground…The Fastbus connection on a cell phone can be interfaced with an RS-232 serial port by building a custom cable. –
Pin one of the Pop-Port is the first pin next to the charging port on the phone. There are fourteen pins, but we’re only concerned with the four contacts that connect through our USB cable: F-Bus RX (pin 6), F-Bus TX (pin 7), and ground (pin 8). Vbus (pin 5) doesn’t seem to do anything in our application, but we’ll connect it anyway.
When you look at the USB cable connector pin one is to the right. Here’s is how the CA-53 cable breaks out the Pop-Port pins.
- Pop-Port Vbus (pin 5) | USB 5 V (pin 1)
- Pop-Port F-Bus RX (pin 6) | USB D+ (pin 3)
- Pop-Port F-Bus TX (pin 7) | USB D- (pin 2)
- Pop-Port ground (pin 8) | USB ground (pin 4)
Unfortunately, the 5V USB supply does not charge the battery or provide power to the device, so we’ll have to connect power via the barrel connector or run off battery. For prototyping we can just run the phone off battery power. In the final product we’ll breakout the Arduino 5 V to a small connector on the shield and make a custom cable, which is surprisingly inexpensive.
Most Arduino boards operate at 5 V, but some operate a 3.3 V like the Nokia 3100. We will have to translate the 5 V logic level to 3.3 V to protect the phone’s circuitry. It would also be nice to use a proper level shifter like the TXB0104 in our Arduino Graphic LCD shield, which would allow us to use both 5 V and 3.3 V Arduino boards without any problems. However, for the proof of concept and prototyping stage we can hack it with a simple voltage divider with our 5 V Arduino Uno.
We can use a voltage divider to convert from 5 V to 3.3 V. We could take the lazy route and just split it in half as 2.5 V is still logic high. With a voltage divider as shown in InsideGadgets: How to use Nokia F-But to send an SMS message we can safely connect our 5 V Arduino to the 3.3 V phone. The voltage divider outputs 2.5 V to the F-Bus RX line, which is logic HIGH even though it doesn’t reach the full 3.3 V. We could have used two different resistor values, but we are using two 330 Ohm resistors for convenience.
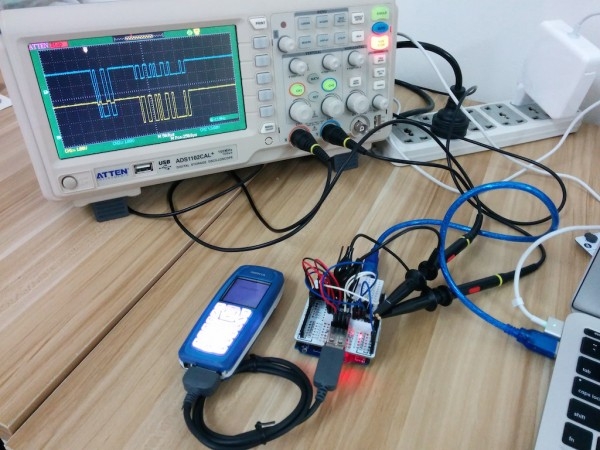
For our proof of concept use used a Pax Instruments Configuration Shield, which has a nice perfboard prototyping area. I mounted a USB socket and a four pin female header for interfacing it with a small breadboard on top breadboard. Once this works we can make more permanent solder connections on the perfboard.
Connect the voltage divider from Arduino TX (D1) to Arduino ground. Connect Vbus (USB 5 V,pin 1) to Arduino 5 V. Connect F-Bus TX (USB D-, pin 2) to Arduino RX (D0). Connect F-Bus RX (USB D+, pin 3) to the middle of the voltage divider. Connect F-Bus ground (USB ground, pin 4) to Arduino ground.
For more detail: Nokia phone Arduino shield