Hello all and welcome to this Christmas tree decoration instructable.
This ornament is designed to hang on your Christmas tree just like any other decoration, but it’s just that little bit more eye catching! When you turn it on it will scroll a “MERRY CHRISTMAS” message across the 8×8 display. Not interesting enough for you? Well just grab the ornament from the tree, turn it off – hold down one of the push buttons – then turn it on and now you will be presented with (possibly) the worlds smallest Christmas tree ornament video game – SANTAS SCRAMBLE!
The game is very simple, you press one of the two push buttons (on the rear of the unit) to move santa either to the left or to the right in order to avoid the oncoming obsticles (preventing him from delivering presents to the children…) the game gets faster the further you get and will tell you what level you made it to if you crash.
To return to the scrolling message, just turn it off then on without holding down a game button.
If you would like to buy a make it yourself kit, feel free to send me a message. Or if you would just like the circuit board on it’s own then let me know also.
The kit contents:
– 1 x PIC16f677 microcontroller (SMD)
– 1 x 8×8 bi-colour LED matrix
– 1 x coin cell battery holder
– 1 x PCB
– 2 x coin cell batteries
– 2 x 10k ohm resistors (SMD)
– 2 x mini push buttons
– 1 x mini slide switch (SMD)
The complete kit is $8.95US
PCB on its own is $3.95US
Alternatively you can download the pcb layout from the link below. It is in diptrace format you can download a freeware version of diptrace from www.diptrace.com
Step 1: Getting everything together.
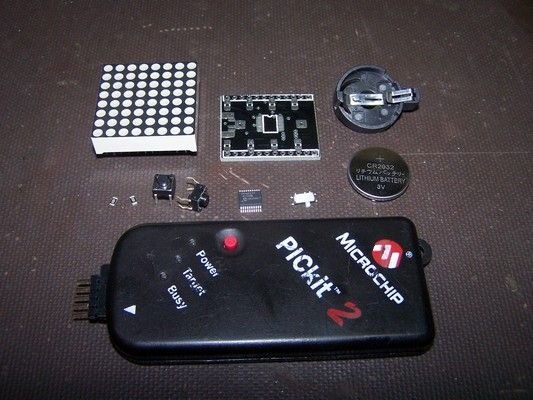
First off we need to gather together all the items required to make this kit.
The kit contents:
– 1 x PIC16f677 microcontroller (SMD)
– 1 x 8×8 bi-colour LED matrix
– 1 x coin cell battery holder
– 1 x PCB
– 2 x coin cell batteries
– 2 x 10k ohm resistors (SMD)
– 2 x mini push buttons
– 1 x mini slide switch (SMD)
You will also need:
– pickit 2 (or similar programmer)
– Experience in soldering
– Soldering Iron (with a small tip)
– Solder
– Solder wick (optional)
– Flux (optional)
The solder wick is very handy when soldering surface mount components if you ever solder pads or connections together. Also, flux is unbelievably handy when you want to achieve a nice smooth finish and ease of soldering.
So fire up your soldering iron and lets get started!
Step 2: Soldering in the pic microcontroller.
The first component to solder in is the microcontroller. Now this is the trickiest component due to the close spacing of the legs on the chip. This is why I can’t emphasise enough the importance of flux. It will make soldering this chip in so much easier.
So with that said, apply some flux to both sides of where the microcontroller will solder onto.
Once done, apply a touch of solder to the top right and bottom left pads.
Then get your microcontroller and line it up with the pads. heat up the two pads that you presoldered. This will hold the microcontroller in place which will make it easy to solder in the remaining legs.
Once all legs are soldered in, it should look a little something like this picture.
Step 3: Ready for programming!
Now that you have soldered in the microcontroller you are ready to program it with the hex file.
(You can download this file from this page)
The PCB has 5 pads where you can connect your pickit programmer to. To do this you will need a five pin header. Plug this into the programmer and then you just need to ‘touch’ these pins to the pads on the circuit board.
(please note, I have the programmer around the wrong way in this photo! you need to flip the programmer around the other way!)
I am guessing that If you have your own programmer, that you have the pickit software installed on your computer.
So open up the pickit program and load the Merry_Christmas.HEX file. program it to the board and you’re done! You now don’t need to connect your programmer again, unless you want to reprogram it with your own code.
Step 4: Solder in the shorting links and slide switch.
The reason that I am using shorting links instead of SMD resistors is due to the low voltage (3volts) that powers this little project. The LEDs drop most of that 3volts and the rest is then dropped within the microcontroller. Adding any external resistance just makes the display too dim.
If you were planning on using some other power supply (such as 5volts) then you would definately want to use resistors here. (100 – 150 ohm would be perfect)
The easiest way to do this is to solder little blobs on all of the pads and then get little offcuts of wire to solder the pads together (as shown in the pic)
Next, you will need to grab the SMD slide switch. Since the slide switch has two plastic tabs underneath it, you will need to cut these off with a blade – otherwise the switch will stick up a fair way off the circuit board. (see picture)
Then solder in the switch to the position shown. Make sure you are a little more generous in the amount of solder that you use on the two sides of the switch (this is what holds it to the board)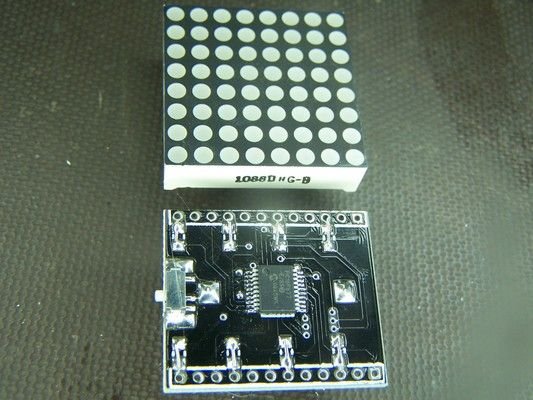
Step 5: Solder in the two 10k resistors.
Flip the board over and grab your two surface mount 10k ohm resistors (they are small so dont lose them!)
This photo shows where they need to be soldered to. Pretty much the middle of the board.
For more detail: LED scrolling Christmas tree ornament with built in video game!
About The Author
Ibrar Ayyub
I am an experienced technical writer holding a Master's degree in computer science from BZU Multan, Pakistan University. With a background spanning various industries, particularly in home automation and engineering, I have honed my skills in crafting clear and concise content. Proficient in leveraging infographics and diagrams, I strive to simplify complex concepts for readers. My strength lies in thorough research and presenting information in a structured and logical format.
Follow Us:LinkedinTwitter