Summary of accelerometer Based Hand Gesture Controlled Robot using Xbee
This article details a gesture-controlled robot project using two Arduino Unos and Xbee communication. Users control the robot's movement and a robotic arm via hand gestures detected by flex sensors embedded in a glove. The system features long-range wireless capabilities, allowing for remote operation of a mobile base equipped with DC motors and wheels, as well as a pan/tilt robotic claw.
Parts used in the Gesture-Controlled Robot:
- Arduino Uno x2
- Xbee S2 x2
- Xbee shield for Arduino Uno x2
- Xbee Explorer Dongle
- Shrink cables x4
- Dual H-bridge SN754410NE
- Flex Sensors x4
- Trolley wheels (30mm) x2
- 12v DC motor x2
- 4AA Battery holder
- 8AA Battery holder
- 5V regulator
- Battery cables
- Robotic claw
- Robotic Claw Pan/Tilt Bracket
- Servo for robotic claw
- Spacer studs x8
- Button
- Glove
- Regular rc wheels (55mm) x2
- Regular switch
- Aluminium plate
- Cables
- Soldering iron
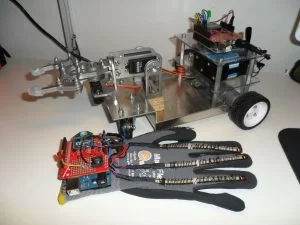
With this robot, you control everything with your hand, even the robotic arm!
The hand gestures can be programmed differently.
Long range with Xbee communcation!
Step 1: Parts Needed
Arduino Uno x2 – http://store.arduino.cc/index.php?main_page=produc…
Xbee S2 x2 – https://www.sparkfun.com/products/11217
Xbee shield for Arduino Uno x2 – https://www.sparkfun.com/products/12847
Xbee Explorer Dongle – https://www.sparkfun.com/products/11697
Shrink cables x4 – http://www.digikey.com/product-detail/en/F221B1%2F…
Dual H-bridge ,SN754410NE – https://www.sparkfun.com/products/315
Flex Sensors x4 – https://www.sparkfun.com/products/8606
Trolley wheels (30mm) x2- http://www.rosscastors.co.uk/castors/top-plate-cas…
12v DC motor x2 – http://www.dx.com/p/high-torque-80rpm-12v-dc-geare…
4AA Battery holder – https://www.sparkfun.com/products/12083
8AA Battery holder – https://www.elfaelectronics.com/elfa3~ex_en/elfa/i…
5V regulator – https://www.sparkfun.com/products/107
Battery cables – https://www.elfaelectronics.com/elfa3~ex_en/elfa/i…
Robotic claw – https://www.sparkfun.com/products/11524
Robotic Claw Pan/Tilt Bracket – https://www.sparkfun.com/products/11674
Servo for robotic claw – https://www.sparkfun.com/products/10333
Spacer studs x8 – http://katalog.we-online.de/en/em/Aluminium_Abstan…
Button – https://www.sparkfun.com/products/97
Glove
Regular rc wheels (55mm) x2
Regular switch
Aluminium plate – any local ironmongery
Cables
Soldering iron
Step 2: Base Model
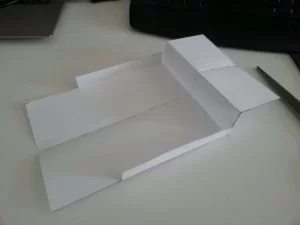
I made a simple drawing in SolidWorks and then went to a local ironmongery to get the plate bended.
Structure
On the base plate under the plexiplate is were the two DC motor will be placed. Over that will the 12v battery holder and the H-bridge fit. And on the top level will the Arduino be mounted. In the middle of the plate will the robotic arm be placed.
The drawing model is included.
Source: accelerometer Based Hand Gesture Controlled Robot using Xbee
- How does the user control the robot?
You control everything with your hand using programmed hand gestures. - What communication method is used for long range?
The project uses Xbee communication to achieve long range capabilities. - How many Arduino boards are required for this project?
The project requires two Arduino Uno boards. - Which sensors detect the hand movements?
Four Flex Sensors are used to detect the hand gestures. - What powers the 12v DC motors?
A 12v battery holder powers the two DC motors on the base. - Can the hand gestures be customized?
Yes, the hand gestures can be programmed differently. - What component allows the robotic claw to move up and down or side to side?
A Servo for robotic claw combined with a Robotic Claw Pan/Tilt Bracket is used. - What material is used for the robot's base structure?
An aluminium plate bent at a local ironmongery serves as the base.