Summary of How to Save Data using EEPROM in PIC16F877A Microcontroller
This tutorial explains how to store small amounts of data in the PIC16F877A's internal 256-byte EEPROM using the XC8 Compiler. It demonstrates a setup where an analog voltage from a potentiometer is saved via a push button and displayed on an LCD, ensuring data persists without power.
Parts used in Saving Data using EEPROM in PIC16F877A:
- PIC16F877A Microcontroller
- XC8 Compiler
- LCD display
- Potentiometer
- Analog channel AN4
- Push button
- RB0 pin
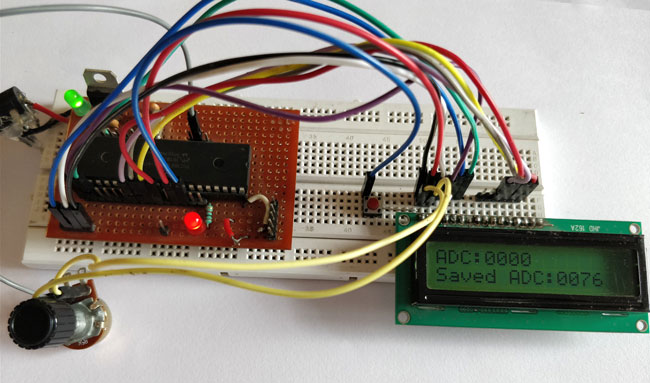
In this tutorial we will learn how easy it is to save data using the EEPROM present in the PIC16F877A Microcontroller. In most real time projects we might have to save some data which should not be erased even when the power is turned off. This might sound like a complicated process, but with the help of XC8 Compiler this task can be done by just using a single line of code. If the data is large in terms of Mega bytes then we can interface a storage device like an SD card and store those data on them. But we can avoid those tiring process if the data is small, we can simply use the EEPROM present in the PIC Microcontroller to save our data and retrieve it at anytime we want
EEPROM in PIC16F877A:
EEPROM stand for “Electronically Erasable and Programmable Read Only Memory”. As the name suggests it is a memory present inside the PIC Microcontroller in which we can write/read data by programming it to do so. The data saved in this will be erased only if it is mentioned to do so in the program. The amount of storage space available in EEPROM varies upon each microcontroller; the details will be given in Datasheet as usual. In our case for PIC16F877A the available space is 256 bytes as mentioned in its specification datasheet. Now let us see how we can use these 256 bytes to read/write data by using a simple experimental setup.
Circuit Diagram and Explanation:
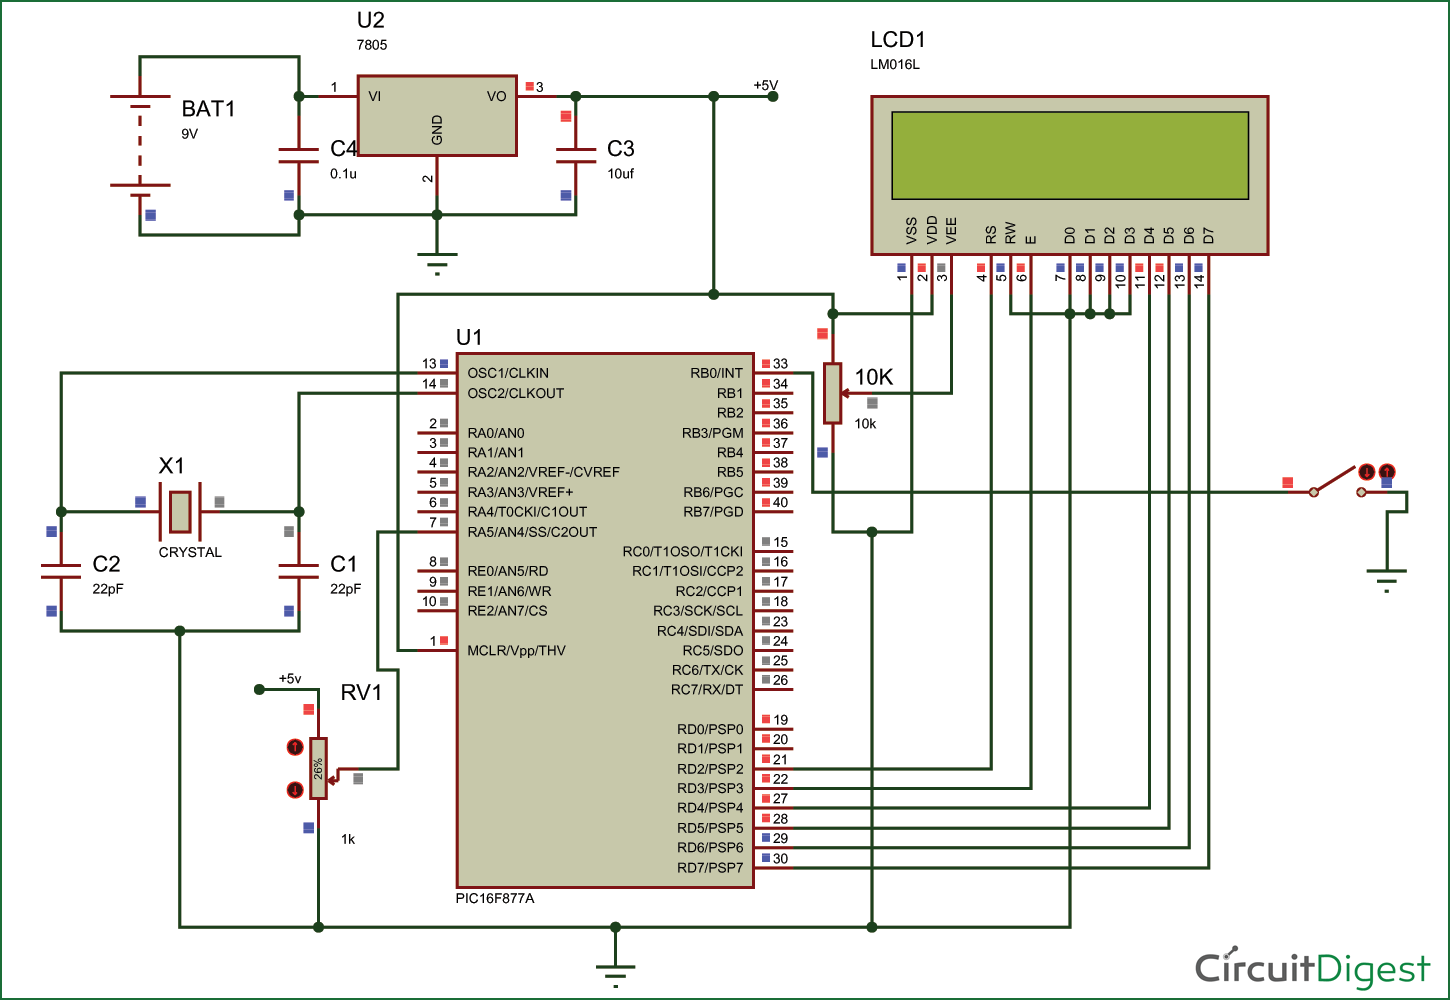
The circuit diagram for the project is shown above. We have interfaced an LCD to visualize the data getting saved and retrieved. A normal potentiometer is connected to AN4 Analog channel so feed in variable voltage, this variable voltage will be used as the data to be saved in the EEPROM. We have also used a push button on RB0, when this button is pressed the data from the Analog channel will be saved in the EEPROM.
for more detail:How to Save Data using EEPROM in PIC16F877A Microcontroller
- What is EEPROM?
EEPROM stands for Electronically Erasable and Programmable Read Only Memory inside the microcontroller. - How much storage space is available in PIC16F877A EEPROM?
The available space is 256 bytes as per the specification datasheet. - Can I save large data like Mega bytes in this EEPROM?
No, for large data you should interface a storage device like an SD card instead. - How do I save data from the analog channel?
Data is saved when the push button connected to RB0 is pressed. - Does the data get erased when power is turned off?
No, the data remains saved unless explicitly mentioned to be erased in the program. - What component is used to visualize the saved data?
An LCD is interfaced to visualize the data getting saved and retrieved. - Which compiler is used for this task?
The XC8 Compiler is used to perform this task with a single line of code. - Where does the variable voltage come from?
A normal potentiometer is connected to the AN4 Analog channel to feed variable voltage.