Summary of Your first PICMicro Project using PIC16F84
Summary: This article introduces beginners to Microchip PICMicro controllers, focusing on prerequisites for working with them. It explains naming (PIC vs PICMicro), contrasts memory types (EEPROM vs EPROM/Flash), and compares PIC families—low-end, mid-range (notably the 16F84), and their features. The author previews upcoming articles on programmers, a 16F84 serial programmer design, and a recommended first project, while deferring detailed software and hardware internals to referenced resources.
Parts used in the PIC16F84 Project:
- Microchip PIC16F84 microcontroller (18-pin package)
- PIC16C61 (photo referenced as roughly equivalent)
- EPROM windowed JW parts (for EPROM devices like 16C54/16C61)
- UV-light EPROM eraser (for JW EPROM parts)
- InCircuit Serial Programming (ICSP) interface connections
- Programmer hardware (serial programmer referenced; design in follow-up articles)
After doing two weeks on LCDs, I thought I’d spend a few weeks focusing on the number one question that I get asked; “How do I start working with the Microchip PICMicro?” The question is asked from a variety of perspectives and goals, ranging from somebody that just wants to become casually familiar with the chip to people who want to learn about the PICMicro to students that have been given an assignment to create a project for the device and don’t know where to begin. In this article and the two that follow it, I want to present what I consider the necessary information and tools for most efficiently learning about the PICMicro microcontroller and be able to create your own applications.
This week, I will go through what I consider the prerequisites and information that you should have before working with the PICMicro. In the next two articles, I will discuss the different types of programmers available for the PICMicro as well as my own design for a simple 16F84 serial programmer. I will also present what I consider to be a good “first” application along with different ways of implementing it, both from a hardware and software point of view. In these three articles, I will not be spending a lot of time on developing application software for the PICMicro nor will I go into a detailed explanation of how the hardware works. This information can be found either on the web or in the books that I reference later in this article.
To start off, rather than going through a history of the PICMicro device, I want to introduce it with a few comments. First off, you may see the Microchip PICMicro referred to as the just the “PIC”. In 1997, Microchip registered the name “PICMicro” for its line of microcontrollers. I suspect that this was done to avoid confusion with other devices which are known as “PICs” (one of the most prevalent is the “Peripheral Interrupt Controller” chip (the 8249A) used in the PC). I’m mentioning this because as you look for information on the PICMicro, you will probably it referenced as both the “PIC” and “PICMicro” for all intents and purposes the two names are used to describe the same device.
16f84.gif (3705 bytes)
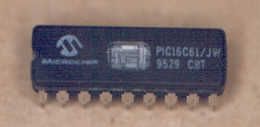
The most popular PICMicro used to teach new users is the 16F84. This device uses a “mid-range” PICMicro processor, with 1024 instructions of “Program Memory” and 68 bytes of Random Access Memory (“RAM”) memory (which are also known as “file registers”). The “Program Memory” is made up of a serially programmable array of “Electrically Eraseable Programmable Read Only Memory” (“EEPROM”) cells which can be serially programmed by the user. Internally to the chip, there is a timer, an interrupt controller and 64 bytes of EEPROM that can be used for data storage. The chip itself comes in an eighteen pin package with thirteen pins available for digital input and output. The photograph at the top of this article is of a PICMicro 16C61 which is roughly equivalent to the 16F84, but uses EPROM program memory instead of EEPROM. The 16C61 chip shown above is a “JW” part, which is Microchip’s designation for the parts which have “windows” for allowing UV light to be used to erase the program memory’s contents.
Just a point to help stem confusion later. The Microchip microcontrollers which have electrically erasable reprogrammable memory (which I sometimes call “Control Store”) are described as having “Flash” program memory. This isn’t quite true as “Flash” is a technology where blocks of memory are erased and then programmed. The Microchip parts can have any instruction address changed (including erased) without affecting any other addresses. This configuration of electrically erasable programmable memory is really “EEPROM” and you’ll see some people become irate over the idea that Microchip calls their EEPROM devices “Flash”. When the microcontrollers are programmed, the program memory is normally erased in one fell swoop which makes the operation similar to that of “Flash”.
There are three PICMicro families. The “low-end” is a family of devices which use a simple processor which executes an one of 33 twelve bit instructions. The low-end processor can “call” subroutines, but it is important to note that only two levels of “nesting” is possible with this device. In earlier books and PICMicro references, the low-end devices (most notably the 16C54) were used as the primary learning tools. Many of the low-end devices used in applications can (and should) be substituted for mid-range devices such as the 16F84 for most teaching situations. The low-end device part numbers are in the format: 16C5xx.
The reason why I suggest that the 16C54 is not used for learning about the PICMicro is it’s use of “Erasable Programmable Read Only Memory” (“EPROM”) instead of the EEPROM of the 16F84. EPROM requires purchasing “JW” (windowed) parts and a “UV-Light” EPROM eraser while the EEPROM PICMicros can be erased at the programming station. Another advantage of the 16F84 devices is their use of the “InCircuit Serial Programming” (“ICSP”) protocol which allows the mid-range devices to be programmed with a minimum amount of I/O pins used where the low-end devices use a parallel protocol which requires fourteen pins to be accessed. This large number of pins makes it much more difficult to build your own programmer. Mid-range devices have part numbers in the formats: 14000 and 16Cyx(x) where “y” is a number greater than “5”.
The mid-range devices are the true workhorses of the PICMicro line with quite a variety of different options available. Along with the devices which enhance the low-end with interrupt controllers and several more instructions, they also have such built in hardware Input/Output (“I/O”) capabilities as analog input, serial (synchronous and asynchronous) I/O, microprocessor bus interfaces and LCD direct control. Along with these features, the processor has been “tweaked” to allow for more control registers and file registers (“RAM”) and utilizes a 14 bit instruction word.
For more detail: Your first PICMicro Project using PIC16F84
- What is the difference between PIC and PICMicro?
They are used interchangeably; Microchip registered the name PICMicro but PIC commonly refers to the same devices. - Why is the 16F84 recommended for beginners?
It is a mid-range device with EEPROM program memory, ICSP support, sufficient RAM and I/O pins, and is widely used for teaching. - What memory types do PICMicro devices use?
Devices use EEPROM, EPROM (windowed JW parts), or Microchip-branded Flash-like EEPROM for program memory. - Can EPROM-based PICs be erased electrically?
No; EPROM parts require UV-light erasure using windowed JW parts and a UV EPROM eraser. - What advantage does EEPROM program memory provide?
EEPROM allows serial programming and erasure at the programming station without UV erasing equipment. - What is ICSP and which devices support it?
ICSP is InCircuit Serial Programming; mid-range devices like the 16F84 support it to minimize required I/O during programming. - Why avoid low-end PICs like the 16C54 for learning?
They use EPROM memory and a parallel programming protocol requiring many pins, making programmers harder to build and use for beginners. - What are some features of mid-range PICMicro devices?
They offer timers, interrupt controllers, more instructions, analog input, serial I/O, bus interfaces, LCD control, and larger register/file spaces.