
Summary of RC5/RC6 codes on a LCD using PIC16F648A
This article describes a PIC microcontroller project that decodes and displays RC5/RC6 infrared remote control codes on an LCD. It utilizes either a PIC16F648A for full RC5 decoding with function names or a PIC16F628A for numeric display of both RC5 and RC6 signals. The system includes status LEDs to indicate signal quality and toggle states, allowing users to identify specific button functions or raw code values from devices like Philips TVs.
Parts used in the RC5/RC6 Codes on a LCD Project:
- PIC16F648A microcontroller
- PIC16F628A microcontroller
- HD44780 LCD
- TSOP1736 IR-receiver
- 470Ω resistor
- Tantalum capacitor (minimum 1µF)
- Green LED
- Red LED
- Yellow LED
A simple project to test and display the transmitted codes from remote controls which work with the RC5 protocol, like the TV remotes from Philips, just aim the remote control at the TSOP1736 IR-receiver.
If you only want to know the code from a button then you can ofcourse also look at the RC5 tables from this website.
The only thing you need is a PIC16F648A or 16F628A (with feeding ofcourse), a HD44780 LCD and a TSOP1736 infrared receiver.
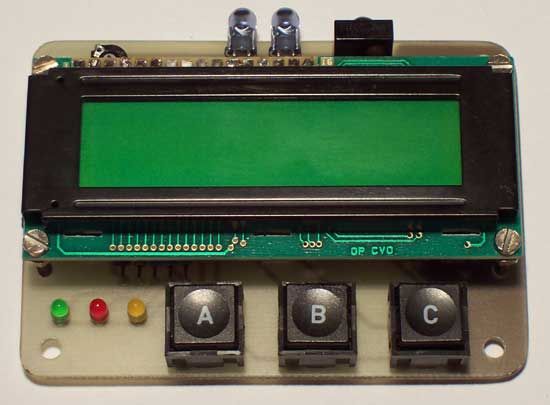
Program 1
The first one works only with the RC5 protocol and must be programmed in a PIC16F648A.
When PORTB.0 (pin 6) is connected to GND then the numeric values from system, command and toggle are displayed in binair and decimal.
If PORTB.0 is not connected (just leave it open) then the system and commands are displayed as functions, i.e. system Amplifier and command Volume +.
Program 2
If there’s no PIC16F648A in stock or you want also decode RC6 signals, then program the second .HEX file in a PIC16F628A.
Program 2 can not give function names, so PORTB.0 has no function here.
The second .HEX file displays the numeric values from system, command and toggle in binair and decimal on the LCD.
LED’s
A LED connected on PORTA.3 returns the toggle signal.
The green LED flashes if an infrared (IR) signal is being received, the red LED if the received signal is poor or if it’s not a RC5/RC6 code and the yellow LED if only a ‘glitch’ is received.
You can leave these LED’s if you don’t need this information.
Attention: The TSOP1736 (= 36kHz IR-receiver) must connected via a 470Ω resistor to +5V and over the + and – pin a tantalium capacitor of minimal 1µF!
For more detail: RC5/RC6 codes on a LCD using PIC16F648A
- What microcontrollers are required for this project?
The project uses either a PIC16F648A or a PIC16F628A. - Can this project decode RC6 signals?
Yes, but only if you use the second HEX file programmed into a PIC16F628A. - How does the system display function names versus numeric values?
Function names appear when PORTB.0 is connected to GND on the PIC16F648A; otherwise, it shows numeric values. - What happens if I leave PORTB.0 unconnected on the first program?
The system displays system and command values as functions, such as Amplifier and Volume +. - Why must a 470Ω resistor be connected to the TSOP1736 receiver?
The TSOP1736 must be connected via a 470Ω resistor to +5V to operate correctly. - What does the green LED indicate during operation?
The green LED flashes when an infrared signal is being received. - What causes the red LED to light up?
The red LED lights if the received signal is poor or if the code is not RC5 or RC6. - When will the yellow LED activate?
The yellow LED activates if only a glitch is received.
