
Summary of PIC18F4550 Tutorial: Blink LED – 2
This article introduces a modular programming approach for the PIC18F4550 microcontroller using custom header files. By separating compiler directives and port settings into distinct `.h` files, the main code remains clean and easier to maintain for complex projects. The tutorial demonstrates this method by creating four blinking LEDs on Port B, utilizing `compdirectives.h` for chip configuration and `ledsettings.h` for pin definitions.
Parts used in the PIC18F4550 LED Blinking Project:
- PIC18F4550 Microcontroller
- Four Light Emitting Diodes (LEDs)
- Breadboard
- Compiler Directives Configuration File (compdirectives.h)
- Port Settings Header File (ledsettings.h)
- Mplab IDE Software
Hi welcome to my 4th chapter of PIC18F4550 programming. Here we are going to learn another methodology or technique for programming a pic18f microcontroller which would be helpful in future while dealing with complex coding. We are going to define our own header file. We are also going to see the Source Code and will understand the importance, benefits of programming a microcontroller this way on Mplab ide. In Chapter3, we saw the basic programming template for pic18f4550 which is a very common style of programming. In this programming tutorial we are going to breakdown the same source code into some header files to make things simple.
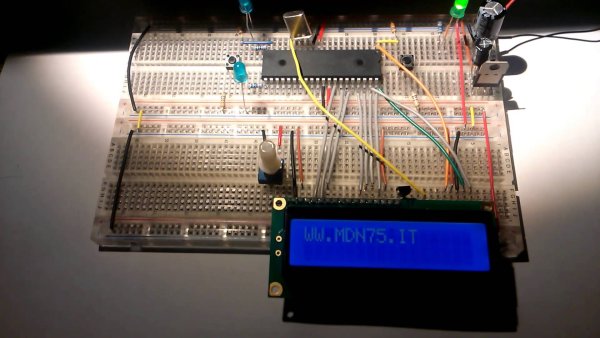
PIC18F4550: Programming Method 2 -Chapter 4
METHOD-2
In our previous chapter on pic18f4550 programming we did all the coding in just one file main.c for blinking an LED with pic18f4550 which is a very common method adapted by many beginners. However here we are going to break down the same program and define our own header file. For our example we are going to use the same old example of blinking an LED. This strategy of programming helps in long run for beginners.
Why do we need to define an external header file?
For a simple example of blinking or flashing an led it is pretty much okay to code everything in one file main.c. But in future when you are dealing with complex coding functions and logics, things might get messy if all the coding is done in just one file. Rather sometimes it becomes difficult for even the actual programmer to find their own mistakes, or to makes changes if some coding needs to be modified after a couple of months. Hence dividing things makes it easy for keeping the track of code blocks.
For example, the source code in our previous tutorial started with a general programming style where you have the includes in the beginning (#include<p18f4550.h>), and then followed by lengthy Compiler directives (#pragma config) to set the chip configuration bits.
Instead of writing the lengthy chip config bits in the main.c, you can create a separate header file with headername.h and then write all the compiler directives in the header file headername.h. Finally include it the main.c like the regular #includes in the beginning of the code. A typical user created header include syntax would look like..
#include “headername.h” //User defined header
While executing the main.c all the compiler directives will be parsed by the compiler defined inside #include ” headername.h”, In future if you want to change some settings in the chip config bits when without touching the main.c you could directly open the respective header file and make changes.
Creating a Header file
-Create a new file.
-Type the compiler directives in the new file created.
-Save the file with a name and extention “.h”. Example: headername.h
-Check mark “Add File to project” >> Hit save.
If everything goes well the then you would see your created header file included in the Project Explorer under “Header Files” , if its not showing then probably while saving the file you forgot to check mark “Add to Project Files”.
-Open main.c and add the line #include ” headername.h “.
By this way you can create your own header files with codes such as compiler directives, timers or port settings and have them included in the main block. The functions defined inside the header files can be also called from main. This strategy would keep the main.c block clean and would also be easy to makes changes with coding in the future. Instead of messing with entire coding you can specifically reach the section you wish to make changes.
Let’s review the schematic and the source code for a example below.
Schematic
In our previous Tutorial we made two LED’s to blink. Here we are going to blink four led’s on port B , RB0, RB1, RB2 and RB3 . Here is a sample schematic. The circuit can be easily built on a breadboard in no time.
Source Code: Blinking led Method 2 with header Files
The source code below will blink the led the same way as in previous tutorial, but here I have defined two header files compdirectives.h and ledsettings.h. compdirectives.h contains all the Chip configuration settings And ledsettings.h has all the necessary port settings and timers for blinking the led.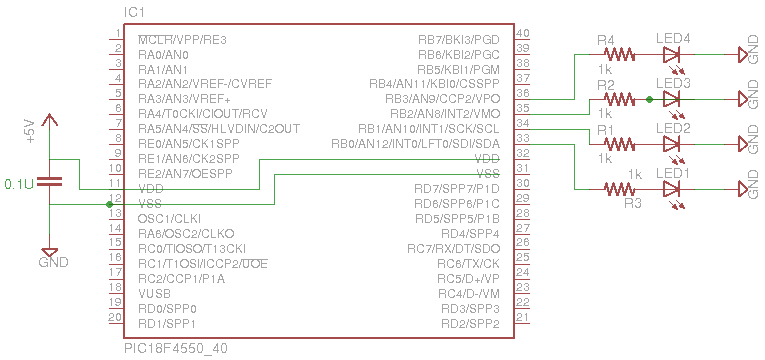
SOURCE CODE : main.
/* ****************** main.c ****************** */
#include<p18f4550.h> // Include Header for PIC18F4550
#include “compdirectives.h” // User defined header: Chip Config | Complier directivs
#include “ledsettings.h” // Port settings
/* *************** TIMER *************** */
void delayzz(void)
{ int i, j;
for(i=0;i<5000;i++)
{ for(j=0;j<2;j++)
{ /* Well its Just a Timer */ } } }
/* ****************** MAIN ****************** */
void main(void)
{
setpin(); // PORT B Setting: Set all the pins in port B to Output
while(1)
{
LED1_on(); // Glow led 1
LED2_off(); // OFF led 2
LED3_on(); // Glow Led 3
LED4_off(); // OFF led 4
delayzz();
LED1_off(); // OFF led 1
LED2_on(); // Glow led 2
LED3_off(); // OFF led 3
LED4_on(); // GLow led 4
delayzz();
}
}
/* THE END */
For more detail: PIC18F4550 Tutorial: Blink LED – 2
- Why should we define an external header file?
Defining external header files keeps code organized, prevents messy long files, and allows easy modification of settings like chip config bits without touching the main code. - How do you create a new header file in Mplab IDE?
Create a new file, type the compiler directives, save it with a .h extension, and ensure the Add File to project box is checked before saving. - What is the syntax for including a user-defined header file?
The syntax is #include "headername.h", where headername is the name of your custom file. - Which specific pins are used to blink the LEDs in this example?
The example blinks four LEDs connected to Port B pins RB0, RB1, RB2, and RB3. - What content is stored in the compdirectives.h file?
The compdirectives.h file contains all the Chip configuration settings and compiler directives. - What does the ledsettings.h file contain?
The ledsettings.h file holds all necessary port settings and timers required for blinking the LED. - Does this method change how the LED blinks compared to previous tutorials?
No, the source code blinks the LEDs the same way as the previous tutorial but uses a broken-down structure. - Can functions defined inside header files be called from main?
Yes, functions defined inside header files can be called from the main block to keep the main.c clean. - What happens if the header file does not appear in the Project Explorer?
If the file is missing, you likely forgot to check the Add to Project Files option while saving the file. - What is the benefit of dividing code into header files for future work?
Dividing code makes it easier to track blocks, find mistakes, and make changes after months of inactivity without messing up the entire code.
