Summary of Making circuit boards in 20 seconds with DLP projector
### Summary This article describes a DIY PCB printer project using a modified DLP projector to achieve 50-micron XY resolution. The method involves inverting the projector, adjusting optics for image scaling, and projecting UV-cured patterns onto photo-resist dry film. Designs are exported from Eagle as inverted PDFs, where white areas cure the resist to form conductive traces. This approach offers a quick, precise alternative for makers with high-failure-rate ideas.
Parts used in the PCB Printer Project:
- DLP 3D Printer (modified)
- XGA 1024×768 Projector
- Photo-resist dry film
- Eagle design software
- Ruler
Every Maker like me dream a PCB printer which can quickly and precisely convert our electronic idea into a psychical circuit board. I know there are plenty of project going on the subject. (see the end of the article) What I tried here is something different, quick and precise. If you have lots of electronic idea in your mind and most of them have a high probability of fail, the system must be quick and easy.
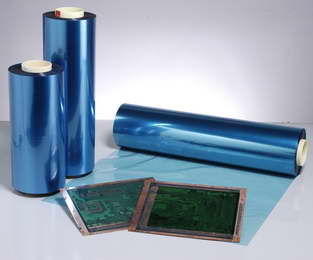
Like other professional methods I am using photo-resist dry film.
Everything up to here is standard photoresist film application. My method getting different from now on. As you know the photoresist dry film is sensitive to uv light. So we can use a DLP projector which is modified to get smaller image. I am working on DLP 3d printers so I have one in my hand The main idea here is modifiy the distance of the projector optics to get smaller image. My Projector is XGA 1024×768 I can get 50 microns XY resolution because of the optic modification. I heard about some projectors which can display images without any modification. Please comment on the article if you know the brand and the model name.
I inverse the projector upside down. Because my setup is a DLP 3d Printer. I adjust the distance to get fine clear projection. After that I export the eagle design as PDF and inverse the colors. The white parts of the objects will cure the photoresist and this parts of the circuit will stay. I draw lines distanced as 1 cm and project that image on a ruler. I try to get the correct zoom factor in order to mach the image lines and the lines on the ruler. So that I am sure the image projected is scaled 1-1
For more detail: Making circuit boards in 20 seconds with DLP projector
- How can I achieve high precision in my PCB printer?
You can get 50 microns XY resolution by modifying the distance of the projector optics. - What type of film is used in this project?
The project uses photo-resist dry film which is sensitive to UV light. - How do I prepare the design files for projection?
Export the Eagle design as a PDF and invert the colors so white parts cure the photoresist. - Why is the projector inverted upside down?
The projector is inverted because the setup is based on a DLP 3D Printer. - How do you ensure the projected image is scaled correctly?
Draw lines 1 cm apart on an image, project it on a ruler, and adjust the zoom factor until they match. - Can other projectors be used without modification?
The author notes that some projectors can display images without modification but asks readers to share brand and model names.