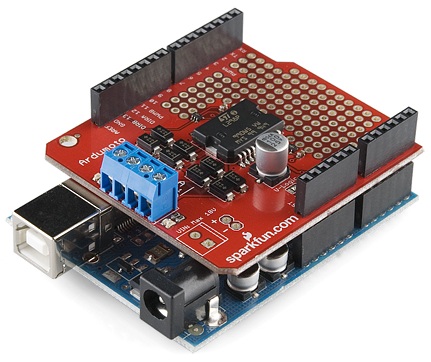
An Arduino shield is a modular circuit board that will expand the functionality of your Arduino. You simply need to plug it over the top of your Arduino board. Arduino shields are often stackable.

You can connect several Arduino shields together to form a “Big Mac” of Arduino modules. Also, there are different Arduino shields for different functions. For this article, our purpose is to show you how to create your own Arduino shield.
Laying Out the Components of the Circuit
The first step to assembling an Arduino shield is to lay out every component. You want to be sure every item you need is in place. Make sure your work surface is clear and is solid-colored. This ensures things are easy to find.
A standard Arduino shield comprises header pins, header sockets, pushbuttons, assorted resistors, and assorted LEDs. There’s no best formula to assemble your kit. You can choose an assembly that works best for you.
When it comes to assembling this shield, you may need to work from a picture to see the layout of the various components. However, very complex assemblies usually come with instructions.
Assembling Your Arduino Shield
Assembling this shield requires that you solder the pushbutton and the header. When you solder these pieces, the shield will be able to rest on your Arduino’s header sockets. This, in turn, extends the pin connections to the proto shield.
It’s worth noting that some proto versions come with header sockets instead of header pins. Header sockets feature long legs. This allows them to rest on top of Arduinos just like header pins do. Moreover, they’ll allow you to place sockets of another shield on top.
The best thing about header pins is that your shield is quite short and requires little room for any closure. An assembled Arduino utilizes header sockets, which are dark sockets running down both sides on top of the board.
For this assembly, you should use header pins without connecting the in-circuit serial programming (ICSP) connector. The ICSP connector is the 3×2 connector in the Arduino Uno’s center-right. You should use the ICSP only if you have advanced skills.
Soldering The Header Pins in Your Arduino Shield
Begin by cutting your header pins to the right length. For this kit, you’ll need a length of 1 x 40. That means 1 row of 40 pins.
Between every pair of pins there is a notch that you can snip to separate the pins. You’ll need the following lengths to secure your shield:
- 6 pins – Analog-in pins
- 8 pins – Power pins
- 8 pins – The short row of digital pins
- 10 pins – The long row of digital pins
You can use clippers to trim the header pins to the right lengths. Make sure you store the 8 extra pins safely for future use. There is a 0.1-inch pitch between the pins, so they should fit properly.
If you decide to purchase header pins of another connector separately, it’s imperative that you look for the same pitch. Now that you understand where each header pin has to go, it is time to solder them in place.
Conclusion
Following the above simple steps, you can easily assemble a basic shield that you can attach to your Arduino. There are several different types of Arduino shields, each with a different function. This one is a proto shield kit. It is simply a blank canvas onto which you can solder your project once you prototype it on a breadboard. We hope you have an easy time making your own Arduino shield.
