Spooky Led Lamp
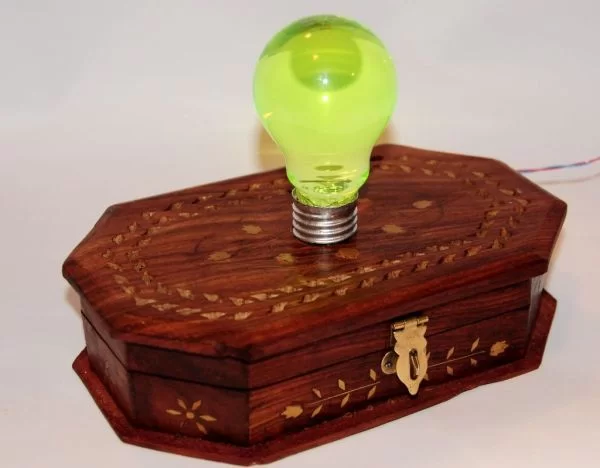
This is a hollowed out light bulb filled with fluorescent liquid and two UV leds plus one red led immersed in the liquid. When turned on the light bulb flickers for a while then starts to pulsate randomly with the UV leds giving a spooky but rather nice look.
The bulb is held to the box by two small magnets that also is used as contacts for the power to it.
I got the inspiration for the project when I stumbled upon a web site describing a similar project.
imakeprojects.com/Projects/glow-crystal/
In the last step of this instructable there are two videos of it in action
Step 1: What you need
To make this project yourself you need the following items:
- Two UV leds
- One red led
- One PIC12F675 microcontroller
- Three 120 ohm resistors
- One diode
- Two light bulbs, one should have clear glass
- Two strong small rare earth magnets
- Two small screws
- A small piece of flat plastic
- A box
Then you need some tools and other equipment like:
- Some tiny wires
- Soldering iron and solder
- Wirecutter
- Hotglue or epoxy
- A PIC programmer
- Clean water
- A highlighter pen
Step 2
Preparing the lightbulbs
The glass bulbs are incredibly strong and resilient to external force but I suggest that you hold the bulb with gloves or in a thick towel. The glass might shatter and give you a nasty cut in the hand. Some protective eyewear or at least ordinary glasses might also be a good precaution…
You need to separate the actual glass part from the metallic base of the bulb keeping both of them intact. When I tried to do that I quickly realized that it’s next to impossible to do that so you need two bulbs.
Step 3
Bulb 1 – Keep the glass
From the first bulb we will keep the glass;
The blob
‘Begin by taking your wirecutter and try to snip off and pry away the soft metallic blob at the absolute bottom of the bulb.
The dark glass
When you removed it there’s a small hole in the dark glassy part in the bottom where you can insert a small metallic object (small screwdriver) and carefully break the dark glass into smaller pieces.
The metallic part
You can now start to cut away the metallic part and carefully “roll” the metal from the bulb much like when you open a tin can with sardines.
Hacking away at the glass
Now we need to remove some of the glass since we need a hole large enough to get rid of the innards of the bulb. We also need the hold large enough fit three leds in it. So start by breaking of the long narrow part that sticks out inside and then very carefully enlarge the hole so you can pull out the filament from the bulb.
Step 4
Bulb 2 – Keep the threaded metallic part
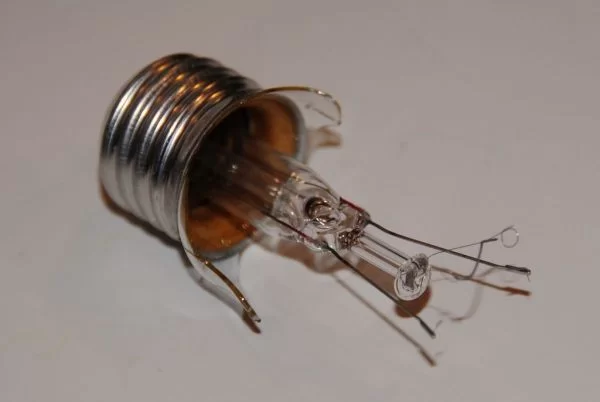
Here we only need to keep the threaded metallic part intact, so we can hack away without any caution or finesse.
Begin by removing the soft blob and the dark glassy part as in the previous step.
Then wrap the bulb in some newspaper and hit it with a hard object so the glass breaks. Remove the shards and start hacking away at the cement that the manufacturer used to bond the glass to the threaded metallic part.
It can take quite a while to get rid of all the cement from inside the metal, but it’s not too difficult to do it.
When finished with this you’ve got a hollow bulb (from the other bulb) that you can insert into the threaded part from this step. The bulb should have glass about 1 cm (1/3 inch) down into the metal when fully inserted.
Step 5
Preparing the power connector in the bulb
I did this by just drilling a two small holes in the plastic, putting the cable and one lead of the diode into the holes and then screwed in the screws. This makes a good contact without any soldering.
It is the lead on the diode without the ring that should be put into the hole. Otherwise it will not conduct when the polarity of the power is right.
Then glue the plastic to the metallic part from the lamp having the heads of the screws facing outwards.
Step 6
Preparing the power connection in the box
Take a small piece of wood and drill two holes at the same distance between them as the screws you put in the bulb power connector. The holes should be the same size as your magnets so you can squeeze the magnet together with a a poser lead into the hole.
Glue the small piece of wood inside the box and adjust it so the screws on the bulb power connector snaps in place at the magnets and the bulb is held in place.
Step 7
The leds
I had a a small metallic gasket/ring that I put the three leds into and glued them in place there. By chance the gasket fitted almost perfectly onto of the opening of the glass bulb.
Solder the three long leads (the anodes / positive pin) of the leds together and solder a wire to it. Then solder the 120 ohm resistors to each of the short leads (cathodes / negative pin) of the leds.
Be sure to trim everything down as short and tight as possible.


