Programming in PIC microcontroller can be done by using assembly language or by using Embedded C because of the ease of writing code.We have used done the programming through Embedded C language.For programming any microcontroller we need a IDE or Intregrated Developement Enviroment. In case of PIC microcontroller the official IDE is MPLAB Further several third parties develop C language compilers for PICs, many of which integrate to MPLAB or feature their own IDE.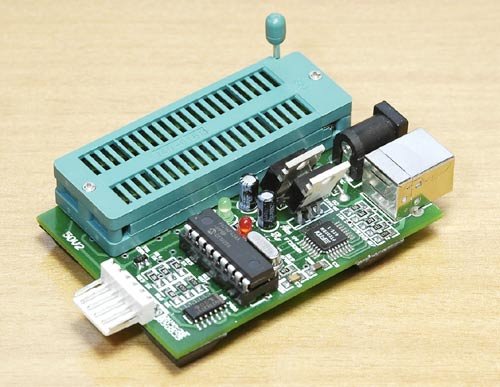 A fully featured compiler for the PICBASIC language to program PIC microcontrollers is available from meLabs, Inc. Mikroelektronika offers PIC compilers in C.For the tutorial given on this website we have used MikroC, a PIC C compilers from Mikroelektronika.The reason we used MikroC is because of its simplicity then again its my opinion.When we build any program, a hex file is created. A hex file is a format used to store machine language code in hexadecimal form. After creating the hex file , we use a programmer to burn the code onto the microcontroller for that we use Pickit2 programmer[for latest devices Pickit 3].The software can be downloaded from here
Steps for using MikroC IDE
Run MikroC as administrator as shown in the figure [Note: MikroC and MikroC pro for PIC are different compilers.We have used MikroC in all our tutorials for PIC. Please don’t confuse it with MikroC pro].
A sub window will open .Implement the following things in it
- Give a name to your Project [ Please don’t use names that are exactly same as the functions used in MikroC such as ‘main‘ or ‘for‘ ]
- Select a suitable location[Please don’t select desktop or my documents locations. Save inside a specific folder]
- Select the device for which you want to write the code
- Write down the value of clock in your hardware [I have used 20 MHz crystal oscillator thats why i wrote 20.000000]
- Click on “Default” and Click on “OK“
- Now a workspace will be created. Write your program in that area.
- After completing your program, save it and click on the build icon as shown in the figure
- If your program has no error then compiler will display a success message in the compiler messages area as shown in the figure above else the error messages will be displayed.Fix those errors(if any)
- Hex file successfully created.


Steps to write your program to PIC microcontroller
Connect your PIC microcontroller to the PIC programmer.
- Connect your PIC programmer to your computer.If you are connecting through your USB, you must first install this driver: PL2303
- Download and Open Pickit 2 programmer software[Download Link].
- If the device name is mentioned as shown in the figure below then it is successfully connected .If not then check your connection and the programmer again.
- Go to “File” in the menu and click on “Import Hex” and then go to the location where you have saved your MikroC project and select the .hex file associated with your MikroC project.
- After importing the .hex file change the VDD PICkit 2 value to “5.0” and click on “Write” as shown in the figure.
For more detail: PIC – First Project