This project explores the Adafruit PiTFT touchscreen and the Raspberry Pi camera board to create a simple point-and-shoot digital camera. One can optionally use WiFi and Dropbox (a cloud file storage and synchronization service) to automatically transfer photos to another computer for editing.
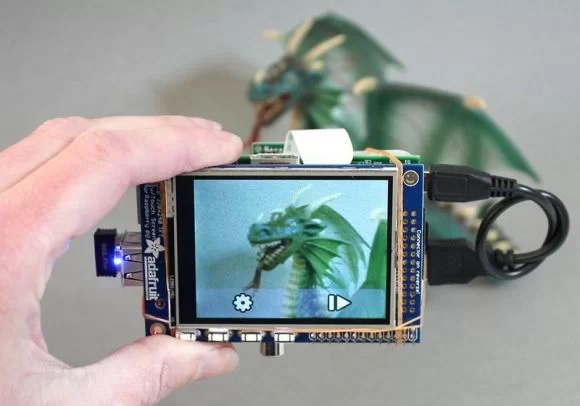
This isn’t likely to replace your digital camera (or even phone-cam) anytime soon…it’s a simplistic learning exercise and not a polished consumer item…but as the code is open source, you or others might customize it into something your regular camera can’t do.
Things You’ll Need:
With Ethernet and two USB ports, the Model B is usually easier to set up. The Model A saves a few bucks and uses less power…but with only one USB port and no Ethernet, it requires some added skill and/or shenanigans to get all the software fully loaded.
- PiTFT Mini Kit — TFT+Touchscreen for Raspberry Pi
- Raspberry Pi Camera Board. For general work you’ll want the regular version. For special projects like security or nighttime nature photography, you can experiment with the infrared version.
- SD memory card, 4GB or larger. To make the camera slimmer and more portable, you can optionally use a microSD card with either our low-profile or Shortening adapters.
The following parts are optional:
- A WiFi adapter allows the camera to upload photos to Dropbox (requires account, free).
- A USB battery pack makes the whole camera portable. If using WiFi and/or a Model B Pi, you’ll want a robust battery pack that can provide 1 Amp (some are limited to 500 mA max).
- In some situations a USB to TTL Serial Cable may be the preferred way to log in and configure the Raspberry Pi, if a spare keyboard and monitor are unavailable.
For more detail: Make your own digital camera using Raspberry Pi