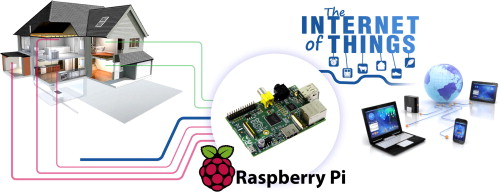
How to Set Up a Home Smart Home Hub with a Raspberry Pi
In recent years, technology has really taken off. It’s evolved from making professional endeavours slightly more efficient and boosting industries alone, to becoming a core part of everyday life in the 21st Century. These days, people seemingly can’t live without the latest devices that mould and sculpt their everyday lives.
However, recently things have taken a slight turn on this front. The introduction of smart homes has had a mixed reception. These developments have drawn the ire of people who suspect that they’re being spied on by the latest tech, and have instead chosen to go their own route; creating their own home smart hubs with a Raspberry Pi.
Consequently, here’s how you can set your own up!

What is a Raspberry Pi?
A Raspberry Pi is a small computer, similar in size to the average mobile phone. It comes with a couple of USB ports, such as HDMI or ethernet ports for network connectivity. You can download free software onto it to then create programs that can turn your lights, heating, television, radio speakers etc, on and off. You can also programme a PIC microcontroller through the software.
Obviously, when this all expands so much, you’ll end up with your very own home smart hub, powered by a Raspberry Pi that operates like a wireless controller.
What You’ll Need
Of course, this whole project is extremely technical, and requires technical goodies to get your very own home smart hub up and running. You’ll need a Raspberry Pi 3 board, a microSD card, smart home devices that will work in unison with your Raspberry Pi and obviously, a working power supply. Additionally, you’ll also need automation software like Home Assistant, OpenHAB, Things Gateway or Mister House.
The Internet Download
If you’re going the Wi-Fi route, take your favoured home automation software and download it onto your Mac or PC. Additionally, you’ll also need to ready up your own domain server so that you can control all your devices through the web. Make sure you research all the files you need for your own home automation services and integrate them into that server. There are many out there that all vary depending on what you want your home automation to do, (garden stats, light control etc). Therefore, do your own research to figure out what you need in your circumstances.
Bluetooth Connection
While Wi-Fi is the most popular route to take (which is the most popular choice as it provides a smoother set up experience), old school Bluetooth can work here too. However, it is rarely used to set up a home automation system, but the fact remains that is useable if you’re pressed on other options. One notable perk is that every computer or Mac comes readily equipped with Bluetooth, meaning you don’t need to invest in other various components to get things operational and connected. Obviously, it’s also wireless too!
The Ethernet Route
Of course, if you’re connecting all your modules on the ethernet side of things, the last thing you want is cables sprawling throughout your property left, right and centre. For true success, the set-up needs to not only be practical and perform well but look just so. Consequently, utilising some cable ties from RS will keep all your wires and cables neat and orderly, ensuring that no loose cables are moonlighting on the side as trip hazards too.
