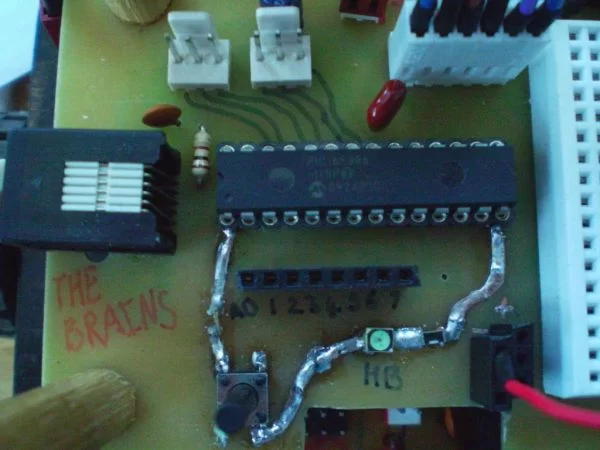
Augmenting a Microcontroller
Microcontrollers (MCUs) are fantastic little ICs that give an extra element of versatility to your electronics, robotics or other project. But they’re really not much use on their own. To function, all MCUs need some sort of support components, and a board to live on — one example of course being the famous Arduino. These boards are called ‘augmented microcontrollers’. And why not make one yourself?
This instructable will guide you through the generic steps of designing and building an augmented microcontroller board. I have purposefully made it generic so that I do not limit it to a particular make or model of MCU, and I’ll try to mention alternative ways of doing things to make it a bit easier for you.
I’m going to be designing and making an augmented microcontroller board for a 28 pin Microchip PIC, the 16F886. My example is going to be for a robot, so I’m going to include motor driver circuits, digital and ADC headers and some indication LEDs.
A generic list of materials/tools:
MCU and assorted supporting components (caps, resistors, headers)
A breadboard for prototyping
Some way of permanently building the circuit (I’ll be etching copper board)
So — let’s get started.
Designing the Main Circuit
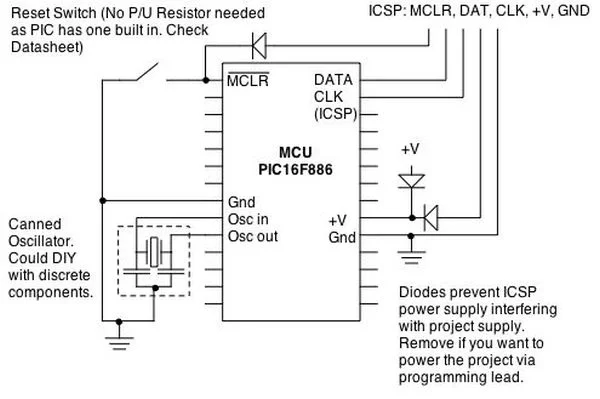
For the purposes of this instructable I’m assuming that you’ll be programming a blank MCU via some sort of in-circuit programming interface (I’m using Microchip 6 pin ICSP). Bootloaders and USB programming are a bit out of my programming depth as of writing!
The most obvious element of the circuit is the microcontroller. Surrounding it will probably be:
Power Supply Regulation
Reset Switch
Programming Header
External Clock (If you need one)
Port headers
Let’s deal with these one at a time…
Power Supply Regulation
Your MCU and surrounding circuitry will probably run at either 5v or 3.3v. I’m using 5v, but similar methods apply for 3.3v. There are two main types of DC-DC power regulation, linear and switching. Linear is easy, switching is more efficient. Linear involves one device, usually a three pin IC, and some capacitors, whereas switching will require a larger IC and various other components.
You need to include at least three power supply caps: ~10uF Aluminium across the unregulated supply, ~4.7uF across the regulated supply, and 0.1uF ceramic across the power rails of the MCU. If you don’t have one elsewhere in your circuitry, you should have a ~300uF aluminium cap across the unregulated power too. A power indication LED is nice, too. One in series with a 1K ohm resistor, running off the regulated power is a nice touch. Make it green. We like green.
Reset Switch
Most MCUs have some sort of reset or mclear pin that, when bought to a certain state, resets the MCU and makes it start it’s program again. On the PIC16F886, this pin should be held high to enable the MCU to operate, but we’ll add a reset switch which momentarily brings it low, resetting the MCU if we need to. Some MCUs have built in P/U resistors, so just a switch to GND is needed.
Programming Header
This is where the MCU connects to your computer to receive it’s program. PICs and AVRs both use six pin headers, but in different formats. I’ll be using a 6 pin RJ-45 socket, as they’re hardy and will put up with me constantly plugging and unplugging as I try desperately to correct the errors in my programs! Consult relevant datasheets to see what the pinout of the connector is, and which pins of the MCU they need to connect to.
Sometimes there can be problems with adjacent data/clock lines, and some people recommend putting an R/C filter on one or both of the lines. This can help reduce crosstalk and interference, meaning less headaches later on. I’m not including a filter in this project.
For more detail: Augmenting a Microcontroller using PIC16F886


