


Summary of Teddy nightlight multicolor using PIC16F84A microcontroller
This article describes a DIY multicolor nightlight project using a teddy bear bubble bath container. The creator repurposes the plastic bear, modifying it to house a PIC16F84A microcontroller circuit and a new LED. By removing original markings and drilling openings, the project creates a custom light source suitable for a baby's room.Parts used in the Teddy Nightlight Multicolor:
- Teddy bear bubble bath pack
- Nightlight with positive economic pressure
- PIC16F84A microcontroller (or any programmable microcontroller)
- Multicolor LED
- Nail polish remover
Teddy nightlight multicolor
- Out of a pack of bubble bath for children in the shape of teddy bear
- a nightlight with positive economic pressure
- Complete circuit with a PIC16F84A (I was at home, but you can use any programmable microcontroller)
- LED multicolor
Then I drilled the base so that it gets wedged perfectly on the spherical part of the nightlight I drilled (enlarged the hole) also the upper part so as to pass light well.
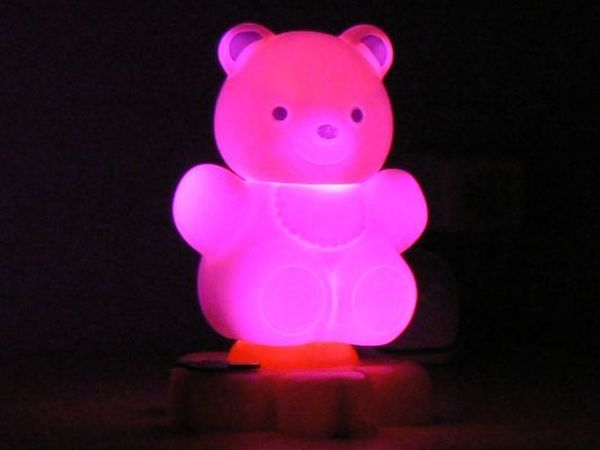
Then I switched to accommodate nightlight, I removed the original LED and resistor, and I drilled the top of the ball so as to pass the led.
Quick Solutions to Questions related to Teddy Nightlight Multicolor:
- What is the ideal use for this multicolor nightlight?
It is ideal for a baby's room. - How can I remove markings from the teddy bear package?
You can cancel all markings like make and range indications using nail polish remover. - Which microcontroller was used in this project?
The project used a PIC16F84A, though any programmable microcontroller can be used. - Can I use a different microcontroller instead of the PIC16F84A?
Yes, you can use any programmable microcontroller if you are not at home with the specific one mentioned. - How do I prepare the base of the teddy bear for the nightlight?
You must drill the base so it wedges perfectly on the spherical part of the nightlight. - Why did the author enlarge the hole in the upper part of the nightlight?
The hole was enlarged to allow light to pass well through the top of the ball. - What components were removed from the original nightlight?
The original LED and resistor were removed to accommodate the new circuit. - Where should the new LED be placed?
The new LED should be passed through the drilled top of the ball.
Related projects
PIC Stepper Motor Controller using PIC16F84A with Proteus Simulation
Introduction Stepper motors are widely used in embedded systems and DIY electronics projects where precise position control is required. This PIC Stepper...
Programmers & ICSP · PIC16F84APIC Musical Doorbell using PIC16F84A with Proteus Simulation
IntroductionThis microcontroller project demonstrates a musical doorbell built around a PIC16F84A and a simple piezo sounder.Using two push buttons, the system allows...
Beginner Tutorials · PIC16C84Exploring the World of PIC Microcontrollers: An Architectural Overview
A Peripheral Interface Microcontroller (PIC), developed by General Instruments Microcontrollers in 1993, operates under software control and is programmed to execute various...
Home Automation & SecurityVoice Activated Power Sockets (Home Automation)
Yet another voice controlled home automation system! As shown in the picture, the system can control any electrical appliance, by turning ON...
Home Automation & SecurityHome Security System with GSM Using 8051 Microcontroller
Security is a big challenge everywhere because thefts are increasing day by day owing to the unsafe and insecure security systems in...
Home Automation & SecurityHome Automation and Security System using Microcontroller ATMEGA8 with Arduino Programming
Home automation and security systems have become very popular these days, today industrial automation techniques are widely adopted by luxurious homes and...

Ibrar Ayyub
I am an experienced technical writer holding a Master's degree in computer science from BZU Multan, Pakistan University. With a background spanning various industries, particularly in home automation and engineering, I have honed my skills in crafting clear and concise content. Proficient in leveraging infographics and diagrams, I strive to simplify complex concepts for readers. My strength lies in thorough...