Summary of Frequency Meter Using Microcontroller
This tutorial explains measuring the frequency of a 0–3.3 V pulse source using an STM32L476 Nucleo as the frequency counter, with a Tiva or other microcontroller providing the pulse. It uses TIMER1 as internal clock, PC13 as external interrupt, and displays results on a 16x2 LCD. Development uses STM32CubeMX to generate Keil code and Energia for the pulse-source board. Wiring details and required hardware/software are provided for a breadboard implementation.
Parts used in the Frequency Meter Using Microcontroller:
- STM32L476 Nucleo board
- Tiva Launchpad (or any other microcontroller board as pulse source)
- 16x2 alphanumeric LCD
- Breadboard
- 1K resistor (for LCD contrast)
- Wires
- PC or development computer
This tutorial simply states how to calculate frequency of a pulse source using a microcontroller.
Story
This tutorial simply states how to calculate frequency of a pulse source using a microcontroller. A high voltage level of pulse source is 3.3 V and low is 0V. I have used STM32L476, Tiva launchpad, 16×2 alphanumeric LCD some wires breadboard and 1K resistor.
Hardware required:
1) STM32L476 nucleo board
2) Tiva launchpad or any other microcontroller board (pulse source)
3) 16×2 alphanumeric
4) Breadboard
5) 1K resistor (for LCD contrast)
Software requirement:
1) STM32cubemx
2) Keil uVision5
3) Energia (for Tiva launchpad)
Step 1
Install Stm32cubemx, Keil UVision5 and Energia in your PC and update them.
Step 2
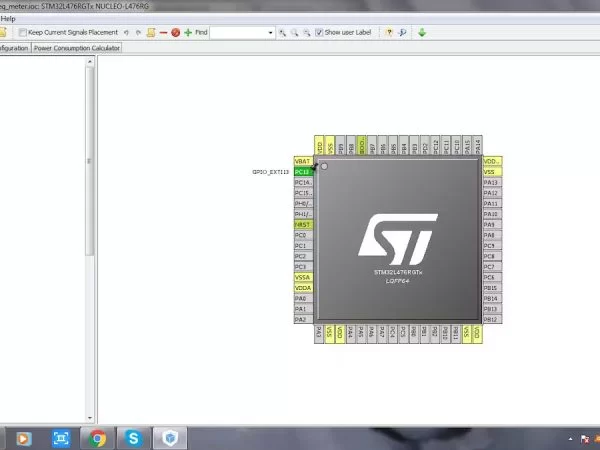
Open Stm32cubemx. Select Stm32l476 Nucleo Board. Select PC_13 as an External Interrupt pin.
Step 3
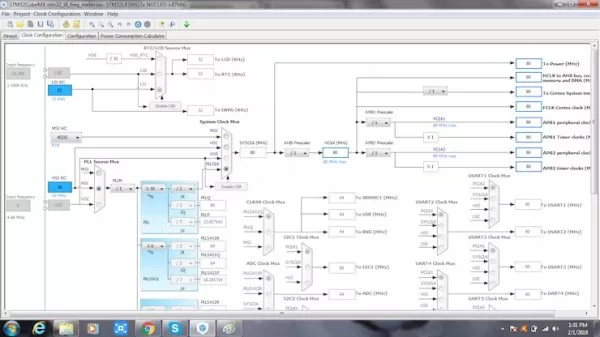
No need to make any changes in Clock Configuration.
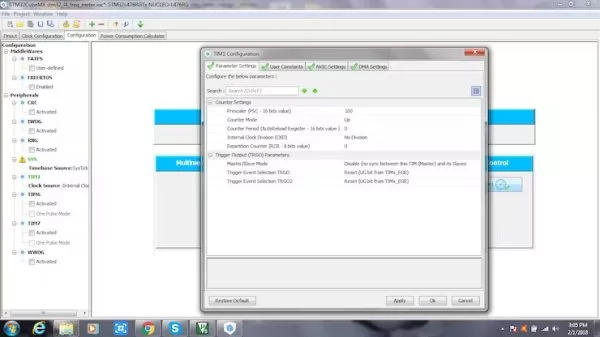
Step 4
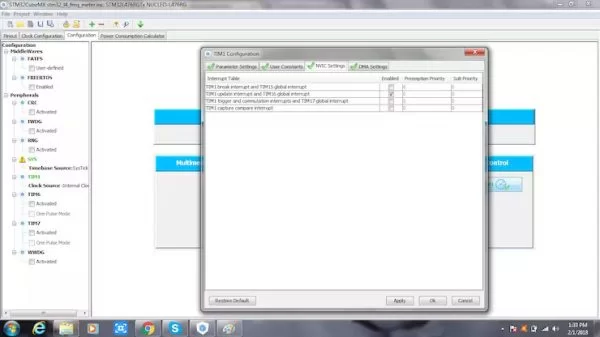
Select TIMER1 and set the clock source as Internal Clock. Adjust the settings in TIMER1 according to the pictures.
Step 5
Give a name to your project and generate a code for Keil IDE from Stm32cubemx.
Step 6
Connect the LCD to STM3276 Nucleo Board with the connections stated below.
Pin connections of STM32 to LCD:
STM32L476 – LCD
- GND – PIN1
- 5V – PIN2
- NA – 1K resistor connected to GND
- PB10 – RS
- PB11 – RW
- PB2 – EN
- PB12 – D4
- PB13 – D5
- PB14 – D6
- PB15 – D7
- 5V – PIN15
- GND – PIN16
Step 7
Connect one pin from the Tiva Launchpad to the External Interrupt pin of Stm32l476, and the GND pin of Tiva Launchpad to GND pin of STM32L476.
If you have any other microcontroller board, you’ll need to connect the GPIO of that board to the External Interrupt pin of STM32L476 Nucleo board, and connect GND of both boards to each other. You need to toggle this GPIO pin programming in its IDE.
Read more: Frequency Meter Using Microcontroller
- What is the pulse voltage range used in this tutorial?
The pulse source high level is 3.3 V and low level is 0 V. - Which pin is used as the external interrupt on STM32L476?
PC_13 is selected as the external interrupt pin. - Which timer is used to measure frequency?
TIMER1 is used with the clock source set to Internal Clock. - What software tools are required for this project?
STM32CubeMX, Keil uVision5, and Energia are required. - How is the LCD connected to the STM32L476?
LCD pins connect to STM32L476 as: GND-PIN1, 5V-PIN2, 1K resistor to GND for contrast, PB10-RS, PB11-RW, PB2-EN, PB12-D4, PB13-D5, PB14-D6, PB15-D7, 5V-PIN15, GND-PIN16. - How do you connect the pulse source to the STM32 for measurement?
Connect a GPIO pin from the pulse source board (Tiva or other) to the STM32 external interrupt pin and connect grounds of both boards together. - Do you need to change clock configuration in STM32CubeMX?
No, there is no need to make changes in Clock Configuration. - How is the STM32CubeMX project used after configuration?
Name the project and generate code for Keil IDE from STM32CubeMX.