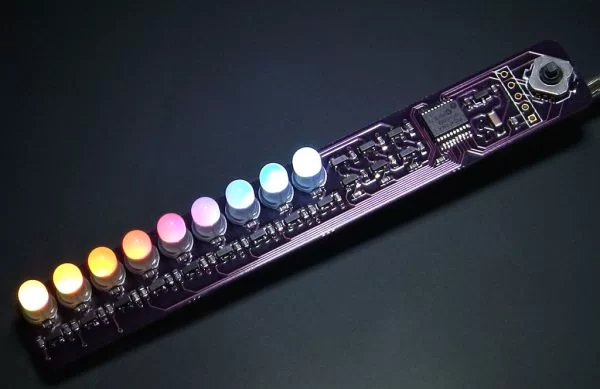
Aurora 9 bar – The Essence of Aurora
Since the introduction of Aurora 9×18, I received many requests for the kits and PCBs. I’m still quite undecided about making those available for a few reasons. However I really want other LED lovers (ok that might sound too much to be able to build one themselves.
So I came up with Aurora 9 bar. It’s a bare essential version of Aurora 9×18. In fact the circuit is almost exactly the same (with a lot less number of LEDs of course). Even the firmware is essentially the same. So it has the same super smooth color fades as Aurora 9×18.
Step 1
Concept & Circuit
Aurora 9 bar’s circuit operates in the same exact way Aurora 9×18’s does. Same PWM theme, same refresh rate, etc. Please refer to my Aurora 9×18 Instructable for the details.
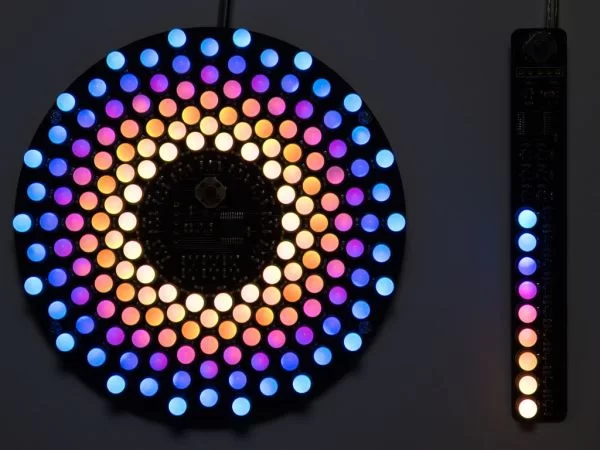
Aurora 9 bar took one LED out from each of Aurora 9×18’s 9 circles. Only difference in the circuit is that it uses BJTs instead of MOSFETs for the high-side switch (to save cost). Because there are only 9 LEDs total, the current requirement for the bus controllers is much lower.
Everything else is the same. So if you somehow manage to hook up more LEDs to Aurora 9 bar, it will look like Aurora 9×18.
Step 2
PCB
Aurora 9 bar uses surface-mount technology (SMT). If you’ve never built anything with SMT, this might be a good opportunity to try out. You will most likely realize that there’s nothing to fear about SMT.
The high-quality, custom made PCBs, as well as kits are available at reasonable prices. Please view the details at “Kits” section of the forums.
Step 3
Parts
You can download BOM files that can be uploaded to Digi-Key for quick ordering.
- 16x 120 Ohm (0603)
- 21x 1k Ohm (0603)
- 1x 10k Ohm (0603)
- 2x 1uF (0603)
- 1x 10uF (1206)
- 1x AP7333-33 or AP7313-33 (3.3V linear voltage regulator)
- 3x MMBT2907A or equivalent PNP transistor
- 12x MMBT2222A or equivalent NPN transistor
- 1x PIC24F08KA101 (SSOP)
- 9x 5mm Tricolor LED (common-cathode) (SparkFun COM-09264 should be identical)
- 1x 5-way Tactile Switch: COM-10063 (Available at SparkFun Electronics)
- 1x 5V regulated power supply, 4 NiMH batteries & case, or USB cable
- 1x 2 pin Molex header (right-angle recommended) (optional)
- 1x 2 pin Molex connector with corresponding terminals (optional)
There are many places to purchase LEDs. I source LEDs directly from China via AliExpress. Takes a few days for delivery, but the prices are great. (If you are purchasing a lot of LEDs.)
You can substitute transistors if you have something compatible.
The kits are available at a reasonable price as well. Please view the details at “Kits” section of the forums.
Step 4
Tools & Supply
- Tweezers
- Soldering iron
- Solder (flux core. go for the highest quality solder you can afford.)
- Soldering flux (Use high quality flux. Low quality flux causes problems! ChipQuick brand recommended.)
- Wire cutter (I recommend this one.)
- Microchip PIC programmer (supports PIC24F08KA and capable of In-circuit programming through a standard 6-pin ICSP connector, such as PICKit, ICD 2, ICD 3)
- Computer running Windows
- Magnifier visor or other visual aid device (optional, but highly recommended)
- Molex crimper (to make your own power supply connector cables)
Step 5
Notes on SMT
If you are already familiar with SMT, you can skip this step.
There’s no need to use reflow method (solder paste & bake) to build the SMT version of Aurora 9 bar. Since there are only a few components to solder, it’s quicker to just hand solder everything.
It’s very helpful to use high quality flux when you solder SMT components. I’d say it’s the key to successful hand soldering of SMD. Apply a small amount of flux to the PCB pads before placing the device, then solder. If you haven’t done this before, you’ll feel like your solder skill has suddenly improved 🙂
For more detail: Aurora 9 bar – The Essence of Aurora using PIC24F08KA microcontroller


 Aurora9bar-BOM.csv