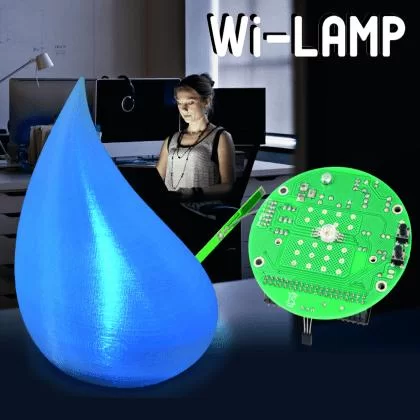
Let’s create a multi-function LED lamp, always connected via wireless, thanks to Arietta G25.
Since several years already, it is possible to find systems for home automation: irrigation, doors and windows, lighting, air conditioning and alarm systems, everything can be centralized and planned. Recently, the classical control boxes have been replaced by smart systems that are always connected to the Wi-Fi Network and that can be remotely accessed by means of mobile devices such as smartphones or tablets.
The here-proposed project follows this trend and is dedicated to the lighting, since it is a RGB lamp (thus capable of taking all the colours) and manageable by means of devices that are connected via Wi-Fi. The heart of the lamp, that we baptized Wi-Lamp, is a board having a wireless interface, and mounting a RGB power LED, and also has a terminal box that allows, as an alternative, to command RGB strips, thus allowing us to lighten whole spaces. As for the usage as a single lamp, Wi-Lamp’s circuit can be included in a commercial lamp, such as a bedside lamp, or in a shell having the desired shape, and printed via a 3D printer; concerning this, we would like to remind that by searching for “lamp” on the thingiverse website, many examples may be found.
After the assembling and the configuration, Wi-Lamp will always be connected to your Wi-Fi network, and you will be able to control it by means of a tablet or of a smartphone, or more in general via any device that is provided with a browser and connected to the same network: it will be enough to access the web control panel and to select one among the various operating modes available, that are the following ones:
- OFF = the lamp is turned off, even if the Arietta board is kept on, waiting for commands;
- Self = by scrolling the finger on the colour picker we may select the desired colour and intensity;
- Fade = the lamp will fade from a colour to another, as in an infinite cycle; by acting on the horizontal bar (slider) we may control its speed;
- Party = the lamp will flash with random colours, at a speed that can be set by means of the horizontal bar;
- Sunset = a useful mode, in the case we wanted to go to sleep without having to remember to turn off the lights; we may select the duration of the “sunset” (from 1 and up to 20 minutes) by means of the slider, and to make it start by pressing the “Sunset Start” button (the lamp will be turned on immediately with a white colour, and will fade following all the colours of the sunset, until it is completely turned off);
- Sunrise = this mode is similar to the Sunset one, but it has colours that are more suitable for the morning; by acting on the slider it is possible to select the dawn duration (from 1 and up to 20 minutes), while the “Starting Time” field is needed in order to select the starting time; once the set hour has been reached, the lamp (from being turned off) will start to gradually turn on, by showing all the dawn colours, and until a full (white coloured) light has been reached;
- Temperature = thanks to the DS18b20 sensor on the board, we may learn the room’s temperature, and colour the lamp with a hue going from blue (the minimum temperature set) to red (the maximum temperature set); as an example, by setting the minimal temperature to 10°C and the maximum one to 30°C, if the the detected temperature was around 10°C (or less), the lamp would be completely coloured in blue;
- Fire = the lamp will simulate the flame in a fireplace;
- Settings = in this section it is possible to change the modes that are recalled when pressing the two buttons that are on the lamp’s PCB; moreover it is possible to completely turn off the lamp (Arietta included) by pressing the “Shutdown Lamp” button;
- Auto = by means of this mode, it is possible to program the lamp, so that it (or all of them) will be started on a certain day of the week, at a certain time, for the desired duration and time; after having set all the parameters, you need to press the “Create” button in order to save the planning and, in order to delete the planning, you need on the other hand to press the red round icon with an X.
Read more: Wi-Lamp, the Open Source Wi-Fi LED lamp

