Step 1: Understanding the circuit
The circuit is really easy to understand.
A resistor of low value (the resistor value will be explained later) is connected in series with the output of the power supply. As current starts to flow through it, a small voltage drop will appear on it and we will use this voltage drop to determine whether the power supply out put is overloaded or short circuited.
The “heart” of this circuit is an operational amplifier (op amp) configured as a comparator (stage 2).
The way it works is really simple, you just need to follow this rule:
If the voltage on the non-inverting output is higher than the inverting output, then the output is set to “high” level.
If the voltage on the non-inverting output is lower than the inverting output, then the output is set to “low” level.
I put quote marks on “high” and “low” for a easier understanding of the op amp operation. It has nothing to do with logical micro controllers 5 volts levels. When the op amp is in “high level”, its output will be very approximate of its positive supply voltage therefore, if you supply it +12V, the “high output level” voltage will approximate to +12V. When the op amp is in “low level”, its output will be very approximate of its negative supply voltage therefore, if you connect its negative supply pin to ground, the “low output level” will be very near to 0v.
When we use op amps as comparators, we usually have an input signal and a reference voltage to compare this input signal.
So, we have a resistor with a
variable voltage that is determined according with the current that flows through it and a reference voltage. Does this ring any bell on your mind? We’re almost finished with the theory be brave and follow me.
As the voltage drop on the resistor in series with the power supply is too small, we need to amplify it a little bit because some op amps are not too accurate when comparing low voltages like 0,5 volts or lower. And that’s why the first stage (stage 1) of this circuit is an amplifier using another op amp. A 3 to 4 times amplifications is more than enough in this case.
The op amp gain(av) is determined by the formula: av = (RF/R1)+1
In this case we’ve got 3.7 times of gain: av = (2700/1000)+1 = 3.7
The third stage of the circuit is the protection itself. Its a relay that you can connect directly directly with the output of your power supply if you are dealing with low current (2A) or you can connect it to a bigger relay if you are dealing with bigger current or even shut down a previous stage of you power supply forcing the output to shut down. This will vary with the power supply you’ve got. For example, if your power supply is based on a LM317, you can simply use the relay to physically disconnect the LM317 output pin from the power supply, as we are using the relay normally closed pin (I’ve uploaded a picture to better describe this example).
The PNP transistor on stage 3 just act like a seal to keep the relay turned on after the short circuit so you can press a button to disarm it. Why I didn’t use the relay itself to do this? It’s because the relay is too slow to do it.
Just think about it: At the moment the relay turns off the output of your power supply, the short circuit does not exist anymore and the comparator goes from high level to low level. As there is no more current flowing at the NPN transistor base, there is no more current flowing through the relay coil as well. When all these steps happens, the relay contacts did not had enough time to complete its course and connect to the other contacts to close the seal. The behavior of the circuit if I used the relay itself to close the seal would be the relay madly trying to turn off the output, but without success. I know I could have used a capacitor to supply enough current to the relay, but I would need a big capacitor and no one can grant that it would work 100% of the times the output of the power supply is shorted. Electrolytic capacitors fails over time, and failure is not a good option in this circuit.
To disarm the circuit a normally closed switch is connected in series with the base of the NPN transistor. By pressing this normally closed switch, it would open its contact and disconnect the base of the NPN transistor from the rest of the circuit breaking the seal and resetting the power supply output.
The 1uF capaciton on the NPN transistor base is just a threshold so a little peak consumption don’t trigger the protection.
You can feed this circuit 9V to 15V. Just be careful to correctly choose your relay voltage and the capacitors voltage. And just to be clear, do not connect this circuit supply pins directly with you power supply output or it will be useless. Just imagine, if your output is shorted, there won’t be enough voltage to supply the protection circuit. You will need to connect it on a stage before the output, maybe a dedicated voltage regulator just for it. A LM7812 will be more than enough.
 Step 2: Choosing series resistor value
I’ve created a separated step for this because this series resistor is the most crucial part of the circuit. As I’ve said before, this resistor is connected in series with the power supply output. As current starts to flow through it a small voltage drop will appear on it.
You need to choose a resistor that the voltage drop on it is around 0.5~0.7 volts when the overload current is passing through it. The overload current is the point that the protection circuit actuates and shuts down you power supply output to prevent damage on it.
You can choose a resistor by using ohms law: V=R*I. In this case we’re going to use: R= V/I.
The first thing you need to determine is the overload current of your power supply. In this part I can’t help you, you’ve got to know the maximum current your power supply can supply and therefore dimension your series resistor value.
Let’s say your power supply can supply 3 amps(The voltage of your power supply does not matter in this case). So, we’ve got R= 0,6V/3A. R = 0.2 Ohm. If you calculated the resistor and the result is not a commercial value, don’t worry. Just get a commercial value resistor that is near to your calculations results.
The next thing you must do is calculate the power dissipation on this resistor, so it does not burn when current is flowing through it. You can calculate the power dissipation by using the formula: P=V*I.
If we use our last example we would get: P=0.6V*3A. P=1.8W a 3W or even a 5W resistor would be more than enough.
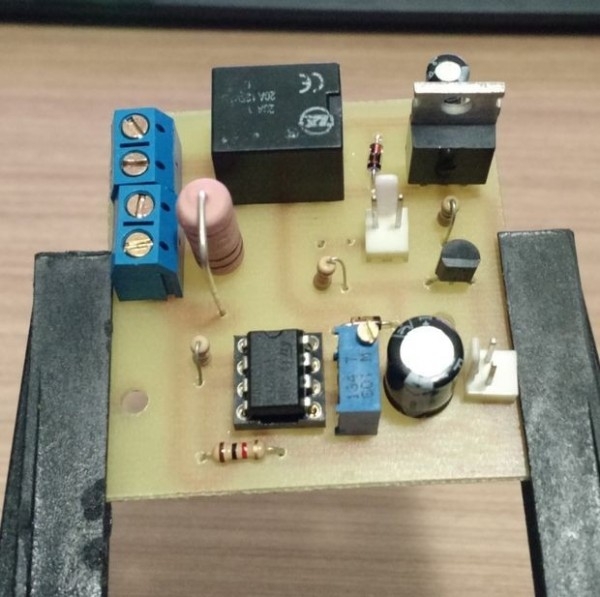
Step 3: Bill of materials
To build a board like mine, you will need:
1 – TL082 (dual op amp)
2 – 1N4148 (diode)
1 – TIP122 (NPN transistor)
1- BC558 (PNP transistor. You can use a BC557, BC556 or equivalent. They are all fine for this application)
1 – 2700ohm resistor
1 – 1000ohm resistor
1 – 10Kohm resistor
1 – 22Kohm resistor
1 – Series resistor (see previous step)
1 – 10Kohm potentiometer
1 – 470uf capacitor
1 – 1uf capacitor
1 – Normally Closed Momentary Switch (see attached picture. Any normally closed momentary switch will work fine)
1 – Relay model T74 (This is a very common relay model. Easy to find in
eBay. Just try to search for “G5LA-14” on eBay. There are many coil voltages and contacts amperage. If you dont want to use this model, make sure to change the PCB layout)
Step 4: Designing the board
I’ve used Express PCB to design the board and the file I uploaded here is free for you to edit as you like. Edit it as you wish to fit the components you have. A PDF version of the board has been uploaded too if you don’t even want to edit it or generate the PDFs yourself.
This circuit is not really that big so I’ve fit it on a 5cm x 5cm board.
Note: The board has an optional led (see PCB picture for more details, I’ve left a note there) so you can know when the protection circuit have disarmed the output of your power supply. If you don’t want to use a led, you must short the pins that the led would be connected or else the circuit won’t work. If you want to connect the led, the square pin is the anode and round pin is the cathode. You can connect any LED but high brights ones.
I’ve tested it on a bread board and you should test it too so you can know for sure if the protection circuit will work with our power supply.
For more detail: Short circuit protection for (almost) any power supply
About The Author
Ibrar Ayyub
I am an experienced technical writer holding a Master's degree in computer science from BZU Multan, Pakistan University. With a background spanning various industries, particularly in home automation and engineering, I have honed my skills in crafting clear and concise content. Proficient in leveraging infographics and diagrams, I strive to simplify complex concepts for readers. My strength lies in thorough research and presenting information in a structured and logical format.
Follow Us:LinkedinTwitter