Summary of Repair of Arcam CD73 laser mechanism
This Arcam CD73 (2004) was failing to read or play CDs due to a worn-out laser. The repair replaced the Sony KSS-213C laser mechanism (complete laser/spindle motor assembly) to restore function. The guide emphasizes anti-static precautions, step-by-step disassembly: remove mains power, take off the steel lid (torx screws), note and remove posidriv screws securing puck and rear of mechanism, unplug two white plugs and the flexifoil cable, withdraw the CD mechanism, and unscrew four screws holding the laser to the chassis while keeping screws, springs, and rubber bushes.
Parts used in the Arcam CD73 Laser Repair:
- Sony KSS-213C laser mechanism (complete laser/spindle motor assembly)
- Anti-static wrist strap
- Torx screwdriver (for lid screws)
- Posidriv screwdriver (for laser and puck screws)
- Small screwdriver for PCB connectors
- Replacement screws, springs, and rubber isolation bushes (original retained)
This 2004 vintage Arcam CD73 came into us with the reported fault that it would no longer play CD’s, or even read the table of contents. Given that it is over eight years old and had plenty of use in that time, we were not surprised to find that the laser had expired and needed replacing.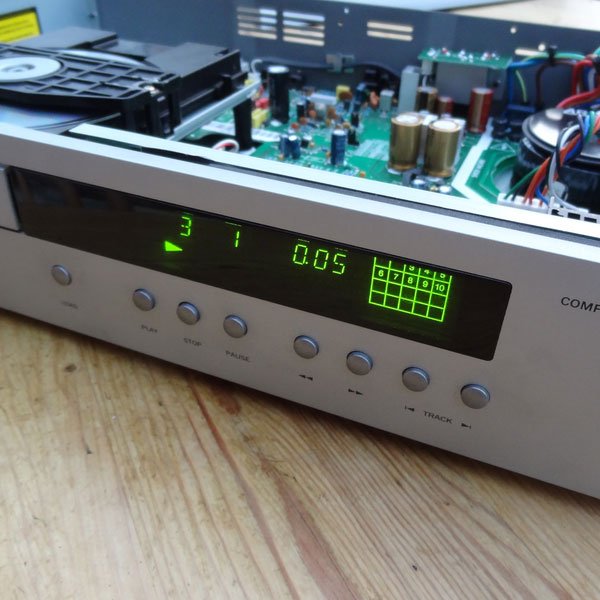
We are more than happy to repair quality hi-fi rather than throw it away, as with a new laser this CD73 will give many years of service. The CD73 uses the popular Sony KSS-213C laser mechanism, which can be picked up from a number of vendors for under £10 – we got ours from eBay and it arrived within a few days. To avoid unnecessary work, we bought a complete laser/ spindle motor assembly rather than the cheaper option of replacement laser only. If you are thinking of going down this route, always ensure that you take appropriate anti-static precautions when handling the KSS-213C, as it can easily be zapped unwittingly!
The first job after isolating the unit from the mains power supply of course is to remove the steel lid from the machine, which is held in place by four torx (silver) screws on either side of the lid, and then three smaller torx (black) screws on the top lip of the rear panel.
Put the lid and screws safely to one side for later. Making sure you are wearing an anti-static wrist strap, you can now start to disassemble the faulty laser mechanism.
First remove the two posidriv screws (shown highlighted in red) securing the CD puck/ beam assembly as shown in the pic below.
The next job is to remove the two posidriv screws at the rear of the laser mechanism, again shown in red below.
Now gently remove the two white plugs from their sockets on the PCB near to the laser transport, and also the flexifoil cable from it’s connector, as shown in the next two photos – all three connectors highlighted in red.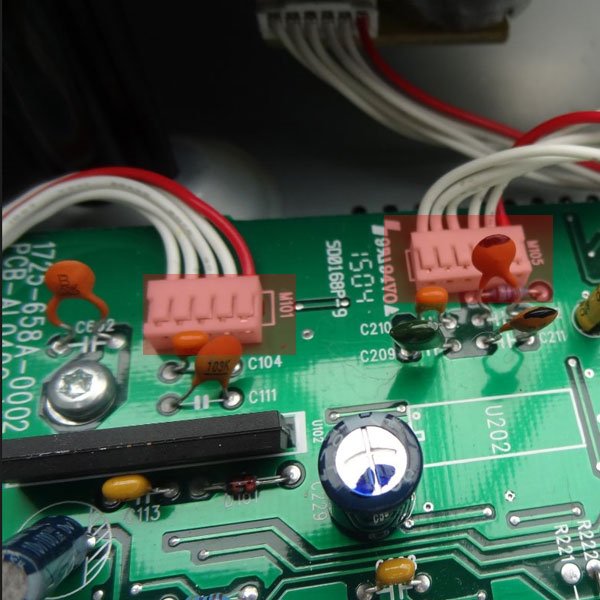
You should now be able to withdraw the CD mechanism from it’s location in the CD player – turn it over and unscrew the four screws which hold the laser mechanism to the metal chassis plate as shown – the two red highlighted screws are at the front of the mechanism, the other two are at the rear. Carfully retain the screws, springs and rubber isolation bushes for later use.
For more detail: Repair of Arcam CD73 laser mechanism
- What was the reported fault with the Arcam CD73?
The player would no longer play CDs or read the table of contents. - What laser mechanism does the CD73 use?
The CD73 uses the Sony KSS-213C laser mechanism. - Is it better to buy a complete laser assembly or just the laser?
The article recommends buying a complete laser/spindle motor assembly to avoid unnecessary work. - Where was the replacement KSS-213C obtained?
The replacement was purchased from eBay. - What safety precaution is emphasized when handling the KSS-213C?
Always take appropriate anti-static precautions, such as wearing an anti-static wrist strap. - Which screws hold the steel lid in place?
The lid is held by four torx silver screws on either side and three smaller torx black screws on the top lip of the rear panel. - Which screws secure the CD puck/beam assembly?
The CD puck/beam assembly is secured by two posidriv screws. - What connectors must be removed before withdrawing the CD mechanism?
Remove two white plugs from their PCB sockets and the flexifoil cable from its connector. - How is the laser mechanism attached to the metal chassis plate?
It is held by four screws (two at the front and two at the rear); retain screws, springs, and rubber isolation bushes for reassembly.