The bootloader facilitates program installation on the PIC32, eliminating the need for an external programmer such as an ICD2 and eliminating the requirement for computer drivers. The PC software necessary for the bootloader is pre-installed alongside the Microchip Applications Library.
Software
PIC Source Code
To set up each new program, you’ll need to establish a dedicated folder that contains both the source code files and the project file, which houses additional program details not found in the source code. Here’s a step-by-step guide:
1. I suggest creating a folder named “PIC32_Code” to act as a repository for all your project folders.
2. Inside your “PIC32_Code” directory, generate a new folder and name it “Bootloader.”
3. Download the PIC32 bootloader zip file from this location.
4. Unzip the downloaded file into the “Bootloader” folder. Ensure you copy and paste the files from within the unzipped folder into the “Bootloader” directory. After completing this step, the “Bootloader” folder should contain seven additional files in addition to the original zip file and folder.
Please note that these files were tested with the Applications Library as of November 18, 2009. If you are using a different library, be aware that these files may not function as intended.
PC software
To load files using the bootloader, you need to utilize an application on your PC known as the HID Bootloader. This bootloader should be included in the application library.
– Ensure that you can find the HID Bootloader in the Start menu under Programs -> Microchip -> MCHPFSUSB v2.6 -> Tools -> HIDBootLoader. Don’t run the program at this point; just confirm its presence.
Running the HIDBootLoader necessitates a fairly recent .NET Framework version, which may not be available if you’re using Windows XP or earlier versions. This concern should have been addressed during the installation of the Applications Library. You can obtain a suitably recent version by downloading it here (please note that the installation may take some time): .NET Framework download.
Installing a Bootloader on the PIC32 with ICD2
These instructions provide a step-by-step guide for initiating a fresh MPLAB project and implementing the HID Bootloader on the PIC32 using the Microchip MPLAB ICD 2, an In-Circuit Debugger.
Our objective is to establish a project for embedding the bootloader into the PIC32. This code must be loaded onto the PIC32 only once. Subsequently, you won’t require the ICD2 for PIC programming.
Starting a New MPLAB Project
- Launch MPLAB IDE.
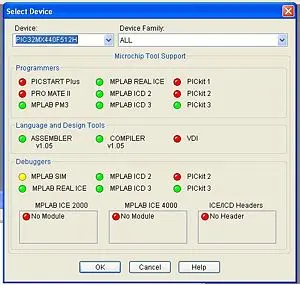
- Navigate to the “Configure” menu and then select “Select Device” to choose the PIC32MX460F512L (the specific PIC model you are currently working with). Within the Device dialog, ensure that the appropriate PIC model is selected from the provided list, and take note of the illuminated indicators that indicate the compatible software for that particular PIC.
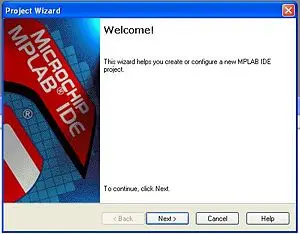
- Choose Project>Project Wizard to start a new project. Click Next
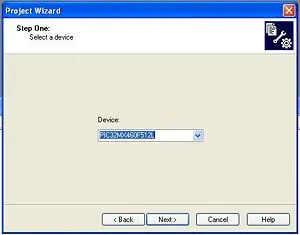
- Select the PIC32MX460F512L from the drop down menu. (It might already be selected) Click Next
- Select the Microchip PIC32 C-Compiler Toolsuite from the drop down menu. Click Next

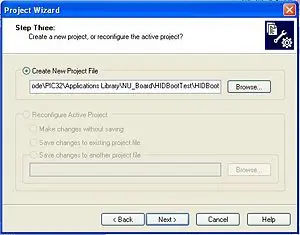
- Create a new project (I called it Bootloader) in the Bootloader folder. Click Next
Please include the following C files in the project. These files should already exist within the Bootloader folder:
1. HardwareProfile.h (a universal header file for various boards)
2. HardwareProfile_NU32.h (hardware configuration specific to NU32; if you have a custom hardware profile, it should be appended to the general HardwareProfile.h)
3. main.c (the primary source file)
4. main.h
5. procdefs.ld (a linker file)
6. usb_config.h (header file for configuring USB communication)
7. usb_descriptors.c (source file for USB communication)
Please proceed by clicking “Next.”
- Click Finish

Creating Bootloader Hex File
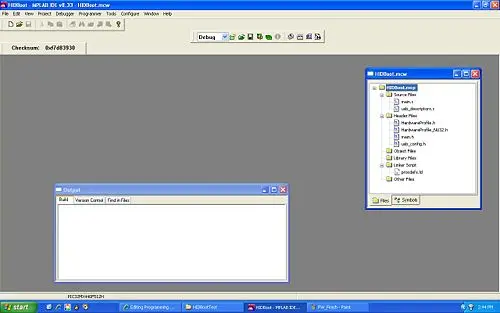
Upon completing the setup, MPLAB should display the following interface. The project window showcases all the files you’ve integrated into the project. Specifically, the ‘procdefs.ld’ file can be found within the linker file folder. It’s important to note that this file isn’t the sole linker file, so you should relocate it by dragging it into the ‘Other Files’ folder.
The purpose of the ‘procdefs.ld’ file is to instruct the programmer or bootloader on where to place files. It’s crucial to have a distinct ‘procdefs’ file for the bootloader and the files you intend to load with the bootloader. This separation ensures that new programs are stored in a different location than the bootloader on the PIC. If you mistakenly use the same ‘procdefs’ file as the one used for the bootloader, the bootloader will attempt to overwrite itself, effectively erasing it and failing to install the new program. In such a scenario, you’ll need to re-install the bootloader on the PIC.
To set up MPLAB to locate the header files from the Microchip Applications Library, follow these steps:
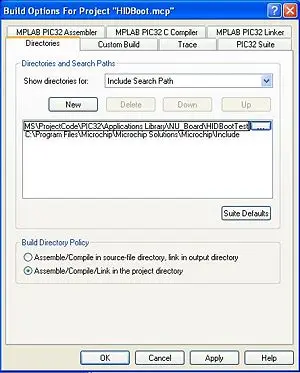
1. Navigate to Project>Build Options>Project in MPLAB.
2. Within the “Directories” tab, select “Include Search Path” from the dropdown menu.
3. Add a new path by browsing to the location of the “include” folder (e.g., C:\Microchip Solutions\Microchip\Include).
4. Add another new path by browsing to the folder where your project is located.
5. Click the “OK” button to confirm and save your changes.
As the bootloader relies on the USB source files from the Microchip Framework, we need to incorporate these source files and specific USB header files into the project. I’ve organized these files into sub-folders in the project window as outlined below.
1. Within the project window, right-click on ‘Source Files’ and select ‘Create Subfolder.’ I’ve named this new folder ‘USB Framework.’
2. Right-click on the newly created folder and choose ‘Add Files.’ Incorporate the following files:
– usb_device.c from … -> Microchip Solutions -> Microchip -> USB
– usb_function_hid.c from … -> Microchip Solutions -> Microchip -> USB -> HID Device Driver
3. In the project window, right-click on ‘Header Files’ and select ‘Create Subfolder.’ Name this folder ‘USB Framework.’
4. Right-click on the newly created folder and choose ‘Add Files.’ Integrate the following files from … -> Microchip Solutions -> Microchip -> Include -> USB:
– usb.h
– usb_ch9.h
– usb_common.h
– usb_device.h
– usb_function_hid.h
– usb_hal.h
– usb_hal_pic32.h
Since we’re using a generic HardwareProfile, it’s important to specify the board to MPLAB. Essentially, we are providing MPLAB with a constant that indicates the board to use.
1. Navigate to Project -> Build Options -> Project and click on the MPLAB PIC32 C Compiler Tab.
2. Currently, the preprocessor macros window is empty. We need to create a variable defined for our board. Click ‘Add’ and enter ‘PIC32_NU32’ if you’re working with the Northwestern PIC32 board.
3. Click ‘OK.’
4. Click ‘OK’ again.
To minimize the size of the Bootloader Hex file and ensure it occupies minimal space on the PIC, it’s important to optimize the compiler for the smallest code size. Failure to do so may result in the bootloader not functioning properly.
1. Navigate to Project -> Build Options and click on the MPLAB PIC32 C Compiler Tab as previously.
2. Click on the ‘Optimization’ category.
3. Select the ‘s’ option for the smallest size, as depicted below. If this option is unavailable, choose the smallest code size available.

