Introduction
I have always been fascinated by photographs about lightnings. While it is relatively easily to put a lightning strike in any photograph using image editing techniques 🙂 I still prefer the real thing. Since photography is a hobby of mine, I wanted to be able to photograph lightnings. However, when I tried to do it without any specialized equipment, I didn’t have much success.
 Reading a bit about the subject on the internet I found there are many designs/solutions available, to get around the problem. Since the price of the commercially available ones are too high for my budget (and let’s face it, it’s not much fun buying something ready made when you can also make it yourself), I decided to make one for myself for less.
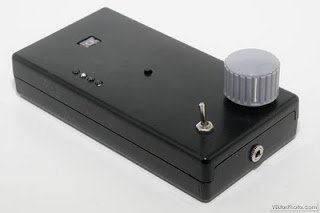
I found many similar designs on different web sites and finally I came up with my own, which is – admittedly – very similar to one particular one I found on this photography site (only in Hungarian). I kept most of the design, but replaced the relays with opto couplers and put the whole thing in a plastic box to make it easy to drag around.
If you are interested to make one like this, please e-mail me. I can provide you with customized kits that contain as many or as few components as you need/like (from just a programmed microcontroller to a fully built and tested PCB) to suit your experience/skills. Please note, I do NOT provide the enclosure as it is very time consuming for me to make. The code for the PIC is also available on request.
Hardware
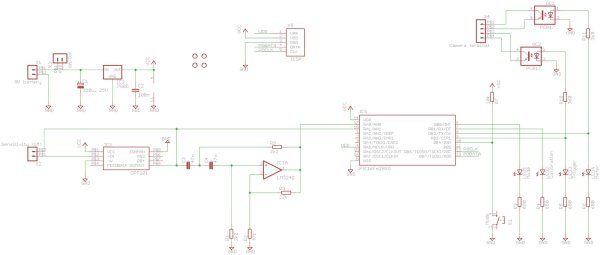
The circuit is based on a 16F628A PIC microcontroller. This is one of my favourite PIC micros and I have used it in several previous projects.
 The cable that attaches to the camera is recycled from an old, cheap camera remote release cable – I just removed the original buttons from it. These remote release cables (for any camera that supports it) can be easily sourced through eBay for a couple of euros. My latest one for Nikon cameras cost around €1,50. The advantage of this is that you don’t have to prepare your own special cable/connector combo for a specific camera, which can be tricky.
About The Author
Ibrar Ayyub
I am an experienced technical writer holding a Master's degree in computer science from BZU Multan, Pakistan University. With a background spanning various industries, particularly in home automation and engineering, I have honed my skills in crafting clear and concise content. Proficient in leveraging infographics and diagrams, I strive to simplify complex concepts for readers. My strength lies in thorough research and presenting information in a structured and logical format.
Follow Us:LinkedinTwitter