
In this tutorial, we will be learning on how to download and install necessary software required to write and do your first project with the CloudX Microcontroller, i will also be writing simple hello world project to test the complete setup.
So, you’ve just bought, or are considering buying, an CloudX Starter kit. Your mind is probably full of questions about how and what you can get started right away maximizing your experience. Nothing is stopping you from coding the next big thing. To help you on get started without anyone’s help or guide, this article will cover required software downloads, driver installation and device configuration. This should be enough to get you running and exploring!
Step 1: What You Will Need:
- A Computer (Operating system Windows XP or Windows 7 or Windows 8 or Windows 10 — They are all supported)
- A CloudX compatible microcontroller
- A CloudX SoftCard.
Step 2: Software Required
The only operating system that cloudX software supported at the time of writing this article is Windows, Click on the software list below to download
- CloudX Software Editor
- CloudX Software Driver
- MPLABX IDE
- MPLAB® XC8 Compiler
- Proteus Simulation software (Optional, but you can find free version everywhere on the internet)
- CloudX Libraries v1.01
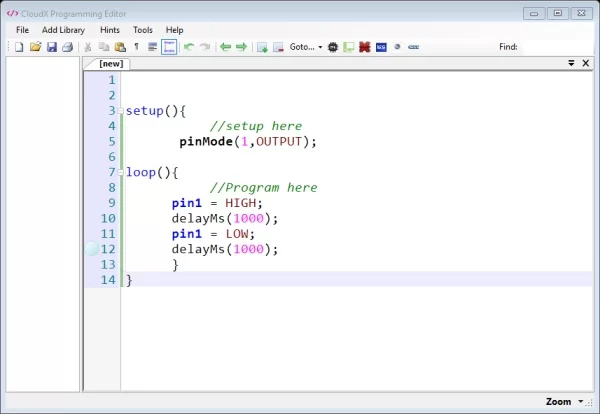
Step 3: CloudX Software Editor

The CloudX Software Editor is a programming environment just like Notepad++ that allows you to write your codes and highlights recognized CloudX C syntax, pre-processor libraries with auto-complete feature. With the CloudX software editor, programming errors is reduced to less than 3% so it makes it more fun for hobbyists to write codes without any bug. Click to download the CloudX Editor Software and install the setup on your computer. To learn more on the CloudX editor click here
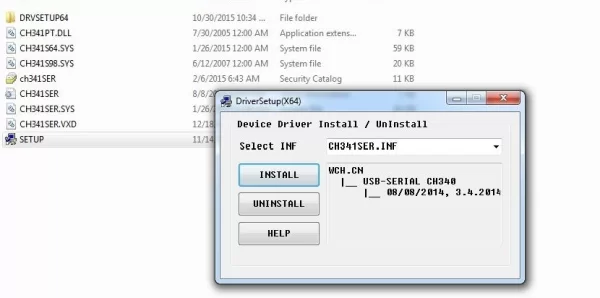
Step 4: CloudX Software Driver
The CloudX Softcard Software Driver is based on the cheap CH340 IC. It functions as a USB – Serial board which allows you to communicate the CloudX Controller with your Computer. The CloudX driver uses CH340G and be downloaded here.
Step 5: Steps to Install
- Download the driver.zip
- Unzip the file
- Run the installer which you unzipped
- Open the CH341SER folder
- Run the SETUP.EXE
- Just click on the install button.
- In the CloudX Editor Software, when the Softcard is connected you will see a Selected COM Port dropdown in the Tools > CodeLoader , the COM number for your device may vary depending on your system.
For more tutorial on how to setup the driver click here
Step 6: MPLABX IDE Installation
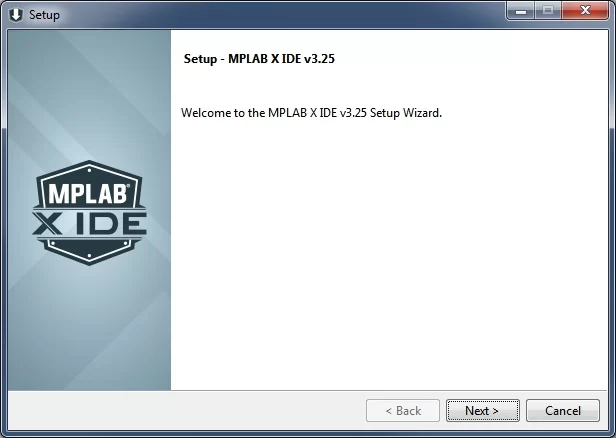
The CloudX Microcontroller is based on the Microchip Technology PIC16F877A processor, here we won’t be saying much about the installation process but incase you are having challenge installing the software then visit mplabx ide installation tutorial website or use our chat box at the right-corner below to ask then ask for support.
Step 7: MPLAB® XC8 Compiler Installation
Since the XC8 Compiler is also a third party software, we won’t be talking about the installation process here but if you encounter any challenge then visit XC8 installation page on microchip website or or use our chat box at the right-corner below to ask then ask for support.
Step 8: CloudX Library
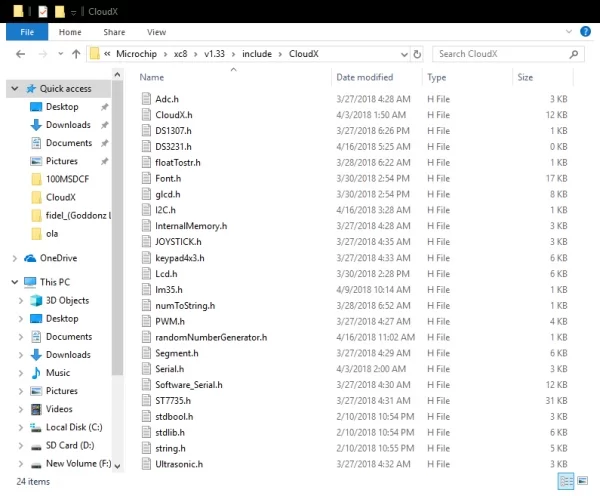
These are pre-written code that helps to simplify users code to few lines, for example, if i want to display a simple “Hello World” on an LCD display, i don’t need to start writing all the LCD instructions and commands which may take hundreds lines of code but with cloudX LCD library you can’t only write the complete project with less than five lines. All you need to know to Where and How to use each library.
After downloading the library in zip file all you need to do is to unzip it and copy the folder “CloudX” and paste to 64 – bits Windows
C:\Program Files (x86)\Microchip\xc8\v1.45\include
32 – bits Windows
C:\Program Files\Microchip\xc8\v1.45\include
The v1.45 is based on your xc8 Compiler version.
Source: Setting Up CloudX
About The Author
Muhammad Bilal
I am a highly skilled and motivated individual with a Master's degree in Computer Science. I have extensive experience in technical writing and a deep understanding of SEO practices.