
Solder stencils are pretty cheap these days, but for a single, quick production run of a really simple design, it seems like a waste of resources to have a professional one produced and shipped to the lab. Of course, if you have a laser cutter handy, you can make a pretty nice one, but if all you’ve got is a rusty knife and some office supplies– don’t fret! You are still in luck.
I’m actually pretty stubborn, and until recently I would just solder this kind of job by hand. This time, though, my good friend Honghong was around to set me straight- she explained a totally cheap and dirty procedure that they use at her factory to make stencils quickly. We tried it out here, and are happy to report that it works great!
It It turns out that soldering stencils aren’t really anything special, at least for large components- they’re basically just pieces of thin material with holes cut in them. In fact, you probably have all the material you need to make one right now- a piece of transparency sheet or velum, a knife, and some tape. So without further ado, the instructions!
Step 0: Gather materials
You will need:
- 1 sheet of velum, preferably 2-3x the size of your PCB
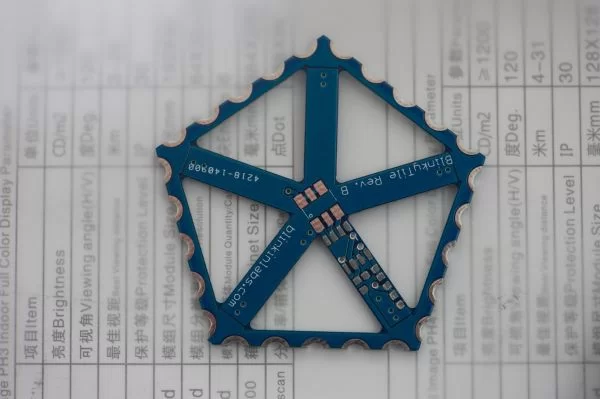
- 1 sacrificial PCB for the template
- Masking tape
- Xacto knife (the sharper the better)
Step 1: Tape the velum to the PCB
Use masking tape to secure the PCB to the velum. The top side of the PCB should point towards the velum.
Step 2: Cut holes in the velum
Use the X-acto knife to cut out openings over the SMT pads on the circuit board. I cut out little rectangles. If you have a small drill handy, you could also just drill holes here.
Step 3: Check the hole alignment
Once you have the holes all cut out, double check that the holes line up with the SMT pads, and that there aren’t any rips or tears in the paper. I messed up the first one, but after replacing the blade on the knife, the second one was fine.
Note that I intentionally left out the big component in center of the board- that one is an LED that would be damaged by this reflow process. Those will be soldered on by hand later.
For more detail: Prototyping tutorial: Quick and dirty solder paste stencils
About The Author
Ibrar Ayyub
I am an experienced technical writer holding a Master's degree in computer science from BZU Multan, Pakistan University. With a background spanning various industries, particularly in home automation and engineering, I have honed my skills in crafting clear and concise content. Proficient in leveraging infographics and diagrams, I strive to simplify complex concepts for readers. My strength lies in thorough research and presenting information in a structured and logical format.
Follow Us:LinkedinTwitter