In this project you’re going to make two ESP8266 talk with each other.
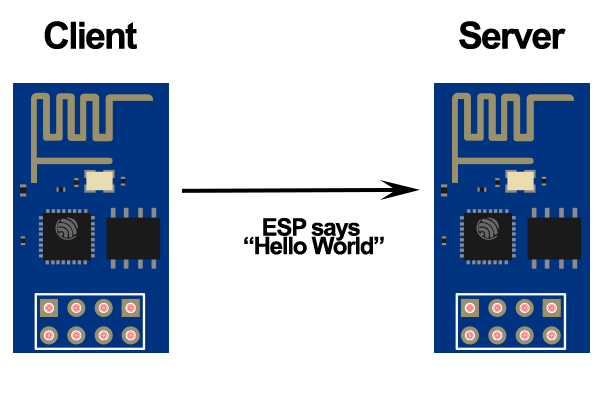
How it works? You’re going to set one ESP as an Access Point (Server) and another ESP as a Station (Client). Then they’ll establish a wireless communication and the Client sends a message to the Server saying “Hello World!”.
Before continue reading this project, please complete the following tutorials:
If you like the ESP and you want to do more projects you can read my eBook Home Automation using ESP8266 here. Let’s get started!
Parts List
Here’s the hardware that you need to complete this project:
Schematics (3.3V FTDI Programmer)
The schematics for this project are very straight forward. You only need to establish a serial communication between your FTDI programmer and your ESP8266 to upload some code. (Repeat the schematics below for the Client and Server)
Downloading ESPlorer
I recommend using the ESPlorer program created by 4refr0nt to create and save Lua files into your ESP8266.
Follow these instructions to download and install ESPlorer:
- Click here to download ESPlorer
- Unzip that folder
- Go to the main folder
- Run ESPlorer.jar. It’s a JAVA program, so you need JAVA installed on your computer
- Open the ESPlorer
Writing Your Server Script
Don’t forget that first you need to flash both your ESPs with NodeMCU firmare. Copy and paste the code below into ESPlorer.
Summary: The ESP Server acts as an Access Point and it has its own SSID=test and Password=12345678. The server is continuously listening for a connection, when it successfully establishes a connection and receives a message prints that string on the serial monitor.
-- Rui Santos
-- Complete project details at http://randomnerdtutorials.com
-- ESP8266 Server

print("ESP8266 Server")
wifi.setmode(wifi.STATIONAP);
wifi.ap.config({ssid="test",pwd="12345678"});
print("Server IP Address:",wifi.ap.getip())

sv = net.createServer(net.TCP)
sv:listen(80, function(conn)
    conn:on("receive", function(conn, receivedData)
        print("Received Data: " .. receivedData)
    end)
    conn:on("sent", function(conn)
      collectgarbage()
    end)end)
Uploading Your Lua Script
When you open the ESPlorer you should see a window similar to the preceding Figure, follow these instructions to send commands to your ESP8266:
1) Connect your FTDI programmer to your computer
2) Set bad raute as 9600
3) Select your FTDI programmer port (COM3, for example)
4) Press Open/Close
5) Select NodeMCU+MicroPtyhon tab
6) Copy the your Lua script into ESPlorer
Then you simply click the button Save to ESP and save your file with the name “init.lua”. Everything that you need to worry about or change is highlighted in red box in the following Figure.
Writing Your Client Script
Having your ESP flashed with NodeMCU. Copy and paste the code below into ESPlorer. Summary: The ESP Client acts as a Station and it is continuously looking for an Access Point. When the Client finds the Server establishes a communication and sends a message “Hello World!” every 5 seconds.
-- Rui Santos
-- Complete project details at http://randomnerdtutorials.com
-- ESP8266 Client

print("ESP8266 Client")
wifi.sta.disconnect()
wifi.setmode(wifi.STATION)
wifi.sta.config("test","12345678") -- connecting to server
wifi.sta.connect()
print("Looking for a connection")

tmr.alarm(1, 2000, 1, function()
     if(wifi.sta.getip()~=nil) then
          tmr.stop(1)
          print("Connected!")
          print("Client IP Address:",wifi.sta.getip())
          cl=net.createConnection(net.TCP, 0)
          cl:connect(80,"192.168.4.1")
          tmr.alarm(2, 5000, 1, function()
            cl:send("Hello World!")
          end)
      else
         print("Connecting...")
      end
end)
Note: To upload the Client Script code follow the preceding heading called “Uploading Your Lua Script”.
Demonstration
In this project the Client is sending a message “Hello World!” to the Server via wireless. Here’s what you should see in your serial terminal windows (see Figure below).
Note: On the left window, I’m using the ESPlorer Output Window . On the right window, I’m establishing a serial communication with PuTTY.org.
Do you have any questions? Leave a comment down below!
For more detail: How to Make Two ESP8266 Talk
About The Author
Ibrar Ayyub
I am an experienced technical writer holding a Master's degree in computer science from BZU Multan, Pakistan University. With a background spanning various industries, particularly in home automation and engineering, I have honed my skills in crafting clear and concise content. Proficient in leveraging infographics and diagrams, I strive to simplify complex concepts for readers. My strength lies in thorough research and presenting information in a structured and logical format.
Follow Us:LinkedinTwitter