
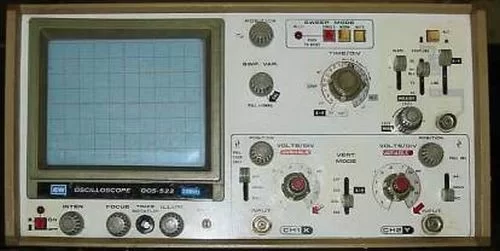
This project is a miniature Audio CRO. For those not familiar with the abbreviation “CRO,” it means “Cathode Ray Oscilloscope” and this is sometimes shortened to “SCOPE or O-Scope.”
A “CRO” is a piece of test equipment with a screen. It produces a visual indication of a waveform, via a probe, when the waveform is connected to the input terminal of the CRO.
If you connect a microphone to the probe and whistle into the mic, the CRO will produce a picture (trace) of the waveform. It will be in the shape of a sinewave. The screen is very similar to an old-style TV set (called a “picture-tube”) and the picture is created by firing a beam of electrons from the back of the tube (called the “neck'”) to the front of the tube where a layer of phosphorescent material glows when the beam hits it.
The beam of electrons is diverted from left to right via an electromagnetic field or an electrostatic field and this produces a line across the screen.
The beam is then deflected up or down by magnetic or electrostatic fields at 90° and this enables it to produce all sorts of patterns.
Here are some photos of the prototype Audio CRO. Note the use of surface-mount components allows a lot of parts to be placed in a very small space.
The 10mH inductor has been placed at an angle to make it less sensitive to the motor magnets so that it only picks up the field of the super-magnet placed on the end of the motor.
The motor is actually a 12v motor from the eject mechanism of a CD player. It operates down to 3v and the RPM at 3v is very low. That’s why it was chosen.
There are a lot of technical challenges to overcome when electronics is combined with mechanical devices. You will experience these when you build the project.
This is exactly what we have done in this project. But in an extremely miniaturised way.
Our screen is digital. It is rotating to produce a screen of light made up of “pixels.” We have an upright strip of LEDs and this is spun from left to right to create a screen that is 8 pixels high.
As you can see from the photos, the project is built on a small PC board containing the PIC chip, components to interface a pick-up coil and microphone to the chip and 4 cells. 16 LEDs are soldered to the edge of the board to create the “display.” The PC board is soldered to the shaft of a motor and a separate 3v supply is used to rotate the motor. We have used electro-magnetic detection to detect the starting point for each rotation of the display so that the RPM of the motor is not important. The display will remain absolutely steady, not matter how fast the shaft is rotated.
However the length of the display will contract if the motor is slowed down.
We then turn each LED on and off many times during the visual part of its rotation, making a screen resolution of up to 8 x 60. (But the audio section has a screen size 8 x 48). This might seem a small area but the project is a CONCEPT DESIGN.
CONCEPT DESIGN
It is designed to show the capabilities of one of the smallest and simplest chips in the PIC microcontroller range. It’s to “get you started” and if it were a complex project, it would be by-passed by those who we are aiming at – the BEGINNER.
Even at this basic level there are a number of features to challenge the brightest hobbyist – so be prepared for a really absorbing project.
LED MYTH
There is a generally accepted thought that the voltage across a LED is a fairly constant value. But this is not so.
As the current across it drops, the “characteristic voltage drop” also drops significantly.
For the LEDs used in this project, the voltage drops from 2.3v (when full current is flowing) to 1.66v when less than 1mA flows.
This value is important as we are placing 4 LEDs across a 5.4v supply and we need to know if any current will flow through the combination when the project is resting.
In our case, 4 LEDs at rest requires 6.64v This means no current will flow when the supply is 5.4v (it has to be higher than 5,4v for the LEDs to start to conduct).
This is the main reason why we have had to place two LEDs in series on each output. If we had only 2 LEDs from the positive rail to 0v rail, (with the output of the chip connected to the mid-point) they would illuminate when the drive-line was in “input-mode (high-impedance mode).”
THE DISPLAY
The display is made from 16 LEDs. The LEDs are in pairs and this makes 8 “pixels.” Two LEDs are connected from an output to the positive rail and two LEDs to the negative rail.
When a control line is HIGH, two LEDs are illuminated and when it is LOW, the other two are illuminated. When the control line is an input, none are illuminated.
Both pairs of LEDs cannot be illuminated at the same time.
To make the display appear steady, the LEDs must be turned on at exactly the same instant, during each revolution. This is called REGISTRATION and is done by sensing the magnetic flux from a magnet and relying on the voltage produced by an amplifying transistor to be detected as a HIGH by GP3, the input-only line.
We have one further problem with displaying an audio waveform.
We need to SYNCHRONISE the rotation of the display with the audio. With a CRO, this is done via a feature called “triggering.”
The beam is held at the left side of the screen until the signal reaches a certain value and this makes every waveform (called a trace) retrace the previous to produce a steady picture.
Since we cannot synchronise the audio with the rotation of the display, we have used a clever feature called SAMPLE AND HOLD.
We sample the audio to produce 48 “points” and store these in registers 30h to 5Fh.
The program then waits for the start of the next revolution and displays these 48 points. It then waits for the start of the next revolution and displays the points again. It does this 30 times and takes another sample of the audio. This produces about 2 updates every second.
The result is a very steady picture.
So, there you have it. A sample-and-hold audio CRO.
For more detail: Audio CRO using PIC12F675 Microcontroller
About The Author
Ibrar Ayyub
I am an experienced technical writer holding a Master's degree in computer science from BZU Multan, Pakistan University. With a background spanning various industries, particularly in home automation and engineering, I have honed my skills in crafting clear and concise content. Proficient in leveraging infographics and diagrams, I strive to simplify complex concepts for readers. My strength lies in thorough research and presenting information in a structured and logical format.
Follow Us:LinkedinTwitter